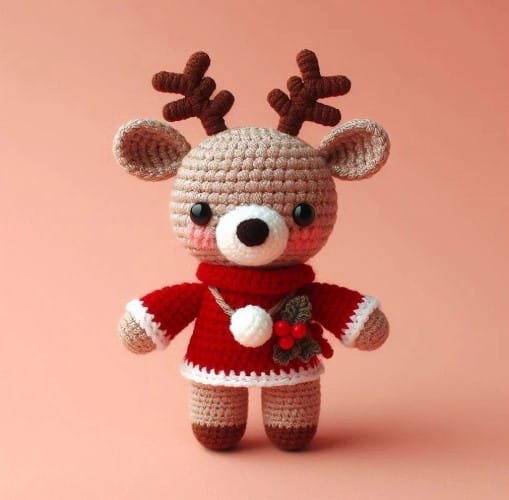
If you’re looking to add a bit of handmade charm to your Christmas decorations this year, then this crochet Christmas reindeer amigurumi tutorial is perfect for you.
Amigurumi, the Japanese art of crocheting small stuffed toys, allows you to create adorable and personalized creations that will brighten up any festive display. In this tutorial, we’ll guide you through every step to make your very own crochet Christmas reindeer amigurumi.
Whether you’re an experienced crocheter or just starting out, this free tutorial is easy to follow, and it will help you create a charming reindeer that’s perfect for the holiday season.
Imagine the joy of gifting a handmade reindeer to loved ones or displaying it on your mantlepiece this Christmas. With just a few simple materials and stitches, you can create a unique holiday decoration that will bring smiles all around.
In this guide, we’ll cover everything you need to know to create your crochet Christmas reindeer amigurumi.
From gathering the right materials to assembling the pieces, we’ll ensure you can craft this adorable reindeer with ease. Let’s dive into this fun holiday project and make your Christmas even more special with a crochet Christmas reindeer amigurumi!
1. Materials You Will Need for the Crochet Christmas Reindeer Amigurumi
Before diving into the crochet process, it’s essential to gather all the materials you will need for your crochet Christmas reindeer amigurumi. Having everything prepared will make the process smoother and more enjoyable.
First, you’ll need some yarn. For the reindeer’s body and head, medium-weight yarn (like worsted weight) in brown will give it a soft and sturdy texture. You can also use cream or beige for the muzzle and the inner parts of the ears to add more details.
For the antlers, you can either crochet them directly with a brown yarn or use a thicker yarn or pipe cleaners to create a firmer structure. The eyes can be made with black yarn or small safety eyes for an easy and cute finish. Don’t forget a bit of red yarn for a little nose – just like Rudolph!
You will also need a crochet hook. A 3.5mm or 4mm hook works best for medium-weight yarn. If you prefer smaller stitches or a tighter fabric, use the smaller hook size.
In addition, get some polyester fiberfill to stuff the reindeer, a yarn needle to sew the pieces together, stitch markers to track your rounds, and scissors to trim any loose ends. With these materials ready, you’re all set to begin creating your crochet Christmas reindeer amigurumi!
2. Step-by-Step Guide to Crocheting the Body of the Reindeer
The first step in making your crochet Christmas reindeer amigurumi is to crochet the body. The body will serve as the foundation of your reindeer and give it its shape, so it’s important to follow the instructions carefully.
Start by making a magic ring with brown yarn. A magic ring helps you start crocheting in the round, creating a tight and secure center. Work several single crochet stitches into the ring (usually six) to form the base of the body.
For the next few rounds, you will increase your stitches. This means that in each stitch from the previous round, you will crochet two single stitches, making the body wider. Repeat this process for a few rounds to create a round, expanded shape.
Once the body reaches the desired size, continue crocheting without increasing for a few rounds to create the height. Once you’ve completed the body, stuff it lightly with polyester fiberfill to give it some shape. Be sure not to overstuff, as it should still be soft and pliable.
After the body is finished, leave a long yarn tail for attaching the head later. This gives you more flexibility in placing the head in the correct position. Now, your crochet Christmas reindeer amigurumi is well on its way!
3. Creating the Head, Ears, and Antlers
Now, let’s move on to the head, ears, and antlers of your crochet Christmas reindeer amigurumi. The head is made similarly to the body, using the same round crochet technique.
Start by crocheting a magic ring with brown yarn and increasing the stitches as you did for the body. Keep increasing until you reach the size of the reindeer’s head that you want. Once you reach the desired size, crochet a few rounds without increasing to form the shape of the head.
Next, add the ears. To crochet the ears, you’ll need to create small triangles. Work several rows of increases to form the ear shape and then finish off the ear by crocheting a few rows of single crochet. Use beige or cream-colored yarn to add detail to the inside of the ears for a more realistic appearance. Attach the ears to the sides of the head.
The antlers can be made by crocheting a few short, narrow chains, then attaching them to the top of the reindeer’s head. If you want firmer antlers, you can use pipe cleaners, crochet around them, or simply use thicker yarn. Attach the antlers securely with yarn to make sure they stand up straight.
After all the pieces are complete, attach the head to the body. Position the head in a way that it will balance well with the body. Use the long yarn tail to sew the head securely to the body, ensuring it stays in place.
4. Adding the Finishing Touches: Nose, Eyes, and Other Details
The last step in creating your crochet Christmas reindeer amigurumi is to add all the finishing touches. This is the part where your reindeer really comes to life!
Start by adding the eyes. You can either crochet small circles using black yarn or use safety eyes for a more polished finish. Sew them securely onto the face of the reindeer, ensuring they are placed symmetrically.
Next, make a red nose for your reindeer by crocheting a small round piece with red yarn. Attach it to the front of the head to create the signature red nose that makes the reindeer look adorable. You can make the nose slightly larger for a cute effect, especially if you’re making a version inspired by Rudolph!
Add any additional details you’d like. For example, you could crochet a small scarf for your reindeer using green or red yarn, or add a little bow to make it even more festive. If you want, you can also add a small tail to the back of the reindeer.
Finally, make sure all parts are securely attached, and trim any excess yarn ends. Your crochet Christmas reindeer amigurumi is now ready to spread some holiday cheer!
FAQ
Q1: What type of yarn should I use for the crochet Christmas reindeer amigurumi?
For best results, use medium-weight yarn (like worsted weight) in brown for the body and head. Use cream or beige for the muzzle and ears, and red for the nose. You can also use metallic or glittery yarn for a more festive effect.
Q2: How do I make sure the reindeer’s antlers stay upright?
You can use pipe cleaners as the base for the antlers and crochet around them for extra sturdiness. Alternatively, crochet the antlers with a thicker yarn to make them firmer and more durable.
Q3: Can I make this project without using safety eyes?
Yes, if you prefer, you can crochet the eyes instead of using safety eyes. Simply make small black circles and sew them securely onto the reindeer’s face.
Q4: How do I make the reindeer’s nose?
Crochet a small round shape using red yarn to create the nose. Attach it to the front of the reindeer’s face using a yarn needle, and make sure it is centered for a cute effect.
Q5: How do I add a scarf to my crochet Christmas reindeer amigurumi?
To add a scarf, crochet a simple chain in your desired color and length, then wrap it around the reindeer’s neck. You can tie it with a knot or sew it in place.
Q6: Can I make this reindeer larger or smaller?
Yes, you can adjust the size of your reindeer by using thicker yarn and a larger hook for a larger reindeer or thinner yarn and a smaller hook for a smaller version.
Join our VIP broadcast list and gain access to exclusive patterns, all for free. As a VIP member, you’ll receive the best patterns daily, delivered directly to your device. ✨📱 It’s a unique opportunity to stay up-to-date with the latest trends and designs, curated just for you. Don’t miss out on enhancing your projects and discovering new inspirations with the best patterns every day! 🎨🔝
Conclusion
In this crochet Christmas reindeer amigurumi tutorial, you’ve learned how to create a charming holiday decoration that will bring festive cheer to any space. We’ve covered everything from gathering the right materials to crocheting the body, head, ears, antlers, and adding the final touches. With this free tutorial, you now have the tools to create your own crochet Christmas reindeer amigurumi.
PATTERN HERE
We hope you enjoyed this project and found the instructions easy to follow. We’d love to hear your thoughts and see your creations! Please share your feedback, ask any questions, or suggest new projects for future tutorials. Wishing you a joyful and creative holiday season!

