The Harlequin blanket pattern is a timeless design that has captured the hearts of crafters around the world. With its geometric elegance and colorful appeal, this pattern is perfect for anyone looking to add a touch of sophistication to their home décor.
Creating a Harlequin blanket pattern involves understanding the fundamental techniques of crochet or knitting, depending on your preferred crafting method. The pattern is typically composed of diamond or elongated shapes that interlock to form a repeating motif.
The beauty of the Harlequin blanket pattern lies not only in its aesthetic appeal but also in its adaptability. Crafters can choose from a variety of yarn textures, colors, and materials to suit their personal style. Some prefer soft, chunky yarns for a cozy feel, while others may use finer threads for a lightweight, decorative blanket.
Understanding the Harlequin Blanket Pattern
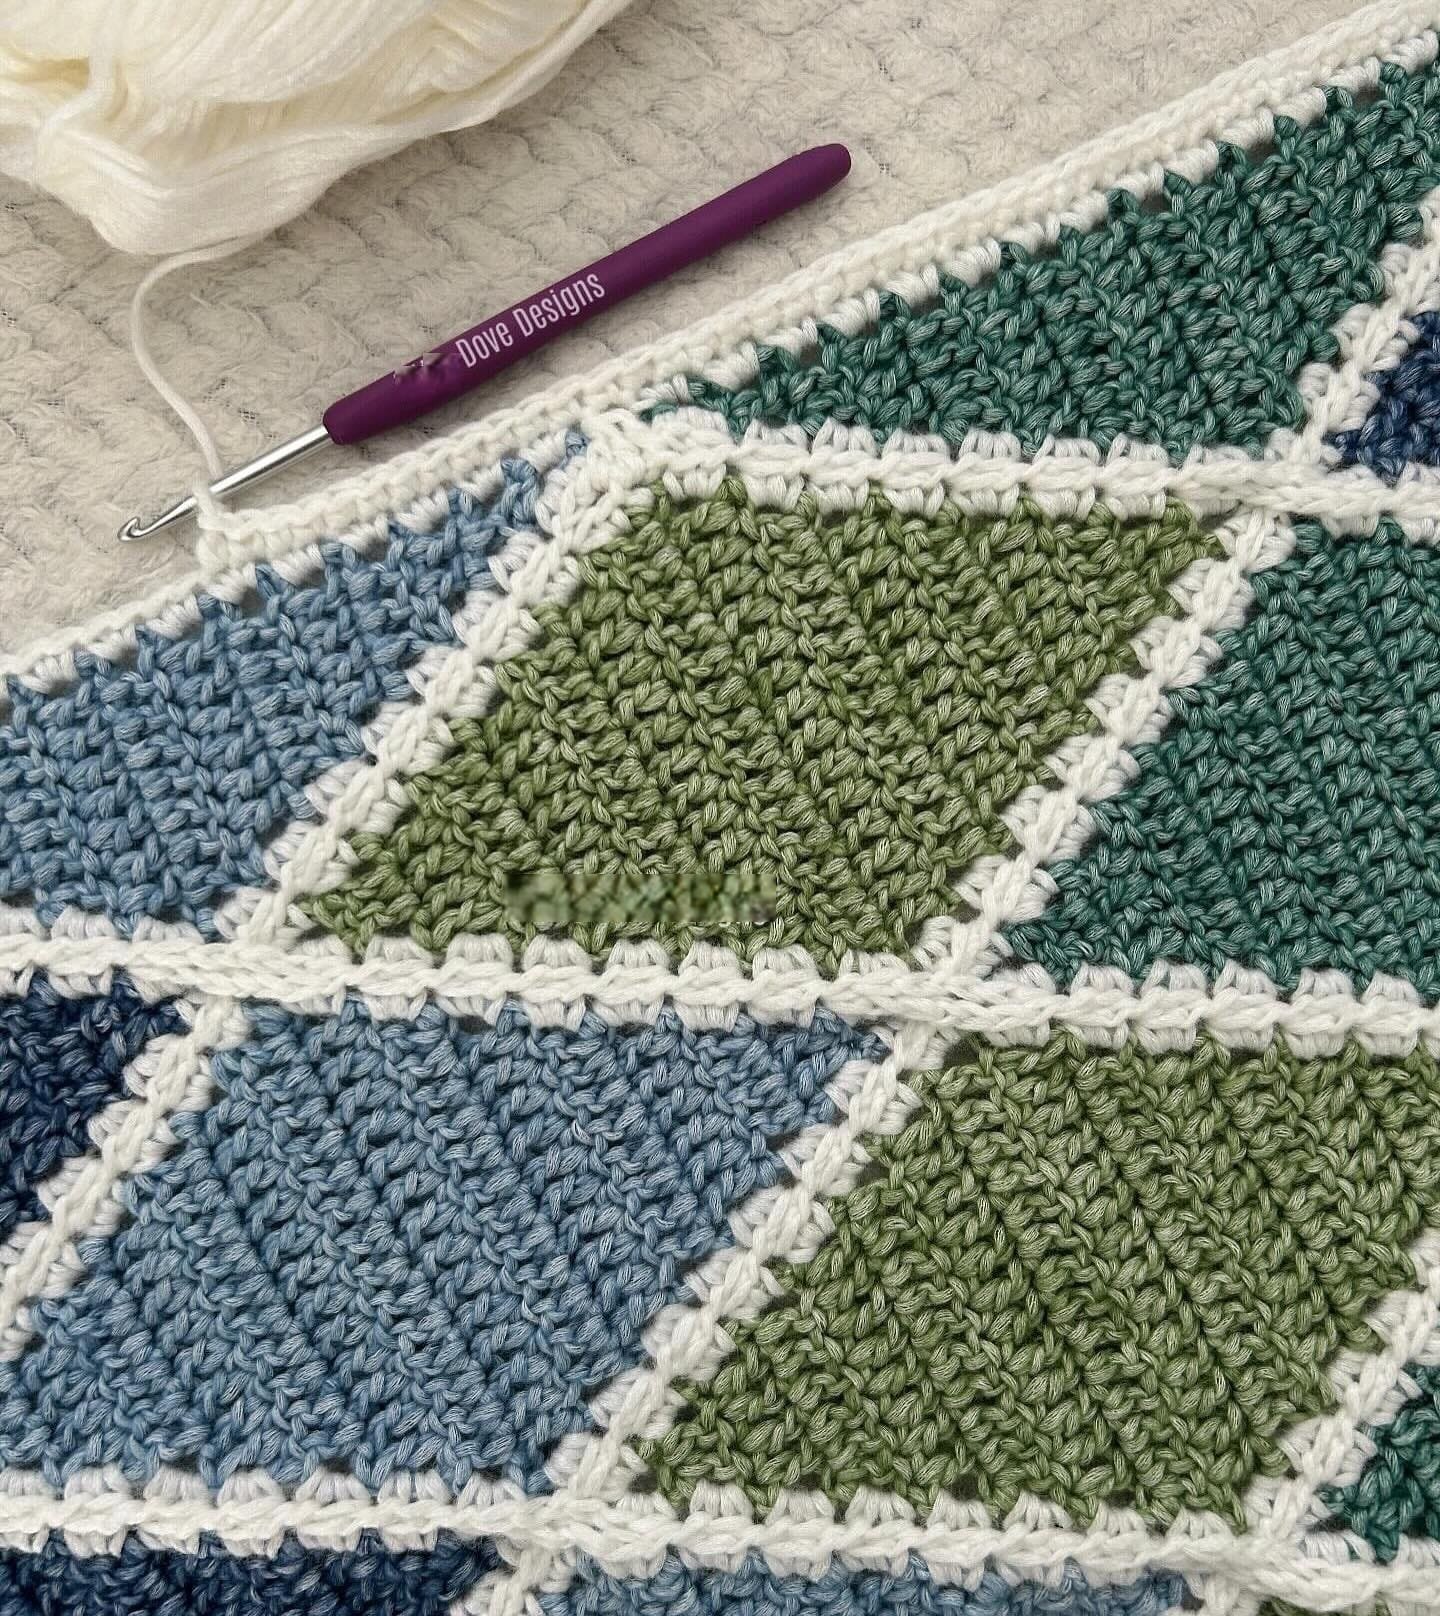
The Harlequin blanket pattern is characterized by its diamond-shaped motifs that fit together like puzzle pieces. Each diamond can be created using basic crochet or knitting stitches, making the pattern accessible even to those with intermediate skills. By alternating colors, you can achieve the signature harlequin effect, which adds depth and dimension to your blanket.
This pattern often uses modular construction, meaning that each diamond is made separately and then joined together. This approach allows for flexibility in size and color combinations. You can experiment with different yarn types to see how they influence the texture and drape of your blanket.
Working with the Harlequin blanket pattern requires careful counting and attention to detail. Each row or round must be completed accurately to maintain the symmetry of the design. Mistakes can disrupt the overall pattern, so it’s important to double-check your work as you go.
Another key aspect of the Harlequin blanket pattern is color planning. Selecting the right combination of colors can highlight the geometric structure and create a visually pleasing effect. Many crafters opt for bold, contrasting colors, while others may prefer a more muted, monochromatic palette.
The pattern also lends itself well to mixing textures. Combining different yarn textures, such as smooth and fuzzy strands, can enhance the blanket’s tactile appeal. This adds another layer of creativity and personal expression to the finished project.
Finally, finishing techniques play a significant role in the overall look of the Harlequin blanket pattern. Adding a neat border or fringe can make your blanket look professional and polished. Proper weaving of ends and blocking the finished blanket ensures that the geometric shapes remain sharp and defined.
Materials Needed for a Harlequin Blanket
Before starting a Harlequin blanket pattern, it’s important to gather all necessary materials. Yarn selection is crucial because the colors and textures will define the overall look of your blanket. Choose high-quality yarn that feels comfortable and meets your desired softness level.
You will also need the appropriate hook or knitting needles for your chosen yarn. Using the recommended size ensures that your stitches are uniform and your diamonds maintain their intended shape. Adjusting hook or needle size can also help modify the blanket’s dimensions.
Other essential materials include stitch markers, a yarn needle, and scissors. Stitch markers help keep track of pattern repeats, while a yarn needle is used to weave in ends after completing your blanket. These tools make the crafting process smoother and more organized.
It’s helpful to have a color chart or planner to map out your design. Planning color placement in advance can prevent mistakes and ensure that the harlequin effect is visually striking. Some crafters like to sketch their pattern or use digital design tools for this purpose.
Measuring tape is another important tool. Keeping track of the dimensions as you go ensures that your blanket will be the desired size. It also helps maintain consistency if you are working on modular diamonds separately.
Finally, patience and time are critical materials in their own right. The Harlequin blanket pattern is detailed and may require multiple hours of careful crafting. Taking breaks and pacing yourself ensures that the project remains enjoyable and that the quality of your work remains high.
Step-by-Step Guide to Making a Harlequin Blanket
To create a Harlequin blanket pattern, start by mastering the basic stitches used in the design. For crochet, this might include chain stitches, single crochets, and double crochets. For knitting, basic knit and purl stitches are commonly used.
Next, practice making a single diamond motif before attempting the full blanket. This allows you to become comfortable with the shape and technique. It also helps you understand how color changes will look within each diamond.
Once you are confident with the individual diamonds, plan the overall layout of your blanket. Decide how many diamonds you need in each row and how many rows will complete your blanket. Mapping this out helps you maintain symmetry and balance.
Begin joining the diamonds together using your chosen method. For crochet, this may involve slip stitches or sewing pieces together. For knitting, you may use a mattress stitch or other joining techniques. The joining process is crucial to achieving the seamless look of the Harlequin blanket pattern.
Tips and Tricks for a Perfect Harlequin Blanket
One key tip for creating a flawless Harlequin blanket pattern is consistent tension. Maintaining even tension across all stitches ensures that your diamonds remain uniform in size. Inconsistent tension can distort the shapes and disrupt the overall pattern.
Choosing complementary colors is also essential. Use a color wheel or reference guides to select shades that harmonize well. This enhances the visual impact of your harlequin design.
If working with multiple yarns, consider winding small color balls for each diamond. This keeps your workspace organized and prevents tangling while switching colors.
Label your pieces if you are making modular diamonds. Keeping track of the order and placement ensures that your blanket matches the planned design. Mistakes in placement can disrupt the harlequin effect and lead to frustration.
Take regular breaks to rest your hands and eyes. Working on detailed geometric patterns for long periods can cause strain. Pausing periodically keeps your crafting enjoyable and helps maintain precision.
Lastly, don’t be afraid to experiment. Try different textures, sizes, or color schemes to make your Harlequin blanket pattern unique. Personal touches make handmade blankets even more special and meaningful.
FAQ about Harlequin Blanket Pattern
Q: Is the Harlequin blanket pattern suitable for beginners?
A: Yes, beginners can try this pattern, especially if they start with simple stitches and practice a single diamond first. Patience and planning are key.
Q: What yarn types work best for this pattern?
A: Soft, medium-weight yarns are ideal, but you can experiment with chunky or fine yarns depending on the desired texture and warmth.
Q: Can I adjust the size of the blanket?
A: Absolutely. The modular design allows you to add or remove diamonds to achieve any size, from a small lap blanket to a large bedspread.
Q: How do I join the diamond motifs?
A: Diamonds can be joined using slip stitches in crochet or mattress stitch in knitting. Sewing the pieces together is another option for a neat finish.
Q: Are there color suggestions for a visually striking effect?
A: Contrasting colors highlight the geometric pattern, but you can also choose monochromatic or pastel palettes for a subtle look.
Q: Can I add fringe or borders?
A: Yes, adding a border or fringe enhances the blanket’s appearance and frames the harlequin design beautifully.
Q: How do I ensure the diamonds stay even?
A: Maintaining consistent stitch tension and counting stitches carefully ensures uniform diamond shapes. Blocking the finished blanket also helps perfect the shapes.
Conclusion
In this article, we explored the Harlequin blanket pattern in depth, covering its design, materials, step-by-step creation, and expert tips. This versatile pattern allows crafters of all levels to produce a beautiful, personalized blanket that enhances any space. By understanding the construction, color planning, and finishing techniques, you can confidently create a blanket that reflects your style and skill. Share your experiences, leave an honest opinion, and suggest any new ideas for making the Harlequin blanket pattern even more enjoyable. Your creativity and feedback make the crafting community stronger and more inspiring.

