If you have ever wanted to try a playful and delightful project, Crochet a Cute Ladybug Free Pattern is one of the most charming ideas you can start with today.
The popularity of Crochet a Cute Ladybug Free Pattern has been growing among crochet enthusiasts of all levels.
When working on Crochet a Cute Ladybug Free Pattern, you will notice that the process is not only about creating something tangible but also about experiencing joy while crafting.
Why Choose a Ladybug Crochet Pattern
One of the main reasons people fall in love with Crochet a Cute Ladybug Free Pattern is the symbolism attached to ladybugs. These little creatures are often seen as a sign of luck, protection, and positivity. Having one in your home, even in crocheted form, can bring an uplifting atmosphere and spark joy whenever you see it.
Another reason is how versatile this pattern can be. A crocheted ladybug can serve as a decorative piece on a shelf, a playful toy for children, or even an accessory attached to bags or clothing. Since the design is small and simple, it can be made quickly and gifted to friends and family for special occasions.
The third reason lies in its adaptability. You can make your ladybug as realistic or as whimsical as you wish. Some people prefer the classic red and black, while others experiment with pastel colors or even rainbow shades for a more modern twist.
Crocheting ladybugs also helps improve your crochet techniques. You will practice working in the round, changing colors, and sewing small pieces together, which can strengthen your overall skills. These little projects are like mini lessons that prepare you for bigger crochet creations.
Additionally, making ladybugs is cost-effective. With just a small amount of yarn and minimal supplies, you can complete a whole set. This makes it perfect for beginners who do not want to invest heavily in materials but still want a satisfying outcome.
Finally, crocheted ladybugs can be an excellent project for teaching children or beginners. The simple shapes and steps make it easy to follow, while the final product feels rewarding and adorable. That’s why many tutorials recommend Crochet a Cute Ladybug Free Pattern as an introduction to crochet.
Materials and Tools Needed
To begin your journey with Crochet a Cute Ladybug Free Pattern, you will need some basic materials. Luckily, this project does not require anything too complex, and most of the items may already be in your crochet kit.
First, you will need yarn. Red and black are the classic choices, but you can select any colors depending on your personal preference. Opting for a medium-weight yarn is a great idea because it makes the stitches more visible and the final product sturdier.
Second, a crochet hook is essential. Depending on your yarn size, you will typically use a hook between 3.5mm and 4.5mm. The right hook will ensure that your stitches are tight enough to hold the stuffing inside without leaving gaps.
Third, stuffing is needed to give the ladybug its shape. Polyester fiberfill is a popular choice because it is soft, lightweight, and easy to work with. You can adjust the amount of stuffing to make your ladybug firm or squishy depending on how you want it to feel.
Fourth, you will need a yarn needle. This is important for sewing the different parts of the ladybug together, such as attaching the wings, adding details, or securing loose ends. A blunt needle is recommended to avoid splitting the yarn.
Fifth, safety eyes or small beads can be added to give your ladybug a lively and cute expression. If the toy is for young children, you can embroider the eyes instead to ensure safety.
Lastly, scissors are necessary to cut the yarn. With these simple tools and materials, you are ready to dive into your Crochet a Cute Ladybug Free Pattern project.
Step-by-Step Process of Crocheting a Ladybug
The exciting part of Crochet a Cute Ladybug Free Pattern is bringing the little bug to life. Each step builds on the previous one, creating a delightful final piece that showcases your effort and creativity.
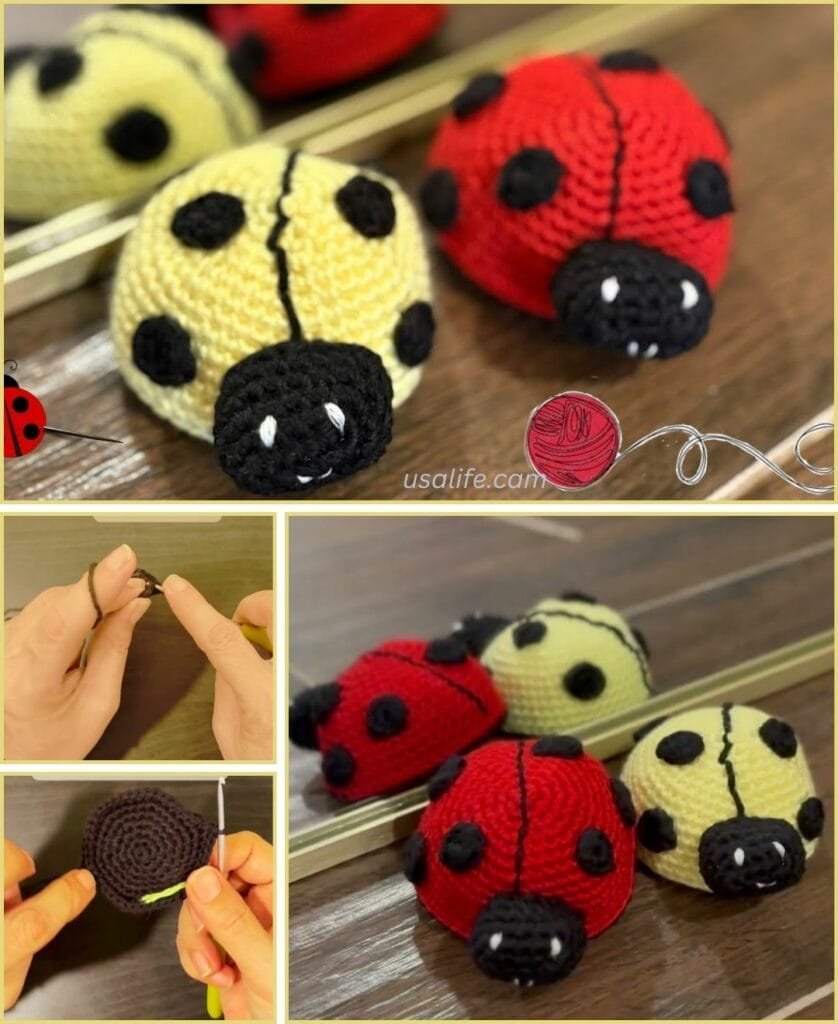
Start with the body by crocheting in the round. Most ladybugs begin with a magic ring technique, which allows you to create a tightly closed center. From there, you increase your stitches gradually to form a spherical shape.
Once the body is complete, switch to black yarn to create the ladybug’s head. This part is usually smaller but just as important to give the ladybug its recognizable look. Attaching it firmly ensures the structure remains stable.
Next, crochet the wings separately. These are typically made in red and then stitched onto the body. Adding small black spots gives them authenticity and makes them instantly recognizable as ladybug wings.
After the wings, focus on the details. Adding antennae with small crochet chains or yarn embroidery gives your ladybug more character. At this stage, you can also attach the eyes—either using safety eyes or embroidered stitches.
Finally, assemble all the parts together. Sew the wings onto the body, position the head correctly, and make sure the spots and details are evenly placed. Once assembled, lightly shape the ladybug with your hands to adjust the stuffing and make it look balanced.
At the end of the process, you will hold a unique creation in your hands. The beauty of Crochet a Cute Ladybug Free Pattern lies in how customizable it is, making each piece a reflection of the maker’s creativity.
Tips for Perfecting Your Ladybug Crochet
While working on Crochet a Cute Ladybug Free Pattern, there are several tips that can help improve your outcome. Every crocheter, whether new or experienced, can benefit from these little insights.
First, always keep your tension consistent. Uneven tension may create gaps that allow stuffing to show through. A neat and tight stitch will make your ladybug look cleaner and more polished.
Second, don’t be afraid to experiment with yarn. Using textured yarns or even sparkly yarn can make your ladybug stand out. Creativity is one of the best parts of crochet.
Third, consider making a set of ladybugs in different sizes. By changing hook sizes or yarn thickness, you can create a family of ladybugs that look delightful when placed together as decoration.
Fourth, use stitch markers to help keep track of rounds. Since ladybugs are worked in circles, it’s easy to lose count. Markers save time and prevent mistakes.
Fifth, when adding details like spots or eyes, place them before sewing everything together. This helps you visualize the final look and adjust as necessary.
Lastly, practice patience. Crocheting small projects may seem quick, but attention to detail makes all the difference. The more carefully you assemble, the more professional your ladybug will appear.
FAQ About Crochet a Cute Ladybug Free Pattern
1. Is Crochet a Cute Ladybug Free Pattern beginner-friendly?
Yes, this pattern is suitable for beginners. The stitches used are simple, and the small size makes it a manageable project.
2. How long does it take to crochet a ladybug?
Depending on your skill level, it can take between one to three hours. Beginners may take longer, while experienced crocheters can finish it quickly.
3. Can I use different colors for my ladybug?
Absolutely. While red and black are traditional, you can use any color combination you prefer to create unique designs.
4. What type of yarn works best for this project?
Medium-weight yarn is recommended because it is easy to handle and creates a sturdy final product. However, you can experiment with different yarn types for texture.
5. Is stuffing necessary for the ladybug?
Yes, stuffing helps give the ladybug its shape. Without it, the project would appear flat and less appealing.
6. Can children safely play with crocheted ladybugs?
Yes, but make sure to use embroidered eyes instead of safety eyes or beads if the toy is intended for very young children.
Conclusion
In this article, we explored everything about Crochet a Cute Ladybug Free Pattern, from the reasons why it is such a popular project to the materials, step-by-step process, tips, and frequently asked questions.
VIDEO TUTORIAL
This delightful crochet project is not only enjoyable but also versatile, allowing you to create personalized ladybugs that bring joy and charm into your space.

