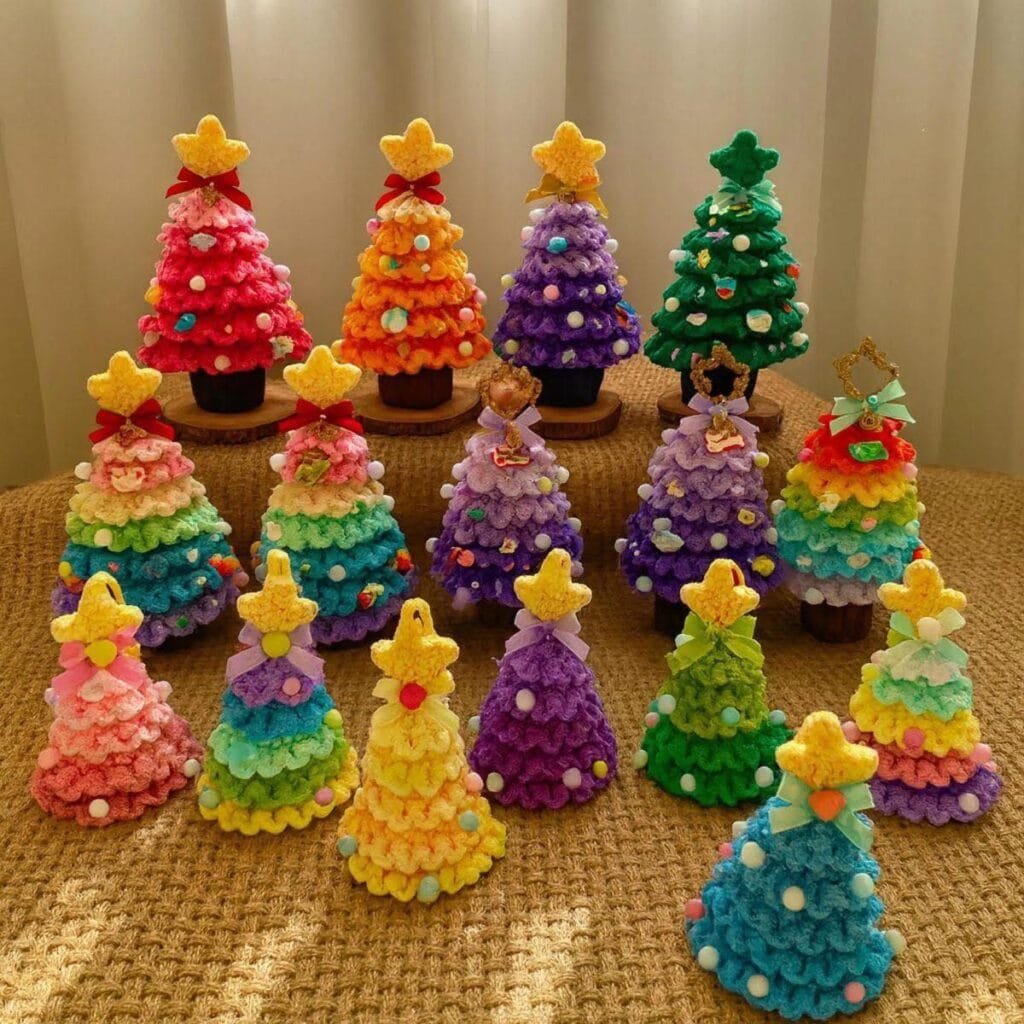
If you’re looking for a fun and festive way to add some handmade charm to your holiday decor, Crochet Mini Christmas Trees Pattern is a fantastic option. These little trees are quick to make, and you can easily customize them to fit your personal style and the space where you’ll display them. Whether you’re a seasoned crocheter or just starting out, this pattern will offer a delightful challenge that results in adorable mini trees for Christmas.
Crocheting these mini trees provides the perfect opportunity to experiment with various textures and yarn colors, making them a unique addition to your seasonal decor. The simplicity of the design ensures that it’s easy to create a set of trees in just a few hours, giving you plenty of time to focus on other holiday preparations.
In this article, we will guide you through the steps of crocheting Mini Christmas Trees from start to finish. With clear instructions and a step-by-step approach, you’ll soon have your own set of these adorable mini trees to display on mantels, tables, or as part of a DIY holiday centerpiece.
Materials Needed for Crochet Mini Christmas Trees
To get started on your Crochet Mini Christmas Trees, you’ll need just a few basic materials. These items are easy to find and can be adapted based on your preferences. Here’s what you’ll need:
-
Yarn: Choose your favorite colors for the trees. Green is the most common, but don’t hesitate to mix it up with other shades to create unique effects. A medium weight yarn (like worsted weight) works best for this pattern.
-
Crochet Hook: Select the appropriate hook size for your chosen yarn. A 4.0 mm or 5.0 mm hook is ideal for most worsted weight yarns.
-
Stitch Marker: To keep track of the beginning of each round.
-
Stuffing: Small amounts of fiberfill or cotton batting will be needed to give the trees structure and shape.
-
Decorative Elements: Tiny beads, buttons, or sequins can be used to decorate your trees with “lights” or ornaments.
-
Yarn Needle: To sew in the ends and attach decorations.
Now that we have our materials, let’s get started with the basic steps to make these mini Christmas trees.
Step-by-Step Instructions to Crochet Mini Christmas Trees
Starting the Tree Base
To begin, create a magic ring (also known as a magic loop) with your yarn. This will form the base of your mini tree. Make sure to leave a long tail so you can weave it in later.
-
Round 1: Chain 2, then make 6 single crochet stitches (sc) into the magic ring. Pull the ring tight to close it, creating a small circle.
-
Round 2: Work 2 sc into each stitch around. You should now have 12 stitches.
Building the Tree Shape
The next rounds will help shape your tree as it starts to grow taller.
-
Round 3: 1 sc in the first stitch, 2 sc in the next stitch. Repeat around (18 stitches).
-
Round 4: 1 sc in each of the next 2 stitches, 2 sc in the next stitch. Repeat around (24 stitches).
-
Round 5-6: Continue to increase by adding 1 additional sc before the increase. By the end of round 6, you should have 36 stitches.
Adding Height
Now that the base is complete, we need to start building the height of the tree.
-
Rounds 7-9: Work 1 sc in each stitch around. These rounds will make the tree taller and more defined. Feel free to adjust the number of rounds depending on how tall you want your tree to be.
-
Round 10: Begin to decrease the tree shape. 1 sc in the first 2 stitches, 2 stitches together. Repeat this pattern to form the tree’s top.
-
Round 11: Continue decreasing by working 1 sc in the next stitch, 2 stitches together. Do this around until you reach the top of the tree.
-
Round 12: Finish off with 2 stitches together to close the top of the tree. Leave a long tail for sewing.
Decorating Your Crochet Mini Christmas Trees
Once your tree base is complete, it’s time to decorate! The beauty of these mini trees is in how customizable they are. Here are a few ways to personalize them:
-
Adding Ornaments: Use small beads or buttons and sew them on to create little ornaments. You can mix and match different sizes and colors for a fun effect.
-
Mini Tree Star: Use a small piece of golden or silver yarn to make a star at the top of the tree. You can crochet a tiny star or use a pre-made embellishment for ease.
-
Glitter Effect: Add a sparkly touch by sewing on sequins or using metallic thread to create a glitter effect on the tree.
-
Faux Snow: To give your tree a wintery look, you can use white fluffy yarn or cotton to simulate snow on the branches.
-
Tree Skirt: For a completed look, crochet a small circular skirt to place under the tree. A simple red or white circle works well, but you can experiment with different patterns for a more intricate design.
Final Thoughts on Crocheting Mini Christmas Trees
Crocheting Mini Christmas Trees is a simple and enjoyable project that brings festive charm to your home. Whether you make just one tree or create a whole forest, the process is fun and easy to follow. These little trees make great gifts, ornaments, or even holiday table centerpieces.
Now that you know how to crochet your own mini trees, there’s no limit to the ways you can personalize and decorate them. Add beads, sequins, or even miniature garlands to make your trees extra special!
FAQ
1. Can I use any yarn for the Crochet Mini Christmas Trees?
Yes, you can use any yarn you prefer! However, medium-weight yarn (like worsted weight) works best for the pattern.
2. How do I make the trees stand up?
Stuffing the trees with fiberfill or cotton batting will help them stand. You can also crochet a base or sew the tree to a small wooden dowel or round piece of felt.
3. How long will it take to crochet a mini Christmas tree?
The time required varies depending on your skill level, but on average, you can complete one tree in 1-2 hours.
4. Can I make the trees in different sizes?
Absolutely! By adjusting the number of rounds or using thicker yarn, you can create trees of various sizes.
5. What are the best decorative elements for mini Christmas trees?
Beads, buttons, sequins, and tiny stars are great decorative elements. Use whatever catches your eye and fits your holiday theme.
6. Are these trees safe for kids?
Yes, the trees are safe for kids, especially if you use non-toxic materials and sew everything securely in place.
Conclusion
Creating Crochet Mini Christmas Trees is an enjoyable and rewarding project that adds a personal touch to your holiday celebrations. From choosing the right materials to adding fun decorations, this craft can be customized to suit any taste or decor style.
VIDEO TUTORIAL
Now that you’ve learned how to crochet these charming trees, feel free to experiment with different designs, colors, and decorations. Please leave a sincere opinion or suggestion in the comments below. We’d love to hear how your mini trees turn out!

