The Wintertale Quilt Pattern is more than just a sewing project—it’s a warm, creative journey that combines art, tradition, and the magic of winter. For many quilting enthusiasts, this pattern captures the quiet beauty of snowy days and transforms it into a timeless piece of fabric art. Whether you are a seasoned quilter or just starting out, the Wintertale Quilt Pattern offers endless possibilities for personalization.
This pattern stands out because of its intricate yet approachable design. The motifs often feature snowflakes, forest silhouettes, cozy cabins, and geometric shapes that remind us of frost patterns on a window. When sewn together, these elements create a story told entirely through fabric and stitches. The Wintertale Quilt Pattern is perfect for gifting, decorating, or even passing down as a family heirloom.
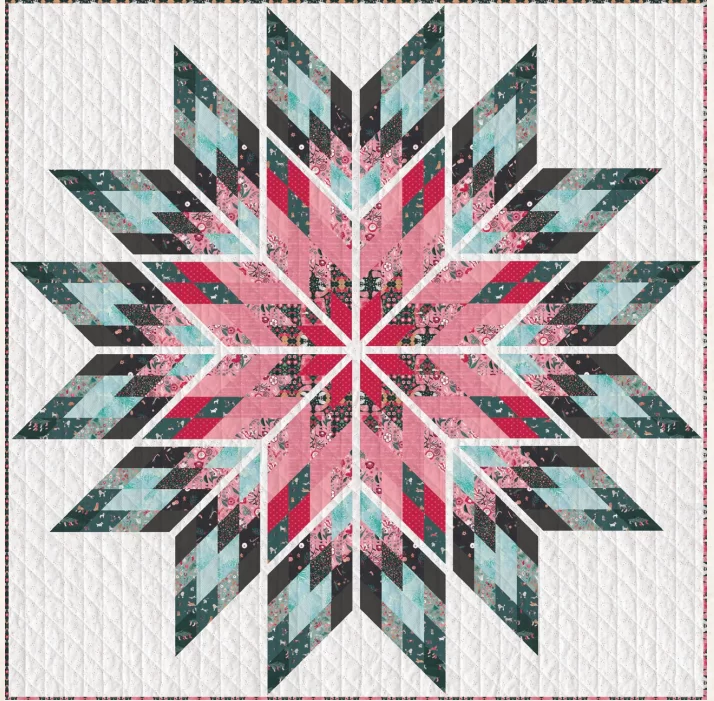
In addition to its visual charm, this pattern is also a wonderful opportunity to explore color combinations, fabric textures, and various quilting techniques. From crisp whites and icy blues to deep forest greens and warm reds, the Wintertale Quilt Pattern can reflect any mood or style you choose. The key lies in blending creativity with the timeless charm of winter’s tale.
Choosing Fabrics for the Wintertale Quilt Pattern
When beginning your Wintertale Quilt Pattern, fabric selection is one of the most exciting steps. The fabrics you choose will set the tone for the entire quilt. Many quilters prefer a cool, wintry palette—think icy blues, snowy whites, and subtle grays—to reflect the season’s calm beauty.
Consider mixing solid fabrics with patterned ones to create depth and visual interest. Prints featuring snowflakes, pine trees, or abstract frost patterns can complement the quilt’s theme perfectly. High-quality cotton fabrics are a popular choice for their durability and ease of handling.
Texture can also play a significant role in bringing the Wintertale Quilt Pattern to life. Flannel, for example, adds extra warmth and a cozy feel, making the quilt perfect for cold evenings. Velvet or linen blends can bring a touch of luxury, while still maintaining the handmade charm.
Another tip is to use contrasting fabrics strategically. Dark borders can frame lighter sections beautifully, giving the quilt a finished, professional look. This contrast also helps the central motifs stand out more vividly.
Before cutting your fabrics, always wash and iron them. This prevents shrinking and ensures accurate cutting and piecing. It also gives you a clearer idea of how the colors and textures will work together in the final quilt.
Remember, the Wintertale Quilt Pattern is a personal expression—don’t be afraid to break the “rules” if your heart leads you toward bolder or unexpected fabric choices.
Essential Tools and Preparation Steps
Starting a Wintertale Quilt Pattern project requires some basic quilting tools that will make the process smoother and more enjoyable. The most important is a good quality rotary cutter, which ensures clean, precise cuts. Pair this with a self-healing cutting mat to protect your workspace and extend the life of your cutter blade.
A sturdy quilting ruler is another must-have. Transparent rulers with grid lines help keep your measurements accurate, which is crucial for a quilt that has multiple small pieces like the Wintertale Quilt Pattern. Accurate cutting will save time and frustration later during assembly.
Thread selection is equally important. Choose a thread that complements your fabric colors but is strong enough to withstand frequent use and washing. Cotton threads are commonly preferred for quilting projects due to their durability and smooth finish.
You will also need pins or clips to hold pieces together before sewing. Many quilters prefer clips for thicker fabrics, while fine pins work well for lighter materials. This simple step can help maintain accuracy and avoid shifting during stitching.
Before you begin sewing, take the time to read through the entire Wintertale Quilt Pattern instructions. Familiarizing yourself with the sequence of steps will help you avoid mistakes and plan your time effectively.
Lastly, keep your sewing machine in top condition. Clean it, oil it if necessary, and ensure the needle is sharp. A well-maintained machine will make quilting not only faster but also more enjoyable.
Step-by-Step Assembly Process
The Wintertale Quilt Pattern typically begins with cutting all the required fabric pieces. Take your time with this step, as precision here ensures that everything fits together smoothly later. Using your quilting ruler and rotary cutter will make this process efficient and accurate.
Once the pieces are ready, start with the smaller sections of the pattern. Many quilters find it easier to assemble the quilt in blocks, which can then be joined together into larger sections. This method helps maintain alignment and keeps the project manageable.
Pressing each seam after sewing is a small but important step. A well-pressed seam lays flat, which improves both the appearance and durability of your quilt. Use a hot iron and press rather than iron to avoid stretching the fabric.
As the quilt top comes together, you will start to see the Wintertale Quilt Pattern take shape. This stage is often the most rewarding, as your fabric choices and sewing efforts begin to form the final design.
After assembling the top, it’s time to layer your quilt. This involves placing the quilt top, batting, and backing together. Secure the layers using safety pins or temporary fabric adhesive to prevent shifting during quilting.
Finally, choose a quilting style that complements your design. You might opt for simple straight-line quilting to keep the focus on the pattern, or you could explore free-motion quilting to add texture and visual interest.
Finishing Touches and Care Tips
Adding the final touches to your Wintertale Quilt Pattern can elevate it from beautiful to breathtaking. One of the most important finishing steps is binding the edges. Binding not only secures the layers but also gives the quilt a clean, professional finish.
You can choose a binding fabric that blends seamlessly with your quilt or one that adds a bold, contrasting frame. Attaching the binding can be done by machine for speed or by hand for a more traditional touch.
Labeling your quilt is a thoughtful final detail. Include your name, the date, and perhaps a short message or dedication. This small addition can transform your quilt into a treasured keepsake.
To keep your quilt looking its best, wash it gently in cold water and avoid harsh detergents. Air-drying is preferred, but if you must use a dryer, select a low-heat setting to prevent shrinking.
Proper storage is also important. Store your quilt in a cool, dry place, away from direct sunlight to prevent fading. Avoid plastic bags, as they can trap moisture and cause mildew.
With proper care, your Wintertale Quilt Pattern creation can last for generations, bringing warmth and beauty to countless winter seasons.
FAQ – Wintertale Quilt Pattern
What skill level is required for the Wintertale Quilt Pattern?
While beginners can attempt it, some familiarity with quilting basics is recommended due to its detailed design.
How long does it take to complete the Wintertale Quilt Pattern?
Depending on your sewing speed and available time, it can take anywhere from a few days to several weeks.
Can I use fabrics other than cotton?
Yes, but ensure the fabrics have similar weights and care requirements to prevent distortion during sewing and washing.
What size is typical for the Wintertale Quilt Pattern?
It can vary, but many versions are made as lap quilts or bed throws. Adjust the measurements to suit your needs.
Is special quilting thread necessary?
Not necessarily, but high-quality cotton thread is often recommended for durability and ease of use.
Can I personalize the Wintertale Quilt Pattern design?
Absolutely! Many quilters add their own motifs, change colors, or adjust block arrangements to make the quilt unique.
Conclusion
The Wintertale Quilt Pattern blends creativity, tradition, and the serene beauty of winter into one timeless project. From choosing fabrics to adding the final stitch, each step offers an opportunity to infuse your own style and care. With the right tools, techniques, and a bit of patience, this quilt can become a cherished piece that warms both body and spirit. I’d love to hear your honest thoughts and any suggestions you may have for making this quilting journey even more inspiring—share your opinion and ideas!

