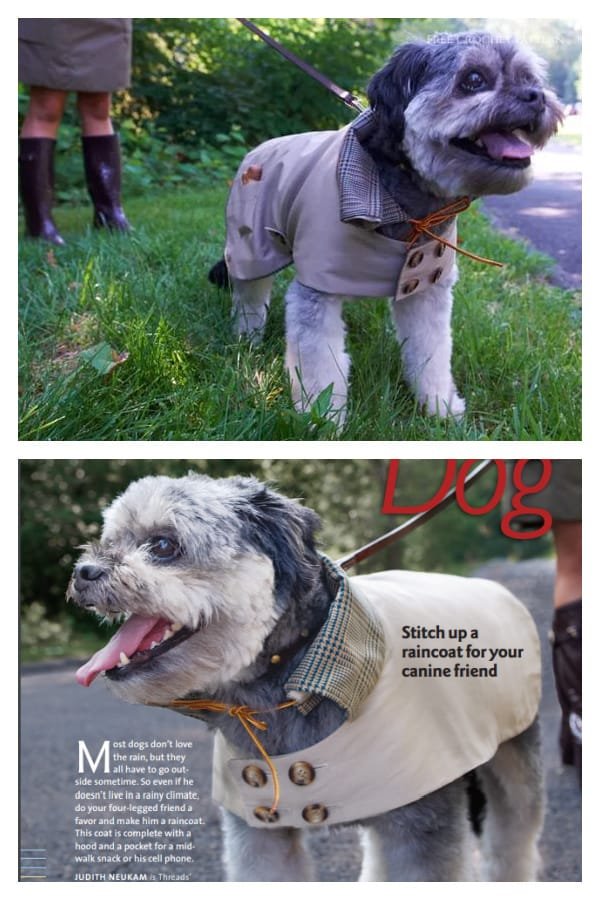
If you’re looking for a fun and practical way to keep your furry friend dry during rainy walks, this Fabric Dog Raincoat Free Sewing Pattern is the perfect solution. Whether you’re a sewing enthusiast or a beginner, creating a personalized raincoat for your dog not only protects them from the weather but also adds a stylish touch to their outdoor look.
Using a Fabric Dog Raincoat Free Sewing Pattern is a cost-effective and enjoyable way to put your sewing skills to use. This DIY approach allows you to choose your dog’s favorite colors, patterns, and materials. Plus, it’s a great opportunity to recycle waterproof fabrics from jackets or umbrellas you no longer use.
In this article, you’ll learn how to use a Fabric Dog Raincoat Free Sewing Pattern, what materials are ideal, how to take measurements correctly, and how to add useful customizations. Let’s dive into the creative and rewarding process of making your own handmade dog raincoat.
Why Choose a Fabric Dog Raincoat Free Sewing Pattern?
One of the main benefits of using a Fabric Dog Raincoat Free Sewing Pattern is the ability to create something unique that suits your dog’s needs and your personal style. Store-bought raincoats often lack proper fitting, especially for mixed breeds or dogs with unique body types.
Sewing your own raincoat allows you to tailor every detail, including the size, closures, and hood design. This is especially helpful for dogs who are picky or uncomfortable in store-bought clothing. The free sewing pattern offers flexibility and adaptability, making it easier to meet your specific goals.
Another reason to use a Fabric Dog Raincoat Free Sewing Pattern is the joy of crafting. Sewing for pets adds a new layer of creativity and personalization that store-bought products simply can’t provide. It becomes a heartfelt project filled with care and love.
Moreover, it’s eco-friendly. By choosing your own fabric dog raincoat free sewing pattern, you can upcycle items like nylon backpacks, old rain jackets, or waterproof tablecloths. These materials are great for crafting raincoats while helping reduce waste.
Patterns that are freely available are also budget-friendly. There’s no need to buy expensive designer dog clothing when you can make one-of-a-kind outfits at home. And, you’ll feel proud every time your dog wears your creation.
Finally, creating your own dog raincoat can be a bonding experience. From taking measurements to trying on the final piece, your dog is a part of the journey, and that makes the experience even more special.
Materials and Tools You’ll Need
To make your own raincoat using a Fabric Dog Raincoat Free Sewing Pattern, you’ll need some basic sewing tools and materials. Most items can be found at home or purchased affordably.
First, you’ll need waterproof or water-resistant fabric. Ripstop nylon, laminated cotton, or recycled umbrella fabric are all excellent choices. Make sure the material is lightweight and comfortable for your dog to move in.
Next, get a lining fabric if you want to add softness or warmth. Fleece or flannel work well, especially if your dog has short hair or you live in a colder area. It helps keep them cozy while staying dry.
A measuring tape is essential for getting accurate body dimensions. Focus on the chest, neck, and length from the collar to the tail. This ensures your fabric dog raincoat free sewing pattern will fit perfectly.
Velcro, snaps, or buttons are needed for closures. Velcro is often preferred because it’s adjustable and easy to manage. It’s safe and allows for quick dressing and undressing.
Don’t forget thread that matches your fabric, and a good pair of fabric scissors. A basic sewing machine makes the process faster, but you can also sew by hand if preferred.
Optional additions include reflective tape for safety, a hood or collar flap, and an opening for a leash clip. These features make your homemade raincoat even more functional and stylish.
Taking Accurate Measurements
One of the most important steps when using a Fabric Dog Raincoat Free Sewing Pattern is measuring your dog accurately. Without the right measurements, even the best pattern won’t result in a proper fit.
Begin by measuring your dog’s neck circumference, where the collar usually sits. This ensures that the neck opening of the raincoat is comfortable and not too tight.
Next, measure the chest girth, which is the widest part of the chest, usually right behind the front legs. This is the most crucial measurement, as a snug fit here will keep the raincoat in place.
Measure the back length from the base of the neck to the base of the tail. This determines how long the raincoat needs to be to provide full coverage without restricting movement.
If your pattern includes sleeves or leg openings, also measure the circumference of the front legs. Some dogs prefer a cape-style coat, while others do fine with leg coverage.
Take the belly length from just behind the front legs to where you want the coat to end under your dog’s body. Avoid covering too far back to prevent soiling during potty breaks.
Lastly, double-check all measurements before cutting your fabric. Keep your dog calm and still during the process for the most accurate results. Use treats and gentle encouragement to make it a positive experience.
Sewing the Raincoat Step by Step
Now it’s time to bring your Fabric Dog Raincoat Free Sewing Pattern to life! With all materials ready and measurements taken, follow these simple steps to create your own raincoat.
Start by printing or tracing your chosen free sewing pattern onto paper. Adjust the pattern based on your dog’s measurements if needed. Cut out the paper template and place it on the fabric.
Pin the paper pattern to the fabric and cut around it, leaving a small seam allowance. Repeat the process for the lining if you’re using one. You’ll have two layers for added comfort and protection.
Begin sewing the main body of the coat, attaching the lining to the outer fabric with the right sides facing each other. Sew along the edges, then turn it inside out for a clean, finished look.
Add closures such as Velcro or buttons. Place them at the neck and under the belly for secure fastening. Test the positioning by wrapping the coat around your dog before final stitching.
Sew on any optional features like a leash hole, reflective strips, or a hood. Make sure all additions are securely attached and safe for your dog to wear.
Finally, try the raincoat on your dog. Make any necessary adjustments for comfort and fit. Your fabric dog raincoat free sewing pattern is now a completed, wearable piece your dog can enjoy on rainy days!
Benefits of a Handmade Dog Raincoat
There are countless advantages to using a Fabric Dog Raincoat Free Sewing Pattern instead of buying pre-made dog clothes. One of the biggest benefits is the ability to create a perfect fit, especially for unique breeds.
Handmade raincoats are more comfortable for your dog because they’re customized to their body. There’s less chance of rubbing, chafing, or slipping compared to generic store-bought options.
You also have full control over the design. Choose fabrics that match your dog’s personality or coordinate with your own outfits for cute photo opportunities during walks.
Another benefit is cost savings. A DIY dog raincoat using a fabric dog raincoat free sewing pattern is far more affordable than high-end pet boutique options.
Durability is another plus. When you sew it yourself, you can reinforce areas that receive more wear and tear, making the raincoat last longer than some factory-made versions.
Lastly, it’s fun! Crafting with love for your pet can be a relaxing and rewarding hobby. It’s a creative way to show care, and your dog will look adorable while staying dry.
FAQ – Fabric Dog Raincoat Free Sewing Pattern
1. Is a dog raincoat really necessary?
Yes! For dogs with thin coats or those who dislike getting wet, a raincoat helps keep them comfortable and prevents them from catching a chill after walks.
2. What fabric should I use for a DIY dog raincoat?
Use waterproof materials like ripstop nylon, recycled rain jackets, or laminated cotton. Lightweight and breathable fabrics are best for mobility and comfort.
3. Can I make a raincoat without a sewing machine?
Absolutely! It may take longer, but hand-stitching a fabric dog raincoat free sewing pattern is entirely possible and just as effective with care and patience.
4. How do I wash the homemade raincoat?
Most waterproof fabrics can be hand-washed with mild soap and air-dried. Avoid heat settings that may damage the material or cause shrinkage.
5. What if my dog doesn’t like wearing clothes?
Start slow. Let your dog sniff and explore the fabric. Use positive reinforcement and short practice sessions to get them used to wearing the raincoat.
6. Are free sewing patterns adjustable for all dog sizes?
Yes, most fabric dog raincoat free sewing patterns can be adjusted. Take precise measurements and scale the pattern accordingly before cutting the fabric.
Conclusion
Making your own Fabric Dog Raincoat Free Sewing Pattern is not only a practical choice but also a fun and rewarding activity. You’ll save money, reduce waste, and create something special tailored to your dog’s unique shape and style.
From choosing the perfect fabric to adding personalized details, every step allows you to show love and care for your furry companion. With the detailed tips and step-by-step instructions in this article, you’re now ready to craft the perfect raincoat.
If you enjoyed this guide or have any suggestions or personal tips to share, please leave your honest opinion in the comments. Your feedback helps improve future tutorials and inspires others to start sewing too!

