If you’re searching for a fun, creative, and nostalgic way to express your style, this crochet granny square bag free pattern might just be what you need. Granny squares have made a massive comeback in the world of fashion and accessories, and what better way to use them than in a handmade bag that’s both practical and charming? Whether you’re a beginner or a seasoned crocheter, this project will bring joy and satisfaction from start to finish.
In this article, you’ll learn how to create your very own crochet granny square bag, including step-by-step guidance, design ideas, and smart tips to personalize your piece. This pattern is perfect for turning leftover yarn into something beautiful and functional. With just a few basic stitches and some inspiration, you’ll have a stylish bag that turns heads and carries your essentials.
We’ll also discuss essential supplies, joining techniques, lining options, and how to add straps for a professional look. By the end of this post, you’ll feel confident in your ability to create a unique crochet granny square bag that reflects your personality and creativity.
Choosing the Right Yarn and Materials
Before you dive into making your crochet granny square bag, it’s important to gather the right materials to ensure a strong, durable, and attractive result. Your choice of yarn can greatly affect the look, feel, and strength of your finished bag.
Opt for a worsted weight cotton yarn if you want a sturdy, eco-friendly bag. Cotton holds its shape well, making it ideal for bags that need to carry some weight. Bright, bold colors or soft neutrals both work well, depending on your style.
Use a crochet hook that corresponds to your yarn weight, typically a 4.0 mm to 5.0 mm hook for worsted yarn. This will give you enough structure without making the fabric too stiff or too loose. Always check the yarn label for recommended hook size.
Don’t forget about other materials like a yarn needle for weaving in ends and scissors for trimming. If you want to line your bag, you’ll also need fabric, thread, and a sewing needle or machine.
For bag straps, you can either crochet them, use pre-made leather handles, or even repurpose old belts. Consider the functionality—are you going for a tote-style bag, a handbag, or a shoulder bag?
If you’re a beginner, consider using a single-color scheme to keep things simple. More experienced crocheters might want to experiment with ombré effects, color blocking, or even floral-themed granny squares.
Lastly, remember to wash and block your granny squares before assembly. This step helps to even out stitches and gives your crochet granny square bag a professional and polished appearance.
How to Crochet the Granny Squares
The heart of a crochet granny square bag lies in the granny squares themselves. These versatile motifs are not only beginner-friendly but also deeply customizable.
Start by making a magic ring or chaining four and joining it with a slip stitch to form a loop. Chain three (which counts as your first double crochet), and then make two more double crochets into the loop.
Chain two to form the corner, then repeat the three double crochets into the loop. Repeat this sequence until you have four corners and four clusters of three double crochets. Join with a slip stitch to the top of the initial chain-three.
In the next rounds, you’ll build on this square by working clusters of three double crochets in each space and chaining two at the corners. This classic method forms a growing square that retains its shape with each round.
You can change colors between rounds to create beautiful contrast or stick with a single color for a more unified look. Use vibrant yarns for a playful, boho-chic aesthetic or go minimalist with soft pastels or neutrals.
Make enough granny squares for the size of bag you want. A small handbag may need 13–15 squares, while a larger tote might require up to 24 squares or more. Square size and yarn thickness also impact this.
Weave in all ends after completing each square. This helps prevent unraveling and keeps your project neat and organized, which is essential for a quality finished product.
Assembling Your Crochet Granny Square Bag
Once you’ve crocheted and blocked all your granny squares, it’s time to assemble them into your crochet granny square bag. This is where your vision starts to come to life.
Lay out your granny squares on a flat surface to plan the shape and design of your bag. Decide which squares go on the front, back, sides, and bottom. For example, a 3×3 grid can make a neat cube-shaped bag.
Use the whip stitch or slip stitch method to join your squares together. Work with the right sides facing each other if you want a seamless join, or leave the seams exposed for a textured, rustic look.
Once the body is joined, sew the bottom squares to the sides. Take care to match the stitches evenly to avoid puckering or gaps. Use stitch markers to help align corners and edges.
If you want a liner, now is the time to sew one. Measure your bag, cut your fabric accordingly, and sew it with right sides together. Insert the lining into the bag and stitch it along the top edge by hand or machine.
Add your straps or handles. Crochet straps using single or half double crochet stitches for strength. Sew or attach your chosen straps securely. Make sure they’re symmetrical for balance.
Finish your bag by checking all seams, securing loose ends, and giving it a light steam if needed. Your crochet granny square bag is now ready to use or gift!
Creative Customizations and Styling Tips
What makes a crochet granny square bag so special is how easily you can make it your own. Let your creativity shine through customizations and styling.
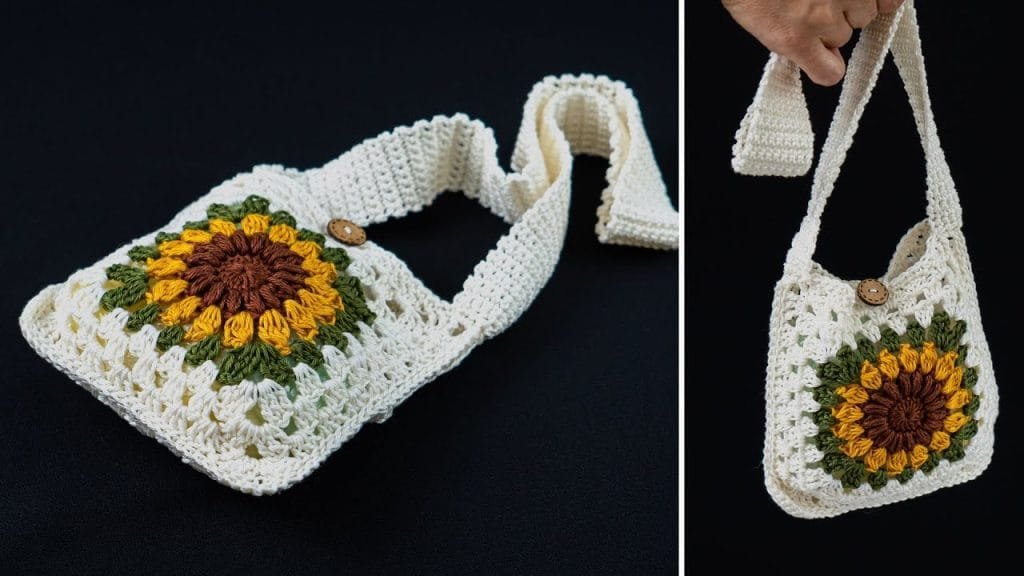
Experiment with different square patterns like sunburst, daisy-centered, or puff stitch versions to add variety and texture. Mix classic and modern motifs for a unique twist.
Add embellishments such as buttons, pom-poms, tassels, or even embroidered patches. These small additions can elevate the design and make your bag truly one of a kind.
Use contrasting yarn to stitch along the edges or seams for a bold, outlined look. This works well with both vibrant and neutral squares, giving a framed effect.
Add a zipper or magnetic snap for extra functionality and security. If you’re using the bag daily, closures help keep your belongings safe and organized.
Turn your crochet granny square bag into a fashion statement by matching it with outfits. Go bohemian with earthy tones, modern with monochrome squares, or retro with rainbow hues.
If you’re gifting the bag, consider adding a tag or note explaining that it’s handmade. People appreciate the love and time put into crochet gifts, especially when paired with thoughtful presentation.
Frequently Asked Questions (FAQ)
What yarn is best for a crochet granny square bag?
Worsted weight cotton yarn is ideal because it provides strength, durability, and structure. Acrylic yarn can also be used for colorful options but may not hold shape as well.
How many granny squares do I need to make a bag?
The number varies depending on the size of your bag. A small purse may need around 13–15 squares, while a large tote could require 24 or more.
Can beginners make a crochet granny square bag?
Absolutely! Granny squares are perfect for beginners. The techniques involved—basic double crochet, chain stitches, and slip stitches—are simple and repetitive.
Do I need to line the bag?
Lining is optional but recommended. It helps the bag keep its shape, prevents items from poking through, and adds a polished, professional finish.
What’s the best way to join granny squares for a bag?
The whip stitch and slip stitch are the most common methods. Use whip stitch for a cleaner, hidden seam and slip stitch for a decorative, visible join.
Can I wash my crochet granny square bag?
Yes, but be sure to check the yarn label. Most cotton yarns are machine washable. Use cold water and gentle cycles. Lay flat to dry to maintain shape.
Conclusion
Creating a crochet granny square bag free pattern is not just a fun and satisfying project—it’s a creative way to craft something useful and stylish. From choosing your yarn to designing your layout, assembling the pieces, and adding personal touches, each step is a chance to express your artistic vision.
We hope this guide has inspired and empowered you to pick up your hook and yarn and try this timeless project. Whether you keep it for yourself or give it as a handmade gift, your bag will carry more than just items—it’ll carry meaning and love.
Have you tried making your own crochet granny square bag? Share your thoughts, experiences, or questions in the comments. We’d love to hear your honest opinion and any suggestions you may have for future tutorials!

