If you’re searching for a practical and heartwarming project, the Crochet Sole Slippers Pattern is a perfect choice. These handmade slippers combine comfort, functionality, and creativity in one beautiful piece. Whether you’re a beginner or an experienced crocheter, creating your own slippers using this pattern is a satisfying way to stay warm and stylish.
Crafting slippers from scratch allows you to personalize them with your favorite colors and yarns. It also means you can make custom sizes for yourself, your family, or as thoughtful handmade gifts. The Crochet Sole Slippers Pattern is ideal because it includes the foundation of any good slipper: the sole. A solid and comfortable sole makes all the difference, ensuring durability and snug support with every step.
Throughout this article, you’ll learn how to follow the Crochet Sole Slippers Pattern, understand the materials involved, master the basic techniques, and even explore ways to make your slippers truly unique. Whether you’re crocheting for fun or looking to expand your collection of cozy home accessories, this guide is here to help you create something you’ll be proud to wear.
Choosing the Right Materials for Your Crochet Sole Slippers
The foundation of any successful project starts with good-quality materials. When working with a Crochet Sole Slippers Pattern, the right yarn and hook will ensure your slippers are soft yet durable.
Firstly, consider using a thick, worsted weight or bulky yarn. These provide the warmth and structure needed for cozy soles. Natural fibers like wool offer excellent insulation, while acrylic blends can be more budget-friendly and easy to clean.
You’ll also need a crochet hook size that matches your yarn. Most patterns will recommend a size, but if you’re modifying or using different yarn, do a small test swatch first. Gauge matters with slippers – too tight and they’re uncomfortable, too loose and they won’t stay on your feet.
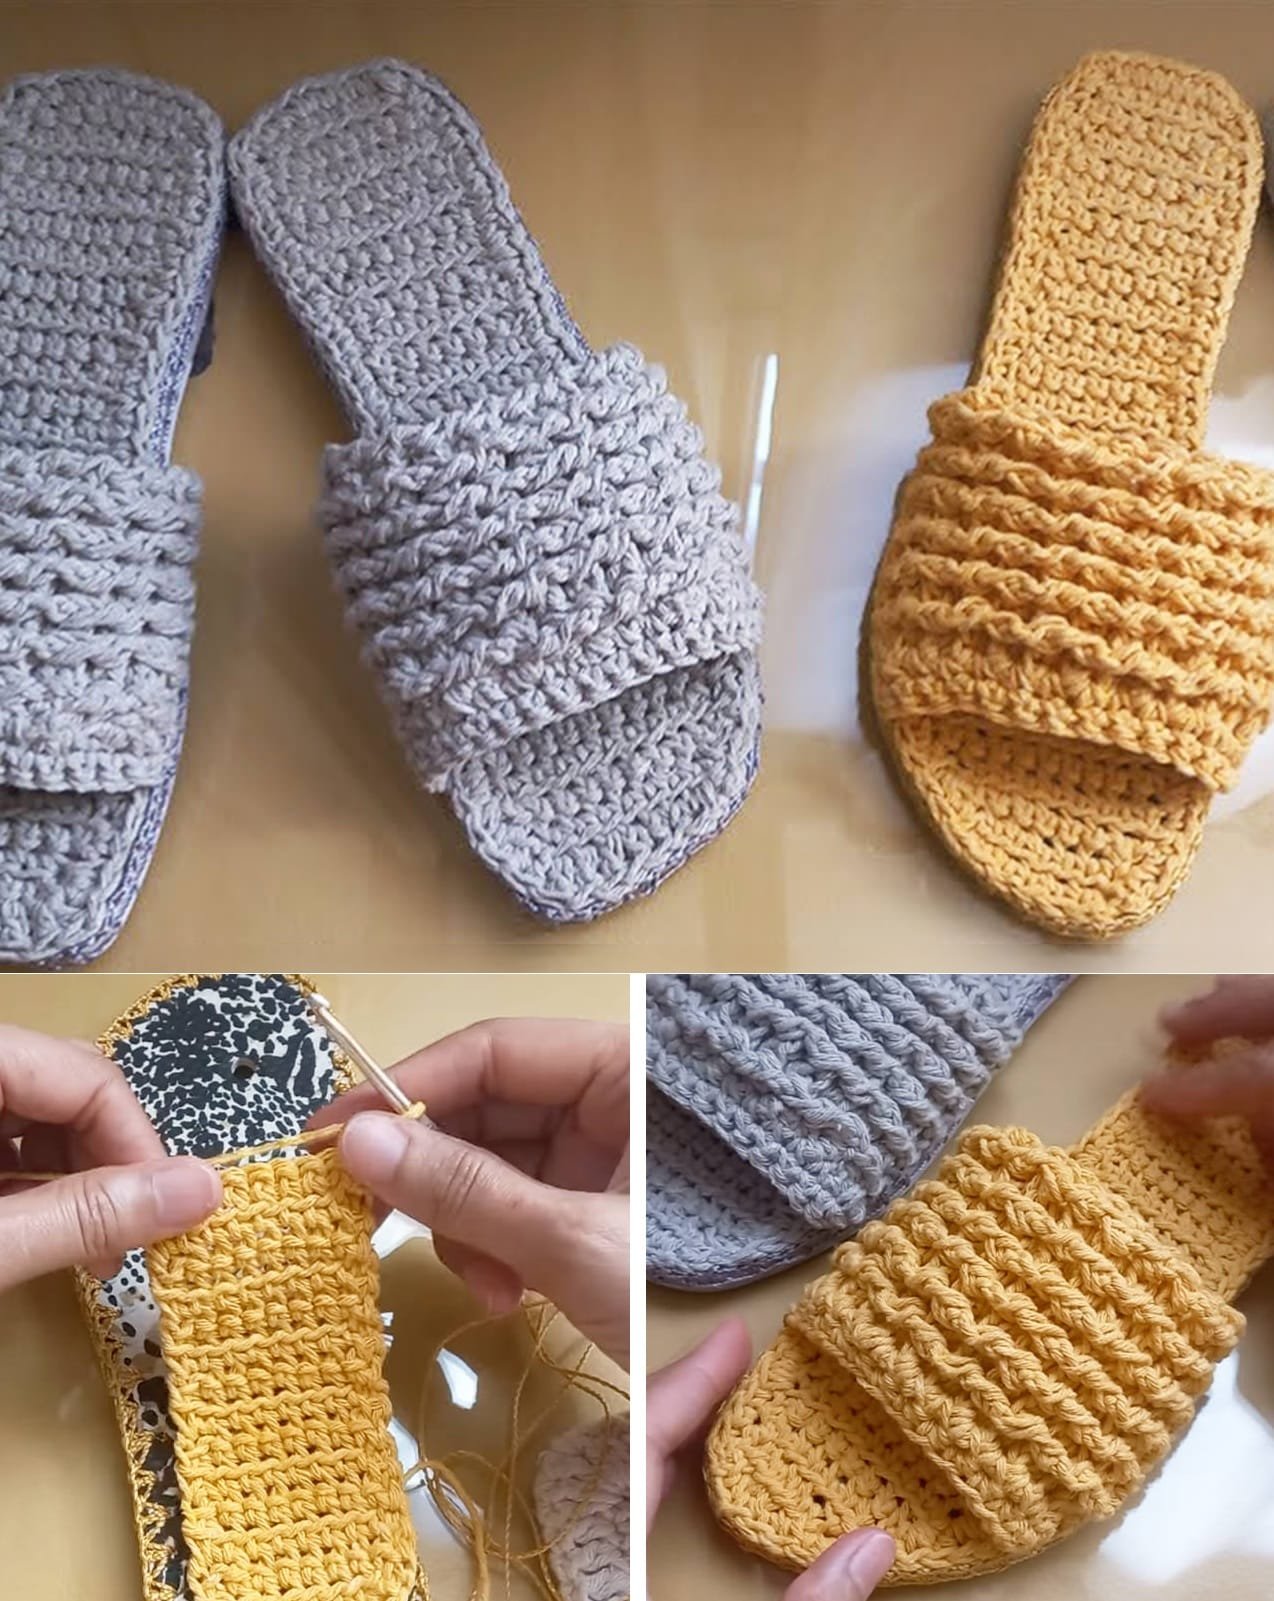
Don’t forget about the sole material. Some crafters like to use double yarn for added thickness. Others prefer sewing a non-slip fabric or leather patch on the bottom for extra grip and longevity.
Optional accessories like buttons, bows, or pom-poms can add a charming finishing touch to your project. Just make sure any embellishments are secure, especially if the slippers are for children or elderly users.
Last but not least, always have a pair of scissors, a yarn needle for weaving in ends, and a stitch marker on hand. These basic tools make your crochet experience smoother and more enjoyable.
By preparing your materials carefully, you’ll set yourself up for success before even starting the first stitch. The Crochet Sole Slippers Pattern will come to life more beautifully when you use tools that support your skill and creativity.
Understanding the Basics of the Crochet Sole Slippers Pattern
To successfully complete your slippers, it’s essential to understand the structure and flow of the Crochet Sole Slippers Pattern. The pattern typically begins with the sole, which serves as the base for the entire slipper.
The sole is usually worked in oval rounds. You start with a chain, then work stitches on both sides of the chain to create an oval shape. This method allows you to form a smooth, flat base for your feet.
Most slippers will use basic stitches like single crochet (sc), half double crochet (hdc), or double crochet (dc). Learning how to increase and decrease stitches is also important, as this helps shape the toe and heel portions.
Some patterns might include ribbing or textured designs along the top or ankle cuff. Ribbing is often made by working into the back loop of the stitches, giving a stretchy and professional finish.
Another aspect to note is the slipper height. Some Crochet Sole Slippers Pattern versions are like ballet flats, while others are ankle-high boots. Choosing a style depends on your personal preference and climate.
Stitch counts and row tracking are crucial when following the pattern. A small notebook or row counter can help you stay organized and avoid mistakes. Repeating rows incorrectly can alter the final shape significantly.
Understanding these foundational elements helps demystify the process. When you grasp the basic construction of a Crochet Sole Slippers Pattern, you gain the confidence to try different styles and modifications later on.
Customizing Your Crochet Sole Slippers for a Perfect Fit
One of the greatest advantages of making your own Crochet Sole Slippers Pattern is the ability to customize the size, color, and shape to your exact preference. Unlike store-bought options, your handmade slippers will truly feel like they were made just for you.
To adjust the size, begin with measuring the foot length. Most patterns include a sizing chart or instructions for modifying the sole by adding or removing rows or chains. Always test the fit before building up the sides.
Color choice also plays a huge role in personalization. From neutral tones to bright, vibrant hues, the yarn color sets the mood. Consider combining two or more colors for a striped or patchwork effect.
Want extra cushioning? Try doubling the sole with a second layer or inserting foam pads between two crocheted bases. This not only improves comfort but also extends the slipper’s life.
Texture adds personality. Add popcorn stitches, bobbles, or even a fur yarn trim to elevate the aesthetic. This is a great way to turn a basic pattern into something unique.
You can also personalize for the seasons. Lighter yarns are better for spring and summer versions, while thick, fuzzy yarns suit colder months. The Crochet Sole Slippers Pattern is flexible enough to suit all seasons.
Finally, experiment with closures. A buttoned flap or a drawstring top can make your slippers fit more snugly and stay secure during use. These thoughtful additions enhance functionality while adding charm.
Tips for Crocheting Like a Pro
Even with a simple Crochet Sole Slippers Pattern, the experience can be improved with some expert tricks that make the process more enjoyable and the results more polished.
Maintain even tension. This ensures your stitches are uniform, leading to a neater finish and consistent sizing. Practice holding your yarn and hook in a way that feels natural and steady.
Read the entire pattern before starting. Familiarizing yourself with the steps helps prevent surprises and allows you to understand the project as a whole.
Use stitch markers generously, especially at the beginning and end of rounds. This helps keep your place and makes complex shaping easier to manage.
Count your stitches after each round. This habit avoids mistakes that can accumulate and distort the final product. A small counting tool or even a phone app can assist.
Weave in your ends as you go. Don’t leave all the finishing for the end – it can become overwhelming and time-consuming. Tidy ends also make trying on the slipper easier during the process.
Block your slippers after finishing. Wet blocking or steam blocking can help set the shape and give a professional appearance, especially if your stitches tightened up during construction.
These simple tips can elevate your Crochet Sole Slippers Pattern experience from a casual craft to a highly satisfying creative project.
FAQ – Frequently Asked Questions about Crochet Sole Slippers Pattern
What is the best yarn for crochet slippers?
Bulky or worsted weight yarns work best. Look for soft yet sturdy options like wool blends or durable acrylics that hold shape and warmth.
Can I make these slippers non-slip?
Yes! Apply fabric glue dots to the soles, sew on suede patches, or use puff paint for a DIY anti-slip solution.
Are crochet slippers washable?
Most are! If you use machine-washable yarn, you can wash them gently. Always follow the care instructions for your specific yarn.
Can beginners follow a Crochet Sole Slippers Pattern?
Absolutely. Many patterns are beginner-friendly. Look for those using basic stitches like single crochet or half double crochet.
How long does it take to make a pair?
Depending on your skill and the design, it can take anywhere from 2 to 6 hours. Simpler patterns are quicker, while detailed designs take more time.
Can I sell the slippers I make?
Yes, you can sell handmade slippers. Just be sure the pattern allows commercial use if it’s not your original design.
Conclusion
Creating your own pair of slippers using a Crochet Sole Slippers Pattern is not only fun and rewarding but also highly practical. From choosing your materials to customizing the fit and adding personal touches, each step allows you to express creativity and care.
You’ve learned how to start, what materials to choose, how to make adjustments, and how to troubleshoot common issues. Now you’re ready to bring your cozy creations to life.
We’d love to hear from you! If you’ve tried this pattern or have questions, please leave your honest opinion and any suggestions below. Your feedback helps improve the crafting experience for everyone.

