Happy Feet! A How To Guide to Making Quilted Sneakers is more than just a fun title — it’s your next favorite creative adventure. Imagine walking in sneakers that are not only stylish but also cozy, quilted, and handmade by you. This guide will take you step by step through the rewarding process of making your own quilted sneakers, even if you’re a beginner.
Combining the vibrant world of quilting with the everyday practicality of footwear, this trend has taken the DIY fashion scene by storm. Quilted sneakers offer the perfect blend of comfort and flair, allowing you to express your creativity with every step. With this tutorial, you’ll learn how to craft your own quilted sneaker masterpiece from scratch.
Whether you’re looking to repurpose old fabric scraps or trying your hand at wearable quilting for the first time, Happy Feet! A How To Guide to Making Quilted Sneakers is here to help. Let’s get started on this colorful and practical project that promises both fun and functionality.
Choosing the Right Materials
The first step to achieving those happy feet is selecting the right materials. The foundation of any good quilted sneaker is quality fabric that’s both durable and comfortable. You’ll want to pick quilting cotton, canvas, or denim as your base layers. Avoid stretchy or slippery fabrics for this project, especially if you’re new to sewing.
Equally important is the sneaker base you’ll use. You can upcycle an old pair of canvas sneakers or purchase a blank, unbranded pair meant for DIY customization. Make sure the shoes fit well before you start applying your quilted panels. A snug, comfortable fit is essential since quilted layers add a bit of thickness.
You’ll also need basic quilting tools like a rotary cutter, cutting mat, quilting ruler, pins, and a sewing machine. Batting (or a thin layer of foam) will be used between the outer fabric and lining to give your sneakers that padded, cozy feel.
When it comes to adhesives, opt for a strong, flexible fabric glue or double-sided fusible interfacing. This will help your fabric stick securely to the shoes without cracking or peeling as you walk.
Don’t forget to gather embellishments like buttons, patches, or embroidery thread. These little details will make your quilted sneakers truly one-of-a-kind and express your personal style.
Lastly, a clear waterproof fabric spray is recommended. Since you’re working with fabric on footwear, protecting your work from the elements is essential for long-term use and durability.
Designing Your Quilted Pattern
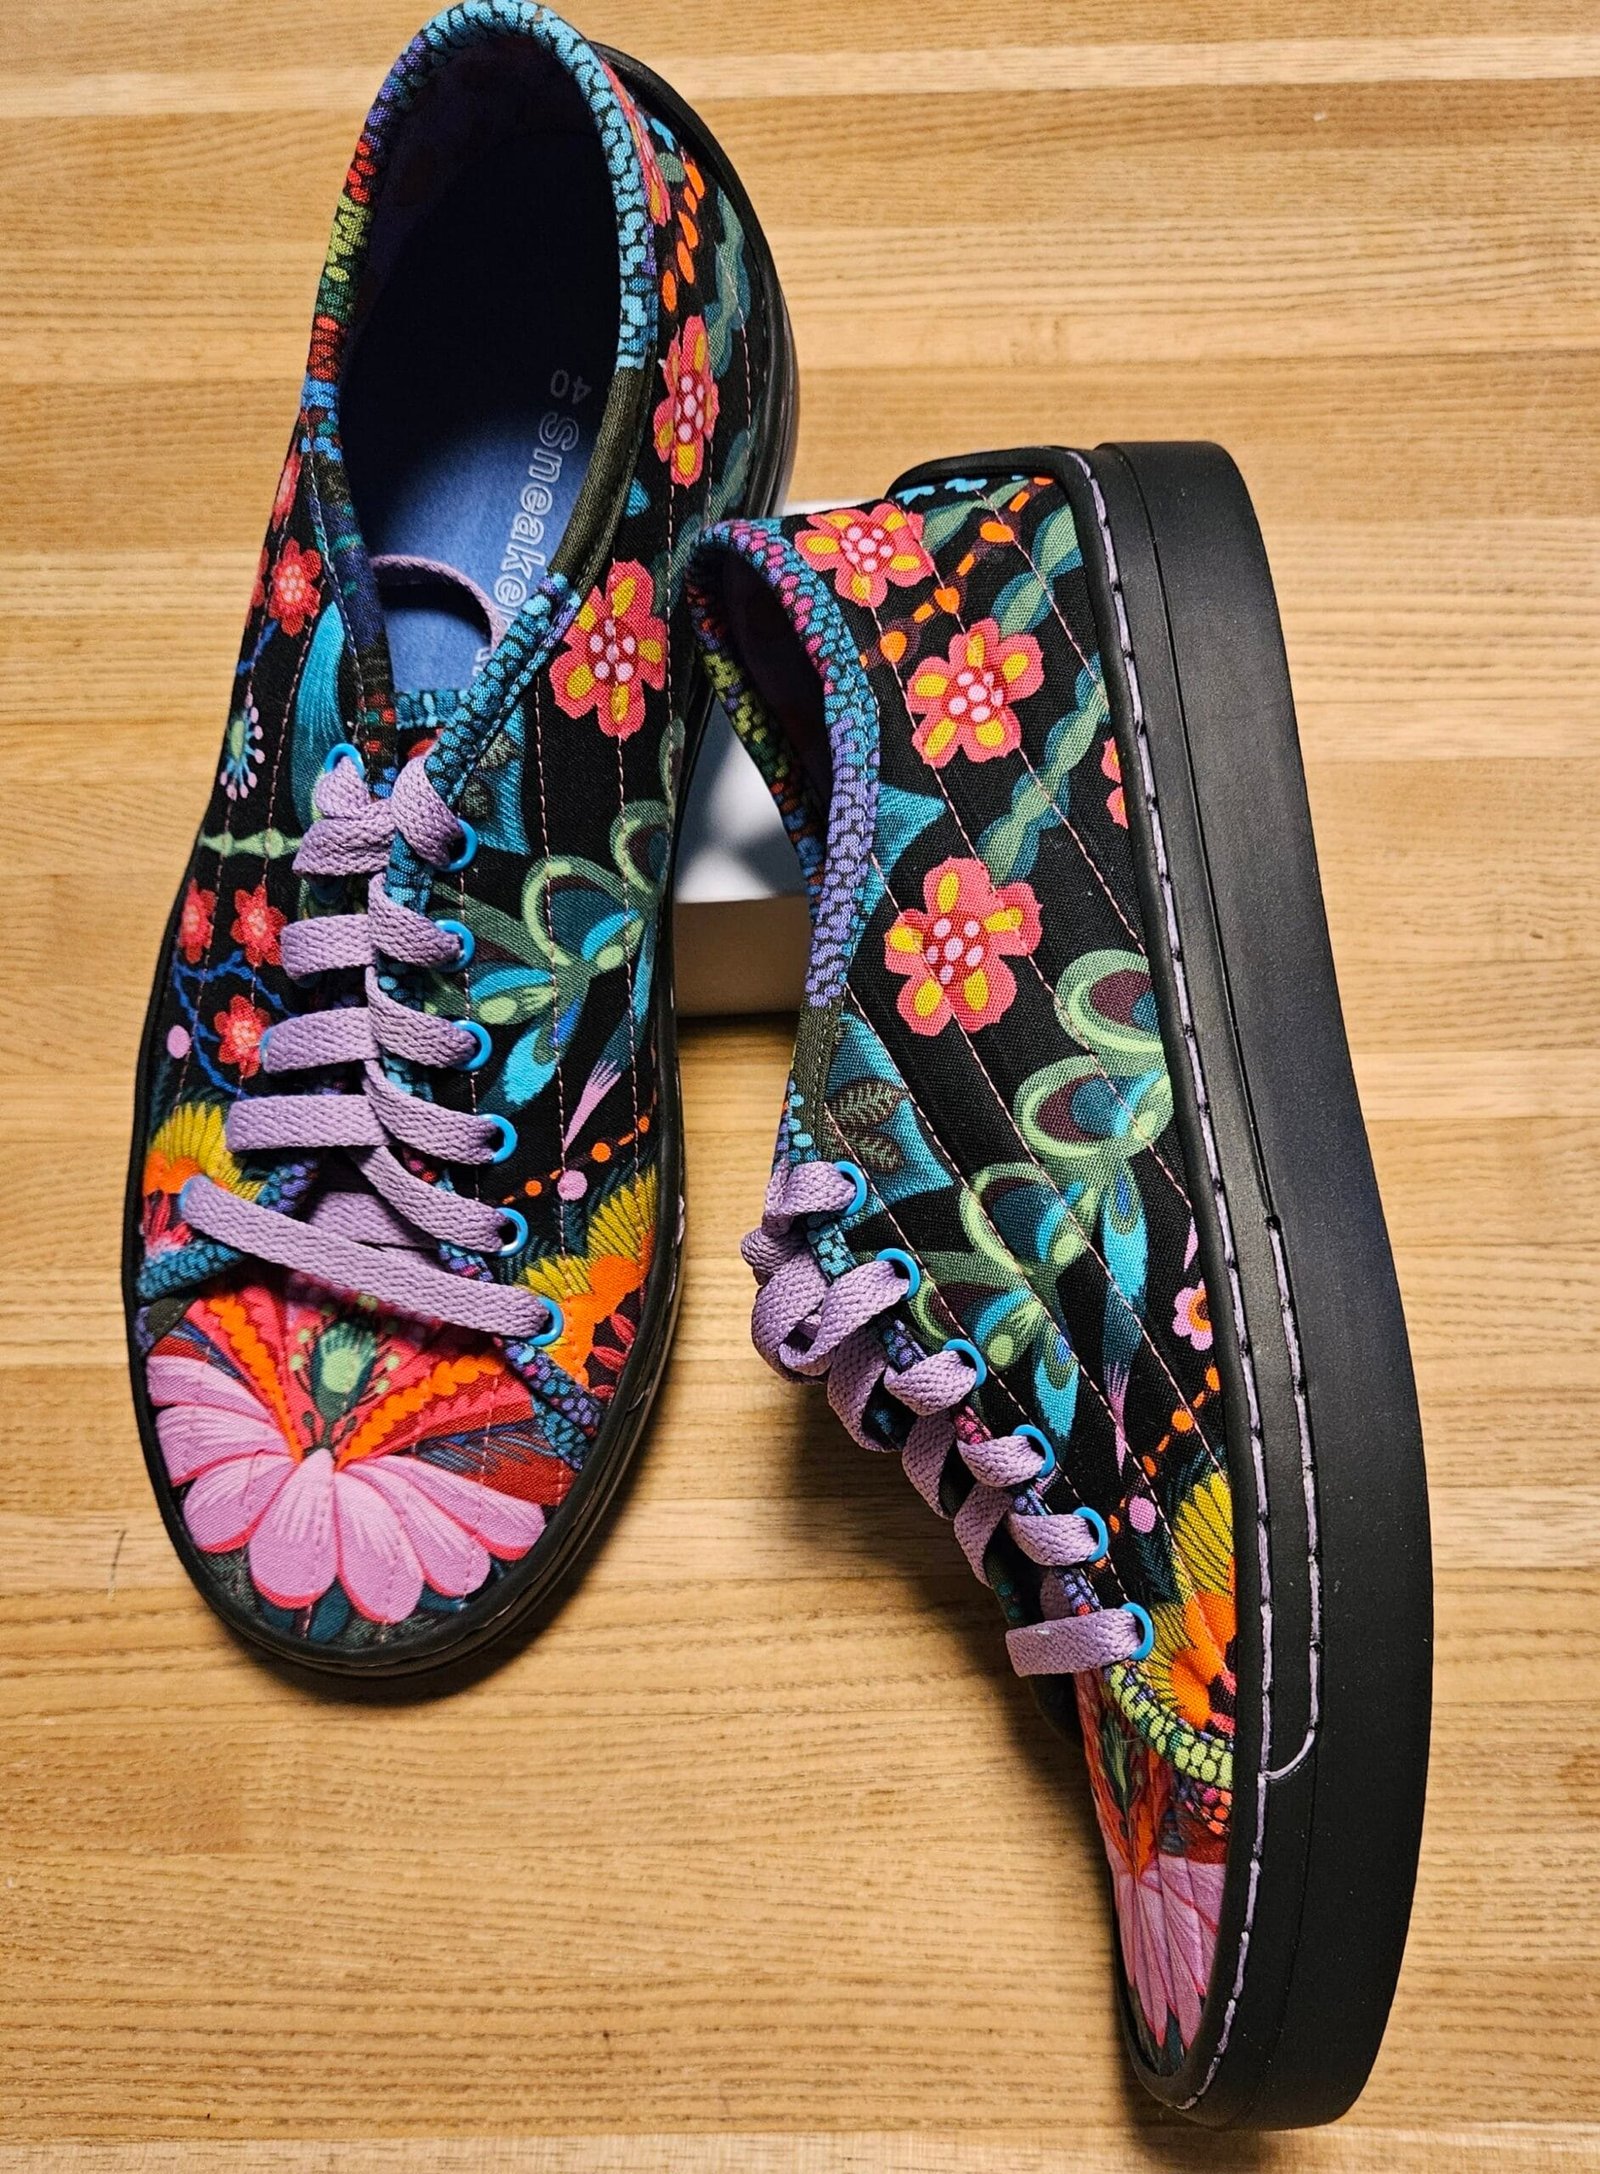
One of the most exciting parts of Happy Feet! A How To Guide to Making Quilted Sneakers is coming up with your own design. Begin by sketching your sneaker layout on paper and visualizing how you want the fabric pieces to come together. Geometric shapes, floral motifs, or even patchwork-style layouts are all great starting points.
Choose a color palette that speaks to your personality. Consider using a monochromatic scheme for a modern look or go bold with contrasting colors and prints. The more confident you are with your design, the more fun the process becomes.
Once your fabric is chosen and prepped, cut out small panels to fit different parts of the sneaker, such as the sides, tongue, and toe cap. Always leave a little extra room for seam allowance and adjustments.
Layer each panel with batting and backing fabric before quilting. Use a straight-line or zigzag stitch to sew through all three layers. These quilted textures will not only look amazing but add that plush comfort your feet will thank you for.
Before attaching the panels to the shoes, place them temporarily with pins or clips and evaluate the visual flow of your design. Adjust any areas that seem out of balance or awkward.
Once everything looks just right, start securing your quilted panels using glue or stitching, depending on your comfort level and the structure of your shoe. Work slowly to avoid wrinkles or gaps.
Assembling and Attaching the Panels
Now that you’ve quilted your pieces, it’s time to bring your quilted sneakers to life. Start with the toe and work your way around the shoe. This approach ensures that overlapping edges look clean and natural.
Apply fabric glue to the edges of your sneaker and carefully press each quilted panel into place. Hold them down with clips or weights until they’re completely dry. Don’t rush this step; a secure hold is key to the durability of your sneakers.
If you prefer stitching your panels, use a heavy-duty needle and strong thread. Hand-sewing allows for more control, especially around curves and tight areas. Take your time and double-stitch the seams to prevent fraying or detachment.
Repeat this process for each section of the shoe. Remember to press and smooth the fabric as you go. A heat press or iron on low heat (with a protective cloth) can help eliminate any wrinkles and activate the glue if using fusible interfacing.
For areas like the tongue or heel, trim your fabric neatly and tuck in the edges for a polished finish. You can also sew on trim or bias tape to conceal seams and add visual interest.
Once all your panels are securely in place, let the sneakers cure for 24 hours before wearing. This ensures the glue has completely set and the materials have bonded well.
Customization Tips for Unique Style
With your quilted sneakers fully assembled, it’s time to add your personal touch. Customization is what truly turns this into a Happy Feet moment. Start by adding embroidered initials, fun patches, or even beads for extra flair.
Painting the rubber sole or toe cap with fabric-safe paint can elevate the look even further. Go for a matching tone or choose metallic shades for a trendy twist. Just make sure the paint is flexible and won’t crack when the shoe bends.
Add laces that complement your fabric theme. Velvet, ribbon, or printed cotton laces can completely transform the vibe of your sneakers. You can even braid your own from scrap fabric to match your quilt pieces.
Decorate the tongue with a small logo tag or charm. This little addition can serve as your signature style and make your shoes feel like a true brand.
If you want more structure in your sneakers, consider inserting additional padding around the ankle area or using interfacing in specific panels before assembly. This provides more support and a professional finish.
Finish off by spraying the entire surface with waterproof spray and letting it cure. This final step will protect your work from dirt and moisture and help keep your sneakers looking new for longer.
FAQ — Frequently Asked Questions
Can I wash quilted sneakers?
It’s best not to submerge quilted sneakers in water. Instead, spot-clean them with a damp cloth and mild detergent. Always let them air dry completely.
Do I need sewing experience to make quilted sneakers?
Not necessarily! This project is beginner-friendly. As long as you follow each step carefully, you can succeed with just basic sewing knowledge.
What type of shoes are best for quilting?
Canvas sneakers work best. They provide a solid, flat surface for attaching quilted panels and are easy to sew or glue on.
Can I use fabric scraps from old clothes?
Absolutely! That’s one of the best parts of Happy Feet! A How To Guide to Making Quilted Sneakers — it’s eco-friendly and allows you to repurpose beautiful fabrics.
How long does it take to complete a pair?
For beginners, expect 6 to 8 hours split over a couple of days. As you gain experience, you’ll move faster and more confidently.
Will the fabric hold up with daily wear?
Yes, as long as you use strong adhesives, quality stitching, and protect your sneakers with waterproofing spray, they should be durable enough for regular use.
Conclusion
Happy Feet! A How To Guide to Making Quilted Sneakers has shown you that quilting isn’t just for blankets — it can walk right out your door with style! From choosing the perfect materials and creating stunning quilted designs, to assembling your sneakers and adding unique custom touches, you now have all the tools you need to bring your own vision to life.
Quilted sneakers are a great way to show your creativity, be sustainable, and create something truly wearable. If you’ve followed along and created your own pair, we’d love to hear from you! Leave a comment with your thoughts, ideas, or any tips you discovered along the way. Your feedback helps make this creative community even stronger.

