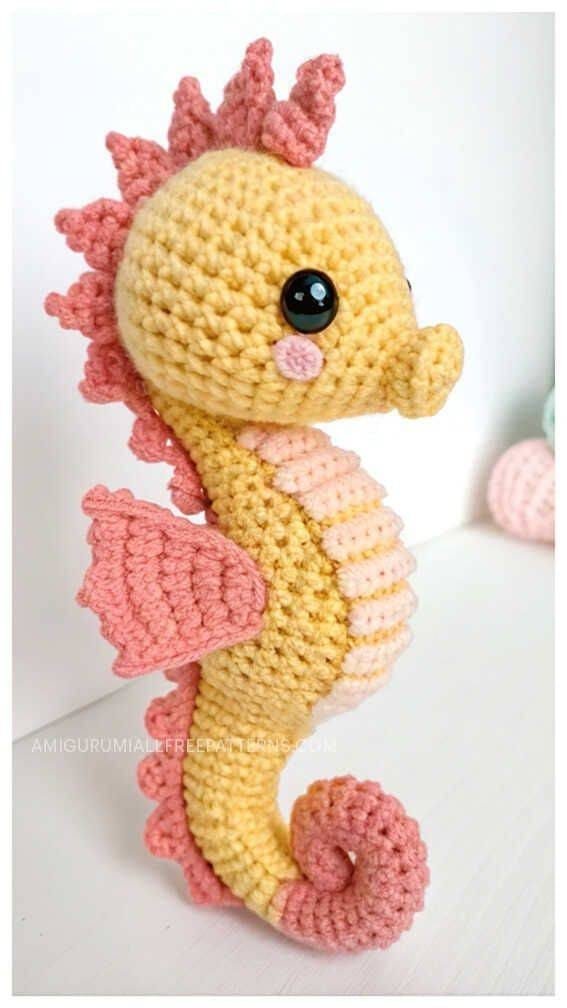
If you’re looking for a charming and whimsical project to add to your handmade collection, this crochet seahorse amigurumi pattern is the perfect choice. With its delicate curves, playful shape, and under-the-sea appeal, the seahorse is a favorite among crochet lovers. Whether you’re creating it for a child’s toy, nursery decor, or just because you love sea creatures, this guide will walk you through everything you need to know.
In this article, we’ll explore the materials you’ll need, the basic techniques required, and how to customize your crochet seahorse amigurumi pattern for different styles and personalities. It’s beginner-friendly but also enjoyable for experienced crocheters looking to unwind with a fun project.
By the end of this post, you’ll feel confident in creating your own crochet seahorse amigurumi and maybe even feel inspired to design a whole underwater family. Let’s dive into the wonderful world of yarn and stitches!
Materials and Tools You’ll Need
To start your crochet seahorse amigurumi pattern, gathering the right tools and materials is key. While there’s room for personal choice, using the right yarn type and hook size ensures a tighter stitch and better shape retention.
First, select a soft but firm yarn—acrylic or cotton works best for durability and stitch definition. Light worsted or DK yarn is commonly used for amigurumi. Make sure to choose vibrant or pastel colors that reflect the seahorse’s oceanic charm.
Second, use a smaller-than-usual crochet hook for your yarn size. This prevents holes between stitches, keeping your stuffing secure. A 2.5mm or 3mm hook is generally suitable for most crochet seahorse amigurumi patterns.
Third, you’ll need safety eyes or black embroidery thread for the eyes. If this toy is for a baby or toddler, embroidered eyes are safer. A yarn needle is also essential for sewing parts together and weaving in the ends.
Don’t forget polyester stuffing to bring your seahorse to life. Use small amounts and fill gradually for a smooth, plush finish. Make sure the stuffing is distributed evenly for a well-balanced shape.
You might also want some stitch markers to help you keep track of rounds, especially if you’re working in a continuous spiral. A pair of small scissors will help with trimming yarn and finishing touches.
Optional extras include embellishments like a tiny bow, flower, or a loop for hanging your crochet seahorse amigurumi as an ornament or mobile. Let your creativity flow!
Understanding the Basic Techniques
Creating a crochet seahorse amigurumi pattern doesn’t require advanced skills, but mastering a few basic techniques will ensure success. The beauty of amigurumi lies in its simplicity and structure.
The most fundamental stitch used is the single crochet (sc). This tight stitch builds the body and gives your seahorse structure. You’ll also use increases (inc) and decreases (dec) to shape the body, tail, and head.
Magic rings are used to start most amigurumi pieces. This method creates a tight, closed center, perfect for the seahorse’s snout, body, or tail. Practicing this technique will make your projects look more polished.
Crocheting in the round is a staple for any crochet seahorse amigurumi pattern. You’ll work in continuous spirals rather than joined rows. Keeping track of your stitch count is vital, so stitch markers are a lifesaver.
Joining parts together is another crucial skill. After crocheting individual parts like the tail, fins, and head, you’ll need to sew them together using a yarn needle. Take your time for clean, symmetrical attachments.
Sometimes the pattern includes surface crochet or back loops only (BLO) techniques for texture. These are optional but can add extra detail to your seahorse. They help define the seahorse’s spiny back or accentuate curves.
Lastly, shaping the tail into a spiral gives the seahorse its signature look. This is usually achieved through pattern increases and clever stuffing. A gentle curl at the end adds realism and personality to your amigurumi.
Step-by-Step Process to Crochet Your Seahorse
Now that you know the tools and techniques, it’s time to bring your crochet seahorse amigurumi pattern to life. Following a step-by-step process helps avoid confusion and ensures consistent results.
Begin by creating the snout with a magic ring and a few rounds of single crochet. Gradually increase stitches to form the head, ensuring it’s round and firm. Add safety eyes or embroider them before closing the head.
Continue into the neck and body without breaking the yarn. Most patterns shape the seahorse’s body with increases followed by decreases to taper it down into the tail. The stuffing should be added gradually as you go.
Once you reach the tail section, start decreasing while shaping it into a curved design. You can curve the tail manually as you stuff, or build the shape into the stitch pattern. Flexibility here allows for personality in the final shape.
After the body is complete, work on the fins. Most crochet seahorse amigurumi patterns have two small side fins and a larger back fin. Use the same yarn or a contrasting color for visual interest.
Sew all parts together securely. Attach fins symmetrically and reinforce the tail’s curl if necessary. A securely stitched head-to-body connection is essential for durability and safety.
Finish with final details—maybe add blush to the cheeks using embroidery or fabric paint, or crochet tiny accessories like a scarf or bow. This is your moment to make the seahorse truly unique.
Customizing Your Crochet Seahorse Amigurumi
One of the joys of working with a crochet seahorse amigurumi pattern is the endless customization. With just a few adjustments, you can create a whole family of seahorses with different personalities.
Change up the colors. Try gradient yarns for a whimsical look or stick to solid tones for a minimalist style. Using pastel shades gives a soft, baby-friendly aesthetic, while bright tones are bold and fun.
Vary the sizes by using different yarn weights or hook sizes. A bulky yarn with a larger hook will make a plush, huggable seahorse, while finer yarns will create tiny, delicate versions suitable as keychains or ornaments.
Add accessories to enhance the character. A mini crochet hat, tiny glasses, or even a necklace can bring out the unique personality of each seahorse. These touches are great for gifting or themed collections.
You can also tweak the pattern. Change the shape of the snout or the number of fins to create fantasy sea creatures like dragon-horses or sea unicorns. Keep the base of the crochet seahorse amigurumi pattern the same for structure.
Create themed collections. For example, a rainbow seahorse set, holiday-themed seahorses, or oceanic pals including turtles and jellyfish. This expands your creativity and keeps crochet exciting and fresh.
Consider personalizing your amigurumi as gifts. Add initials, birth dates, or tiny messages embroidered on the tail. These details make your handmade work meaningful and treasured for years.
FAQ – Crochet Seahorse Amigurumi Pattern
Q: Is the crochet seahorse amigurumi pattern suitable for beginners?
A: Yes, most patterns are beginner-friendly if you’re comfortable with basic stitches like single crochet, increases, and decreases. Magic ring and sewing parts together may take a little practice.
Q: What type of yarn works best for a seahorse amigurumi?
A: Light worsted (DK) or cotton yarn is recommended for its structure and durability. It helps the seahorse hold its shape and gives clean stitch definition.
Q: How long does it take to complete a crochet seahorse amigurumi?
A: Depending on your skill level and the complexity of the pattern, it can take anywhere from 3 to 8 hours. More detailed or larger versions may take longer.
Q: Can I wash the finished seahorse amigurumi?
A: If using machine-washable yarn and embroidered eyes, yes. For best results, hand wash gently in cold water and air dry to maintain shape.
Q: How can I make the seahorse safe for babies?
A: Avoid safety eyes and instead embroider features with yarn or thread. Make sure all parts are securely sewn, and use hypoallergenic stuffing.
Q: Can I sell finished products made from a crochet seahorse amigurumi pattern?
A: Yes, in most cases you can sell finished items. However, always check the designer’s licensing terms if you’re using someone else’s pattern.
Conclusion
Creating your own crochet seahorse amigurumi pattern project is a joyful and fulfilling experience. You’ve learned about the essential tools, the techniques to master, the step-by-step process, and the fun of personalizing each creation. Whether you’re crafting for a loved one or simply expressing your love for marine life, this seahorse pattern offers a delightful journey from yarn to art.