The Frankenbag Tutorial Pattern is a creative and eco-friendly sewing project that turns your leftover fabric scraps into a bold, unique handbag. Right from the first stitch, this tutorial empowers you to create a Frankenbag that reflects your personal style, using patchwork techniques that celebrate imperfection, color, and imagination. If you’re looking for a way to repurpose materials while crafting something practical and stylish, this Frankenbag tutorial is your next favorite DIY project.
Unlike conventional sewing patterns, the Frankenbag Tutorial Pattern doesn’t require a strict layout or uniform design. It’s about embracing randomness—sewing different fabric pieces together like a quilt and building a beautiful bag with a story in every stitch. This patchwork method not only reduces waste but also results in a one-of-a-kind item that no one else will have.
In this article, you’ll learn everything you need to know to create your own Frankenbag, from choosing fabrics to assembling and adding finishing touches. Whether you’re an experienced crafter or new to sewing, this guide breaks the process down into simple steps so that anyone can enjoy making their own Frankenbag at home.
Choosing the Right Fabrics for Your Frankenbag
When starting your Frankenbag Tutorial Pattern, the first step is to gather your materials. This is where creativity really begins. The goal is to use scraps, old clothing, or remnants from past projects to create a cohesive and vibrant design.
Look for fabrics in different textures and colors. Cotton, canvas, denim, and linen are all excellent options because they’re easy to sew and durable. You might also want to include one or two bold prints to give your Frankenbag a standout feature.
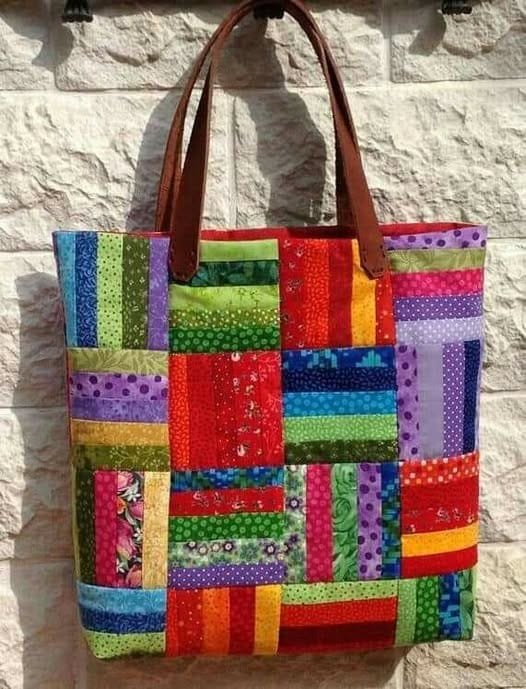
Don’t be afraid to mix florals with stripes, polka dots with solids, or even soft pastels with deep jewel tones. As long as there’s some visual harmony, your Frankenbag Tutorial will shine.
Lay out your fabrics before cutting. This helps you see how the different pieces work together and avoid clashing combinations. Try grouping them by color families or values (light, medium, dark).
Make sure you have a few larger scraps for the bag’s back and bottom sections, as these areas need more support. Smaller pieces are perfect for the front panel and decorative features.
If you’re using stretch fabric or slippery textures like satin or silk, stabilize them with interfacing or pair them with more structured materials to maintain the bag’s shape.
Finally, consider the lining. A solid-colored lining can balance a busy exterior and hide internal seams neatly. It’s also a great way to add a personal detail, like a favorite fabric hidden inside.
Cutting and Arranging Your Patchwork Design
Once you’ve chosen your fabrics, the next step in the Frankenbag Tutorial Pattern is to plan your patchwork layout. You can use a grid or free-form arrangement, depending on your style.
Start by cutting your fabric pieces into rectangles, squares, or other geometric shapes. This helps ensure straight seams and a cleaner final look. Irregular shapes are fine too, as long as you align your edges carefully while sewing.
Arrange your pieces on a flat surface like a table or floor. Move them around until you find a balance that feels right. Look for variety—alternate bold prints with solids, and mix different sizes and orientations.
Once you’re satisfied, take a photo of the layout so you can remember the order. You can also number the back of each piece with chalk or washable fabric pen to keep them organized during sewing.
Begin sewing your pieces together in small sections. Work in rows or columns, then join the rows together. Press each seam open or to the side to reduce bulk.
After assembling the front panel, trim the edges to form a clean rectangle or square for the bag’s body. Repeat the process for the back panel or choose a single large fabric piece to contrast the front patchwork.
Remember, the beauty of the Frankenbag tutorial lies in its originality. Don’t stress over perfect seams or matching points—embrace the quirky and handmade look.
If you’d like to add pockets or embellishments, this is a good time. Use any leftover fabric from your patchwork layout to create a matching pocket or strap accent.
Assembling the Frankenbag: Construction and Structure
Now that your panels are ready, it’s time to assemble the Frankenbag. This part of the Frankenbag Tutorial Pattern focuses on structure, durability, and functionality.
Start by cutting interfacing or batting to match your front and back panels. This will add body and stiffness to your Frankenbag, making it more suitable for everyday use.
Fuse or baste the interfacing to the wrong side of your fabric. Then place the front and back panels right sides together, pinning along the edges.
Sew along the sides and bottom, leaving the top open. Use a ½ inch seam allowance for added strength. You can also box the bottom corners by folding and sewing across the corners to give your bag depth.
Next, prepare your lining. Cut two pieces the same size as your exterior panels and sew them together, leaving a small hole in the bottom for turning later.
Insert the lining into the exterior bag, right sides facing, and align the top edges. Add handles or straps between the layers, making sure they are evenly spaced and facing down inside the bag.
Sew around the top opening, securing all layers together. Then turn the bag right-side-out through the hole in the lining, and hand-stitch or machine-stitch the hole closed.
Topstitch around the top edge of your Frankenbag for a professional finish. This also helps reinforce the seams and makes the bag look polished.
If you want to add closure options like magnetic snaps, zippers, or buttons, this is the moment. Be sure to test placement before final installation to avoid damaging the fabric.
Personalizing and Styling Your Frankenbag
One of the best parts of following the Frankenbag Tutorial Pattern is the freedom to personalize your bag. From playful add-ons to meaningful patches, there are countless ways to make it truly yours.
Consider embroidery or hand-stitching a name, phrase, or design onto the front panel. This adds character and showcases your creativity.
Add tassels, fringe, or beading along the edges for a bohemian or whimsical look. These can be attached by hand or sewn with your machine.
Attach metal hardware like D-rings or decorative rivets for a modern, professional appearance. They also make it easier to adjust or replace straps in the future.
Use fabric paint or textile markers to draw on your patchwork. This works especially well if you’ve left some solid blocks for decoration.
Incorporate a small charm, keychain, or fabric flower as a final touch. These little details bring life and personality to your finished Frankenbag.
Every time you make a Frankenbag, it becomes a reflection of who you are at that moment—your favorite colors, textures, and creative instincts all stitched together.
FAQ: Frankenbag Tutorial Pattern
What is a Frankenbag?
A Frankenbag is a handmade bag created using patchwork techniques with various fabric scraps. It’s called “Frankenbag” because it’s assembled from many different pieces—just like Frankenstein’s monster.
Do I need a pattern to make a Frankenbag?
Not exactly. The Frankenbag tutorial pattern is more of a guideline than a strict pattern. It encourages creative freedom and improvisation while offering general steps to follow.
What types of fabrics work best for a Frankenbag?
Medium-weight fabrics like cotton, canvas, and denim work well. You can mix them with lighter or textured fabrics, but be sure to stabilize them if needed for balance.
Can I make a Frankenbag by hand without a sewing machine?
Yes, but it will take more time and effort. Use strong hand stitches and double thread where possible for durability.
How do I make the bag more structured?
Adding interfacing, batting, or even a recycled tote bag base inside can give your Frankenbag more shape and strength.
Can I sell Frankenbags I make?
Absolutely! As long as the design is your own and you’re not violating someone else’s template or copyright, you can sell your handmade Frankenbags at markets, online shops, or to friends.
Conclusion
The Frankenbag Tutorial Pattern is more than just a sewing guide—it’s a creative journey that turns forgotten fabric pieces into functional, stylish art. Whether you’re drawn to sustainability, looking for a new hobby, or wanting to craft something truly unique, this tutorial empowers you to design a bag that’s completely your own.

