The Row Assembly Quilt Pattern is one of the most versatile and beloved quilting styles in the world of textile art. Whether you are new to quilting or an experienced crafter looking for a fresh project, the Row Assembly Quilt Pattern offers endless creative possibilities. From playful designs to elegant arrangements, this pattern provides both structure and freedom for artistic expression.
When you begin working on a Row Assembly Quilt Pattern, you’ll notice how its simplicity gives way to complexity as you build row by row. Each row becomes a canvas of its own, and together they form a harmonious and beautiful quilt. It’s no wonder this method remains a favorite in quilting communities and sewing rooms around the globe.
In this article, we will explore everything you need to know about the Row Assembly Quilt Pattern, from basic concepts to advanced tips. You will learn how to plan, piece, and complete a quilt using this method, and gain inspiration for your own unique creations. Let’s dive into the wonderful world of row assembly quilting.
What is a Row Assembly Quilt Pattern?
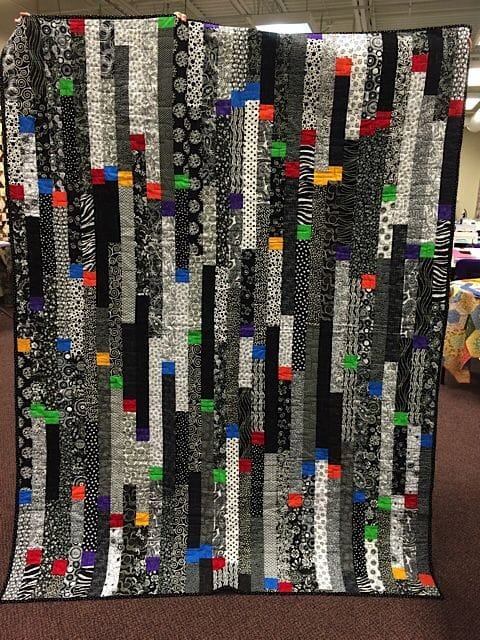
The Row Assembly Quilt Pattern is a technique where individual rows of fabric pieces are assembled separately and later joined to create the quilt top. This pattern allows quilters to focus on one row at a time, making it easier to manage and less overwhelming than working on a full quilt top all at once.
One of the greatest advantages of using a Row Assembly Quilt Pattern is the ability to mix and match different designs in each row. You can combine various blocks, shapes, and colors to form a quilt that tells a story or reflects a theme. This flexibility is ideal for both beginners learning the art and experts seeking new ways to challenge their skills.
Planning is key when creating a Row Assembly Quilt Pattern. Since each row can feature a distinct design, it’s important to sketch or map out your quilt before you begin cutting and sewing. Many quilters find joy in designing each row like a chapter of a book, where every section contributes to the overall narrative.
The technique also helps with precision and alignment. Because each row is assembled on its own, quilters can ensure that seams and patterns line up perfectly when the rows are joined together. This results in a polished, professional-looking quilt that you can be proud of.
Additionally, the Row Assembly Quilt Pattern is an excellent choice for group projects. Each participant can work on a separate row, and when combined, the quilt becomes a beautiful symbol of teamwork and creativity. This makes it a popular choice for charity quilts and community quilting efforts.
Finally, the Row Assembly Quilt Pattern is adaptable to various sizes and shapes. Whether you’re making a baby quilt, a lap quilt, or a king-size masterpiece, this method provides the structure and guidance you need to succeed.
Planning Your Row Assembly Quilt Pattern
Planning a Row Assembly Quilt Pattern is an exciting first step in your quilting journey. Before cutting fabric, take time to think about the colors, fabrics, and overall design you want to achieve. Sketching your idea on graph paper or using quilting software can help you visualize the final product.
Selecting fabrics is one of the most enjoyable parts of preparing your Row Assembly Quilt Pattern. Consider mixing solids with prints, using a unifying color scheme, or playing with contrasting shades for added visual interest. The choices you make here will define the character of your quilt.
Another important planning tip is to decide on the width and height of your rows. Keeping rows consistent in height ensures a neat finish, but you can also experiment with varying row sizes for a more dynamic look. Remember, the Row Assembly Quilt Pattern offers plenty of room for personalization.
As you design your quilt, think about how each row will transition into the next. Will the rows blend softly with similar colors and patterns, or will they create bold separations? The decisions are all yours, and each approach offers its own charm.
If you’re new to quilting, starting with a simple layout for your Row Assembly Quilt Pattern can help build confidence. Even basic rows of squares or rectangles can create stunning results when combined thoughtfully. Simplicity often highlights the beauty of the fabrics themselves.
Lastly, take notes as you plan your quilt. Keeping a record of fabric measurements, block counts, and layout choices will save you time and reduce errors later. Good planning makes the entire quilting process smoother and more enjoyable.
Sewing Techniques for Row Assembly Quilt Pattern
When it’s time to sew your Row Assembly Quilt Pattern, start by organizing your fabric pieces for each row. Labeling stacks or using small containers for each row can help keep everything in order as you work.
Precision is key in piecing together each row. Take your time to align edges carefully and maintain a consistent seam allowance, usually a quarter inch. This will ensure that the rows fit together neatly when it’s time to assemble the quilt top.
Pressing your seams properly as you go is another important step. With the Row Assembly Quilt Pattern, many quilters choose to press seams to one side on alternating rows. This reduces bulk where rows meet and helps seams nest together nicely.
If your rows feature complex blocks or intricate designs, consider piecing them in smaller units before joining them into full rows. Breaking the process into smaller tasks can make detailed work more manageable and reduce mistakes.
As you complete each row, lay them out together occasionally to check alignment and overall appearance. This allows you to make adjustments early, rather than after all rows are sewn. The Row Assembly Quilt Pattern benefits from regular checks like this to maintain harmony in the design.
Finally, when all rows are ready, sew them together carefully, pinning at seam intersections to ensure perfect alignment. Take it slow, and enjoy seeing your quilt come together beautifully, row by row.
Finishing Your Row Assembly Quilt Pattern
Finishing your Row Assembly Quilt Pattern quilt is a rewarding final stage. Once your quilt top is complete, it’s time to prepare your backing and batting layers. Choose a backing fabric that complements your quilt top and provides a soft, durable foundation.
Layering the quilt is a step that requires patience. Smooth out all layers carefully and secure them using safety pins or basting stitches. A well-basted quilt is easier to quilt and reduces the chance of shifting during sewing.
You can quilt your Row Assembly Quilt Pattern using a variety of techniques. Straight-line quilting works beautifully with the structured rows, while free-motion quilting can add flowing, artistic detail. Choose a quilting style that enhances your design and fits your skill level.
Binding the quilt edges is the next step. Many quilters prefer double-fold binding for durability. Take your time stitching the binding in place, as it frames your work and gives the quilt a finished, professional look.
Before considering your quilt complete, check for any loose threads or small repairs needed. A final press with an iron can also help set the seams and give the quilt a crisp, polished appearance.
Finally, don’t forget to label your quilt! Adding your name, date, and perhaps a title or dedication makes your Row Assembly Quilt Pattern project a keepsake to treasure for years to come.
FAQ About Row Assembly Quilt Pattern
What is the best fabric for a Row Assembly Quilt Pattern?
Cotton fabrics are typically the best choice for the Row Assembly Quilt Pattern. They are easy to work with, durable, and available in countless prints and colors.
How do I make sure my rows align perfectly?
Careful measuring, consistent seam allowances, and regular pressing will help your rows align neatly in a Row Assembly Quilt Pattern.
Can beginners try the Row Assembly Quilt Pattern?
Absolutely! The Row Assembly Quilt Pattern is beginner-friendly because it allows you to focus on one section at a time, making the process less intimidating.
How do I add variety to my Row Assembly Quilt Pattern?
You can vary your quilt by mixing different block styles in each row, experimenting with color schemes, or incorporating appliqué or embroidery.
What size quilt can I make with this pattern?
The Row Assembly Quilt Pattern can be adapted to any size, from small wall hangings to king-size bed quilts. It’s all about planning your rows accordingly.
Do I need special tools to create a Row Assembly Quilt Pattern?
Basic quilting tools like a rotary cutter, quilting ruler, and sewing machine are all you need for a Row Assembly Quilt Pattern.
Conclusion
The Row Assembly Quilt Pattern is a timeless and versatile method that opens the door to creativity, precision, and satisfaction. From planning and piecing to quilting and binding, each stage of the process offers a chance to express your style and grow as a quilter. Whether you are making your first quilt or adding to a growing collection, this pattern provides a solid foundation for beautiful, lasting works of art.

