The Criss-Cross Edging – Tutorial is a detailed guide designed to help crafters enhance their projects with a stunning, intricate border technique.
Whether you’re working on a crochet piece, a knitted blanket, or even a sewing project, the criss-cross edging can add an elegant finish that elevates the overall look.
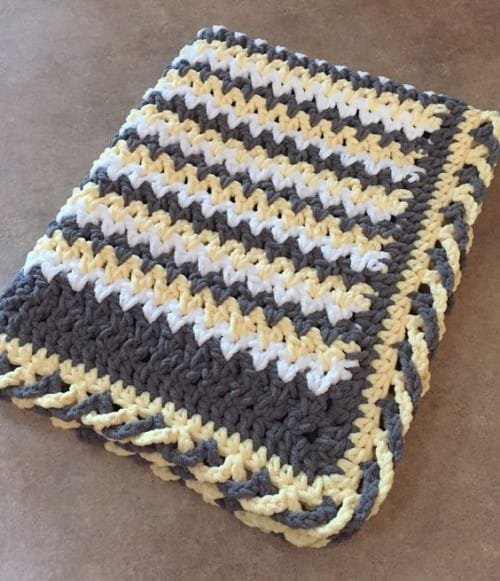
This decorative edging style is characterized by its interwoven design, creating a lattice effect that catches the eye.
The Criss-Cross Edging – Tutorial is suitable for beginners who want to learn a new technique and for experienced crafters looking to diversify their skill set.
In this guide, we will cover everything from selecting materials to mastering the technique. With clear instructions, tips for customization, and answers to common questions, you’ll have all the tools you need to create beautiful criss-cross edges.
1. Getting Started with Criss-Cross Edging
Before diving into the Criss-Cross Edging – Tutorial, it’s essential to prepare your materials and understand the basic concept of this technique.
- Criss-cross edging is typically used to frame or border projects, giving them a neat and professional finish.
- The design involves interlacing stitches, creating a woven effect that resembles overlapping X-shapes.
- This edging works well with various crafting techniques, including crochet, knitting, and embroidery.
Having a clear vision for your project will help you choose the right materials and approach. Let’s start with the basics.
2. Materials and Tools for Criss-Cross Edging
To complete the Criss-Cross Edging – Tutorial, you’ll need the following materials and tools:
- Yarn or Thread: Choose a material that complements your project. For crochet and knitting, opt for a medium-weight yarn. For embroidery, select a durable thread.
- Hook or Needle: Use the appropriate hook size or needle type for your chosen yarn or thread.
- Scissors: A sharp pair of scissors will help you achieve clean cuts.
- Measuring Tape: Ensure precise measurements to maintain consistency throughout the edging.
- Blocking Tools: These are optional but helpful for setting the finished edge into place.
- Stitch Markers: Use these to mark specific points for complex patterns or large projects.
Having these items ready will streamline your process and make the tutorial more enjoyable.
3. Step-by-Step Instructions for Criss-Cross Edging
Creating the criss-cross edging involves following a specific sequence of steps. Here’s how to get started:
- Foundation Row: Begin with a solid foundation row along the edge of your project. This row serves as the base for the criss-cross stitches.
- Creating the First Layer: Work a row of stitches across the foundation row, leaving enough space between each stitch for the criss-cross effect.
- Forming the Criss-Cross Pattern: On the next row, interlace your stitches by working into alternating spaces from the previous row. This creates the signature X-shape.
- Repeating the Pattern: Continue the criss-cross sequence until you’ve covered the desired length of the edge. Adjust the spacing for tighter or looser designs.
- Securing the Edging: Finish with a row of simple stitches to secure the pattern and prevent unraveling.
- Blocking and Finishing: Use blocking techniques to set the stitches and ensure a smooth, professional appearance.
4. Tips for Customizing Criss-Cross Edging
Personalizing your criss-cross edging is a fun way to make your projects unique. Here are some ideas:
- Experiment with Colors: Use multiple colors for the criss-cross stitches to create a vibrant, eye-catching design.
- Vary the Stitch Size: Play with stitch sizes to achieve different effects, from delicate and intricate to bold and dramatic.
- Add Beads or Embellishments: Incorporate small beads or sequins into the criss-cross pattern for added texture and sparkle.
- Adjust the Spacing: Modify the spacing between stitches to control the density of the design.
- Combine Techniques: Pair the criss-cross edging with other decorative borders, such as picots or scallops, for a layered look.
- Use Contrasting Textures: Mix smooth and textured yarns to enhance the visual appeal of the criss-cross pattern.
FAQ
Q: Can I use the criss-cross edging on any type of project?
A: Yes, the criss-cross edging is versatile and can be applied to various projects, including blankets, garments, tablecloths, and more.
Q: What is the best yarn for criss-cross edging?
A: Medium-weight yarn works well for most projects, but you can also use lightweight or bulky yarns depending on the desired look.
Q: How long does it take to complete criss-cross edging?
A: The time required depends on the size of your project and the complexity of the pattern. Small items may take a few hours, while larger pieces can take several days.
Q: Is criss-cross edging beginner-friendly?
A: Yes, this technique is accessible to beginners with basic skills in crochet or knitting. Clear instructions and practice make it easy to master.
Q: How do I prevent my criss-cross edging from curling?
A: Blocking the finished edge and ensuring even tension while stitching can help prevent curling.
Q: Can I mix criss-cross edging with other patterns?
A: Absolutely! Combining criss-cross edging with other decorative elements adds depth and character to your project.
Join our VIP broadcast list and gain access to exclusive patterns, all for free. As a VIP member, you’ll receive the best patterns daily, delivered directly to your device. ✨📱 It’s a unique opportunity to stay up-to-date with the latest trends and designs, curated just for you. Don’t miss out on enhancing your projects and discovering new inspirations with the best patterns every day! 🎨🔝
Conclusion
The Criss-Cross Edging – Tutorial is a fantastic way to elevate your crafting projects with a polished and sophisticated border. From understanding the basics to mastering the technique, this guide has provided everything you need to create beautiful criss-cross edges.
PATTERN HERE
We’d love to hear your thoughts and see your creations! Share your experiences with the Criss-Cross Edging – Tutorial in the comments below. Your feedback and suggestions inspire us to create even more helpful content for the crafting community. Happy crafting!

