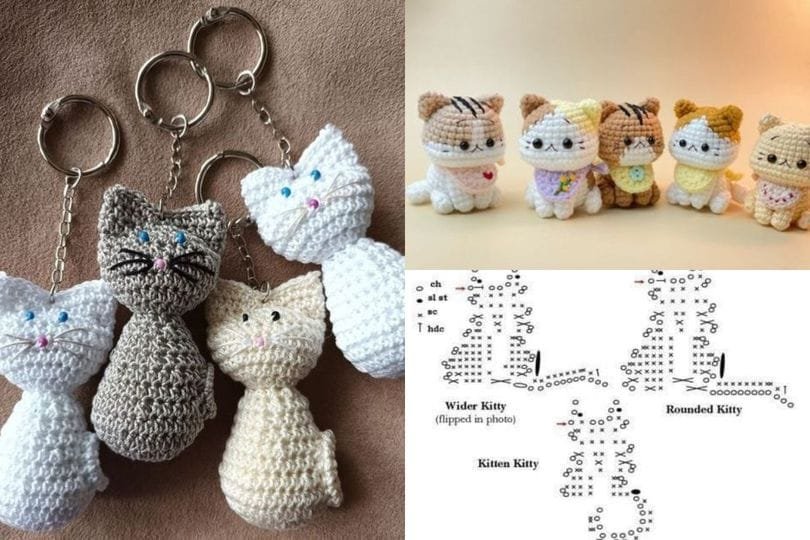
Looking to add a touch of cuteness to your keys or bag? Try making Adorable Crochet Kitten Keychains! These tiny crocheted kittens are a charming way to show off your love for cats, while keeping your keys organized in style.
Best of all, they’re simple to create and make for delightful handmade gifts. This free tutorial will guide you through each step, so whether you’re a beginner or an experienced crocheter, you’ll be able to craft your own unique kitten keychain in no time.
These crochet kitten keychains use minimal materials, so they’re budget-friendly and great for using up leftover yarn from other projects.
Plus, because they’re small and portable, you can make them almost anywhere – all you need is a little yarn, some stuffing, and a keychain ring. The result is an adorable, pocket-sized kitten that brings a smile to your face every time you reach for your keys.
In this article, we’ll cover everything you need to know about making these adorable crochet kitten keychains. From gathering the right materials to assembling the finishing touches, this guide has you covered. So, grab your crochet hook, and let’s dive into the world of mini kitten keychains!
1. Materials Needed for Crochet Kitten Keychains
Creating your own adorable crochet kitten keychains requires only a few simple materials. These items are readily available at most craft stores, making it easy to gather everything you need to get started.
- Yarn Selection: For this project, you’ll need a small amount of yarn in the color of your choice. Worsted weight yarn works well for these keychains, as it’s sturdy and holds the shape of the kitten nicely. You may also want to choose colors that resemble real kittens, like gray, brown, or black, but feel free to get creative!
- Crochet Hook Size: A small crochet hook, typically around size 2.5mm to 3.5mm, is ideal for this project. The smaller hook size ensures tight stitches, which help the keychain maintain its shape and prevent stuffing from poking out.
- Stuffing Material: A small amount of fiberfill stuffing is needed to give your kitten a cute, plush appearance. You don’t need much, just enough to fill the kitten’s body so it holds its shape well.
- Keychain Rings: To turn your crochet kitten into a keychain, you’ll need a keychain ring. These can be found at most craft stores or online, and they make it easy to attach your finished kitten to keys, bags, or even gift packages.
- Safety Eyes or Embroidery Floss: For the kitten’s face, you can use small safety eyes to give it a realistic look. If you prefer, you can also embroider the eyes and nose using black embroidery floss, which can be safer if you’re gifting the keychain to a child.
- Tapestry Needle: A tapestry needle is essential for sewing the parts of the kitten together and for weaving in the ends of your yarn. It makes finishing the project neat and professional-looking.
2. Step-by-Step Instructions to Crochet the Kitten
Now that you have your materials ready, it’s time to start crocheting your adorable crochet kitten keychain. Follow these step-by-step instructions to bring your mini kitten to life.
- Create the Head and Body: Start by crocheting a small sphere to form the kitten’s head. This is done with a series of increases and decreases, which help shape the head while keeping it small. Once the head is complete, move on to the body, using similar techniques to create a slightly larger sphere.
- Add the Ears: Crochet two small triangles to serve as the kitten’s ears. These are usually just a few rows of stitches, increasing slightly in each row. Once finished, attach the ears to the top of the head, making sure they’re symmetrical for a balanced look.
- Make the Legs and Tail: For the legs, crochet four small tubes. Each tube should be about the same size to give the kitten a balanced appearance. The tail can be made as a slightly longer, thinner tube. Attach these pieces to the body in their respective positions.
- Add the Stuffing: Before closing off the head and body, add a small amount of stuffing to each. Be careful not to overstuff, as it can distort the shape of the kitten. Just enough stuffing will give your kitten a soft, plush look.
- Attach Safety Eyes and Embroider Features: Insert safety eyes into the head if you’re using them, or embroider eyes and a nose using black embroidery floss. Adding these facial features is what brings the kitten to life, so take your time to get the placement just right.
- Attach the Keychain Ring: Finally, attach the keychain ring to the top of the kitten’s head, using a jump ring or simply threading the keychain through the yarn. Make sure it’s securely attached so that it holds up to regular use on your keyring.
3. Customizing Your Crochet Kitten Keychain
One of the best parts of making your own adorable crochet kitten keychains is the ability to customize them. Here are some fun ideas to make each kitten unique and personal.
- Experiment with Colors: While realistic colors like gray and brown are popular, don’t be afraid to get creative. Try using bright colors, like pink, purple, or blue, to give your kitten a whimsical look that stands out.
- Add Accessories: You can make your crochet kitten even cuter by adding tiny accessories. Try crocheting a small scarf, hat, or bow for your kitten. These accessories are easy to make and can be changed out to suit different seasons or holidays.
- Personalize with Embroidery: If you’re making this keychain as a gift, consider adding a tiny initial or heart embroidered onto the kitten’s body. This small detail adds a special touch and makes the keychain even more meaningful.
- Use Variegated Yarn: For a unique effect, try using variegated or self-striping yarn. This type of yarn changes colors automatically, giving your kitten a multi-colored or striped appearance without needing to switch yarns.
- Add a Bell or Charm: Attach a small bell or charm to the keychain ring for a fun, jingling accessory. Bells add a playful element, while charms allow for more personalization based on the recipient’s interests.
- Create a Set of Kittens: If you’re really enjoying the process, make a set of kittens in different colors or with different expressions. A collection of mini kitten keychains is perfect for gift-giving or selling at craft fairs.
4. Tips for Beginners Making Crochet Keychains
Creating adorable crochet kitten keychains is a fun project for all levels, but beginners may benefit from a few helpful tips to make the process easier and more enjoyable.
- Practice Basic Stitches First: If you’re new to crochet, practice basic stitches like single crochet, increase, and decrease before starting this project. Familiarity with these stitches will make the kitten keychain much easier to complete.
- Use a Stitch Marker: Since keychains are small, it’s easy to lose track of your rounds. Use a stitch marker to mark the beginning of each round, so you can keep track of your stitches and maintain the shape of the kitten.
- Crochet Tightly: For keychains, it’s best to crochet tightly to create a dense fabric. This prevents the stuffing from poking through and ensures that the keychain holds its shape well.
- Take Your Time with Assembly: Assembling small parts like ears, legs, and tails can be tricky. Take your time to attach each piece securely, and check for symmetry to make sure your kitten looks balanced and even.
- Watch Tutorial Videos: If you’re a visual learner, watch video tutorials that demonstrate similar projects. Seeing the steps in action can make the process clearer and help you feel more confident.
- Have Fun and Experiment: Don’t worry about perfection—crochet is a creative process. Allow yourself to make mistakes, try new techniques, and enjoy the process of bringing your adorable kitten to life.
FAQ
Q1: How long does it take to make a crochet kitten keychain?
For most crocheters, it takes about 1-2 hours to complete a kitten keychain, depending on skill level and complexity of design.
Q2: What is the best yarn for crochet keychains?
Worsted weight yarn works well for keychains as it’s sturdy and provides good structure. You can also use cotton yarn for a tighter, more durable texture.
Q3: Can beginners make crochet kitten keychains?
Yes! This project is beginner-friendly, especially with simple patterns. Practicing basic stitches like single crochet is recommended before starting.
Q4: How do I prevent my keychain from fraying over time?
Make sure all ends are woven in securely, and consider using fabric glue on areas with lots of wear, like the keychain attachment.
Q5: Can I wash my crochet kitten keychain?
Yes, but wash it gently by hand with mild soap. Allow it to air dry completely to avoid misshaping or damaging the stitches.
Q6: Are there patterns available for other animal keychains?
Yes, there are many free patterns for various animals, from puppies to bears, available online. Once you master the kitten, you can explore other options.
Join our VIP broadcast list and gain access to exclusive patterns, all for free. As a VIP member, you’ll receive the best patterns daily, delivered directly to your device. ✨📱 It’s a unique opportunity to stay up-to-date with the latest trends and designs, curated just for you. Don’t miss out on enhancing your projects and discovering new inspirations with the best patterns every day! 🎨🔝
Conclusion
Making adorable crochet kitten keychains is a fun and creative way to showcase your crochet skills. Not only are these keychains easy to make, but they’re also endlessly customizable, allowing you to create one-of-a-kind gifts or accessories.
We hope this tutorial has inspired you to make your own kitten keychain! Let us know your thoughts, share your creations, and feel free to leave suggestions for future tutorials. Happy crocheting!

