The Star Glow Quilt Pattern – Tutorial is an exciting project that combines the beauty of quilting with a touch of creativity. This quilt pattern features a stunning star design that seems to radiate warmth and brightness, making it perfect for cozying up your living space or gifting to a loved one.
Whether you’re a seasoned quilter or a beginner looking to take on a new challenge, this tutorial will guide you through every step of the process.
In this article, we’ll explore the various aspects of creating your own Star Glow Quilt. From gathering materials to cutting, piecing, and finishing, you’ll find detailed instructions to help you successfully complete this beautiful quilt.
This tutorial emphasizes a humanized approach, ensuring that each step is clear and accessible, regardless of your skill level.
As we delve into the details of the Star Glow Quilt Pattern, you’ll discover tips for color selection, piecing techniques, and advice for managing your quilt project efficiently. By the end of this tutorial, you’ll have a beautiful quilt that you can proudly display in your home or gift to someone special.
1. Materials Needed for the Star Glow Quilt Pattern
To embark on your journey of creating the Star Glow Quilt Pattern, it’s essential to gather all necessary materials. Having everything ready will make the quilting experience more enjoyable and productive.
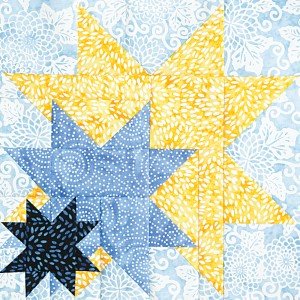
- Fabric: Choose a variety of fabrics for the quilt. A typical Star Glow Quilt requires a main fabric for the star points, a contrasting background fabric, and a fabric for the star center. A recommended palette includes bright colors like yellow or orange for the star points, paired with a soft white or light gray background.
- Rotary Cutter and Cutting Mat: A rotary cutter allows for precise cutting, essential for achieving clean edges. Ensure you use a self-healing cutting mat to protect your work surface.
- Quilting Ruler: A clear quilting ruler is invaluable for measuring and cutting fabric accurately. Look for one with grid markings to assist with aligning your pieces.
- Sewing Machine: A reliable sewing machine with a straight stitch function is sufficient for piecing your quilt. Use a needle suitable for quilting, such as an 80/12 size.
- Thread: Select a high-quality cotton thread that complements your chosen fabrics. A neutral color works well for most projects, but consider matching it to your star fabric for a seamless look.
- Iron and Ironing Board: Pressing your seams as you sew is crucial for a polished finish. A good iron helps set your seams and ensures that your quilt lies flat.
By gathering these materials before you begin, you set yourself up for a successful and enjoyable quilting experience.
2. Cutting Your Fabric for the Star Glow Quilt
Once you have your materials organized, it’s time to cut your fabric for the Star Glow Quilt Pattern. Accurate cutting is essential to ensure your pieces fit together perfectly.
- Cutting Squares and Triangles: For a standard 60×70-inch quilt, you’ll need to cut:
- Triangles: Cut triangles from your star point fabric, using a ruler to measure 4.5 inches on each side. You’ll need enough triangles to create the star design.
- Background Squares: Cut squares from your background fabric at 5 inches. These will serve as the base for your star points.
- Creating Half-Square Triangles: To create half-square triangles (HSTs), pair one star point triangle with one background square. Draw a diagonal line from one corner to the opposite corner, sew a ¼-inch seam on both sides of the line, and cut along the drawn line to yield two half-square triangles.
- Pressing Open: After cutting, press the seams of your half-square triangles open. This reduces bulk and ensures that the pieces lie flat, making assembly easier.
- Arranging Your Pieces: Before sewing, lay out your pieces to visualize the final design. Arrange the half-square triangles and background squares to ensure your star pattern is balanced.
- Organizing Fabric: As you cut your fabric, keep your pieces organized. Use labeled containers or piles to avoid confusion later in the sewing process.
With your fabric pieces cut and organized, you’re ready to move on to the assembly of the Star Glow Quilt Pattern.
3. Assembling the Star Glow Quilt Block
Now that you have all your pieces cut, it’s time to assemble your Star Glow Quilt Block. The assembly process is where your creativity comes to life.
- Sewing Half-Square Triangles Together: Start by taking two half-square triangles (one star point and one background) and aligning them with right sides together. Sew along the long edge with a ¼-inch seam. Press the seams open to minimize bulk.
- Building the Star Design: Continue sewing your half-square triangles into rows. As you build each row, ensure that the triangles are arranged correctly to form the star shape. Pay attention to the alignment of colors to create a harmonious design.
- Joining Rows: Once your rows are complete, it’s time to join them. Pin the rows together, aligning seams as best as possible. This will help maintain the integrity of your star points.
- Final Pressing: After all rows are sewn together, give your quilt block a final pressing. This ensures that all seams are flat and that your block is ready for the next steps.
- Trimming the Block: Use a rotary cutter and ruler to trim any excess fabric. A finished block should measure approximately 12.5 inches square, allowing for seam allowances when assembling your quilt.
- Repeat for Additional Blocks: If you plan to create a larger quilt, repeat these steps to make multiple blocks. Consider varying the fabric combinations to add visual interest to your quilt.
With your Star Glow Quilt Blocks assembled, it’s time to put them all together into a complete quilt.
4. Finishing Your Star Glow Quilt
With all your blocks complete, the final step is to finish your Star Glow Quilt. This involves layering, quilting, and binding.
- Layering the Quilt: Lay out your quilt backing fabric on a flat surface, right side down. Place the batting on top, followed by the quilt top (right side up). Smooth out any wrinkles, ensuring everything is properly aligned.
- Basting: Use safety pins or a basting spray to secure all layers together. This prevents shifting during the quilting process.
- Quilting: You can either hand quilt or use a sewing machine to quilt your layers together. For the Star Glow Quilt, consider echo quilting around the star points to accentuate the design. Choose a quilting pattern that enhances the overall look of the quilt.
- Trimming Excess Batting: After quilting, trim any excess batting and backing fabric to ensure clean edges. This will make the binding process easier.
- Binding the Quilt: Prepare your binding by cutting strips of fabric 2.5 inches wide. Join the strips together to create one long strip, then press in half lengthwise. Attach the binding to the edges of your quilt, folding it over to the back and securing it with a slip stitch or sewing machine.
- Final Pressing and Care: Give your quilt a final press to smooth out any wrinkles. Once completed, your Star Glow Quilt is ready to be displayed, used, or gifted!
FAQ: Frequently Asked Questions About the Star Glow Quilt Pattern
1. Is the Star Glow Quilt Pattern suitable for beginners?
Yes, the Star Glow Quilt Pattern is beginner-friendly. While it involves some basic techniques, the tutorial provides step-by-step instructions that make it easy to follow.
2. How long does it take to complete the Star Glow Quilt?
The time to complete the Star Glow Quilt varies based on skill level and dedication, but on average, it can take anywhere from 8 to 15 hours.
3. Can I use different fabric types for this quilt?
Absolutely! While cotton is the most common fabric for quilting, you can use other fabrics such as flannels or batiks. Just ensure they are compatible in weight and texture.
4. What is the finished size of the Star Glow Quilt?
The finished size of the quilt can vary based on how many blocks you make. Each block measures 12.5 inches, so the final dimensions will depend on the arrangement of the blocks.
5. How do I care for my finished quilt?
To maintain your Star Glow Quilt, wash it on a gentle cycle with cold water and tumble dry on low heat. This helps preserve the colors and fabric integrity.
6. Where can I find more patterns similar to the Star Glow Quilt?
Many quilting books, magazines, and online resources offer similar patterns. Joining quilting communities online can also provide inspiration and access to various designs.
Join our VIP broadcast list and gain access to exclusive patterns, all for free. As a VIP member, you’ll receive the best patterns daily, delivered directly to your device. ✨📱 It’s a unique opportunity to stay up-to-date with the latest trends and designs, curated just for you. Don’t miss out on enhancing your projects and discovering new inspirations with the best patterns every day! 🎨🔝
Conclusion
In this tutorial, we covered everything you need to know about the Star Glow Quilt Pattern – Tutorial. From gathering materials to cutting, assembling, and finishing, we provided a detailed guide to help you successfully create your own quilt. With your new skills and knowledge, you can explore various color combinations and techniques, ensuring that your quilt reflects your unique style.
We hope this article has inspired you to take on the Star Glow Quilt project. Please share your thoughts and suggestions in the comments below. Your feedback is invaluable to our quilting community! Happy quilting!

