The Penny’s Garden quilt – free pattern is a beautiful and timeless project for quilters of all levels. This quilt is designed to evoke the charm of a traditional garden, with its delicate floral patterns and patchwork blocks resembling petals and blooms.
Whether you’re an experienced quilter or just getting started, Penny’s Garden quilt is a rewarding project that will result in a stunning piece of art, perfect for cozying up at home or giving as a thoughtful handmade gift.
In this article, we will explore every detail of how to create the Penny’s Garden quilt, from gathering the necessary materials to piecing together your blocks and assembling the entire quilt. You will also find useful tips and tricks that will help you along the way, ensuring that your quilt turns out beautifully.
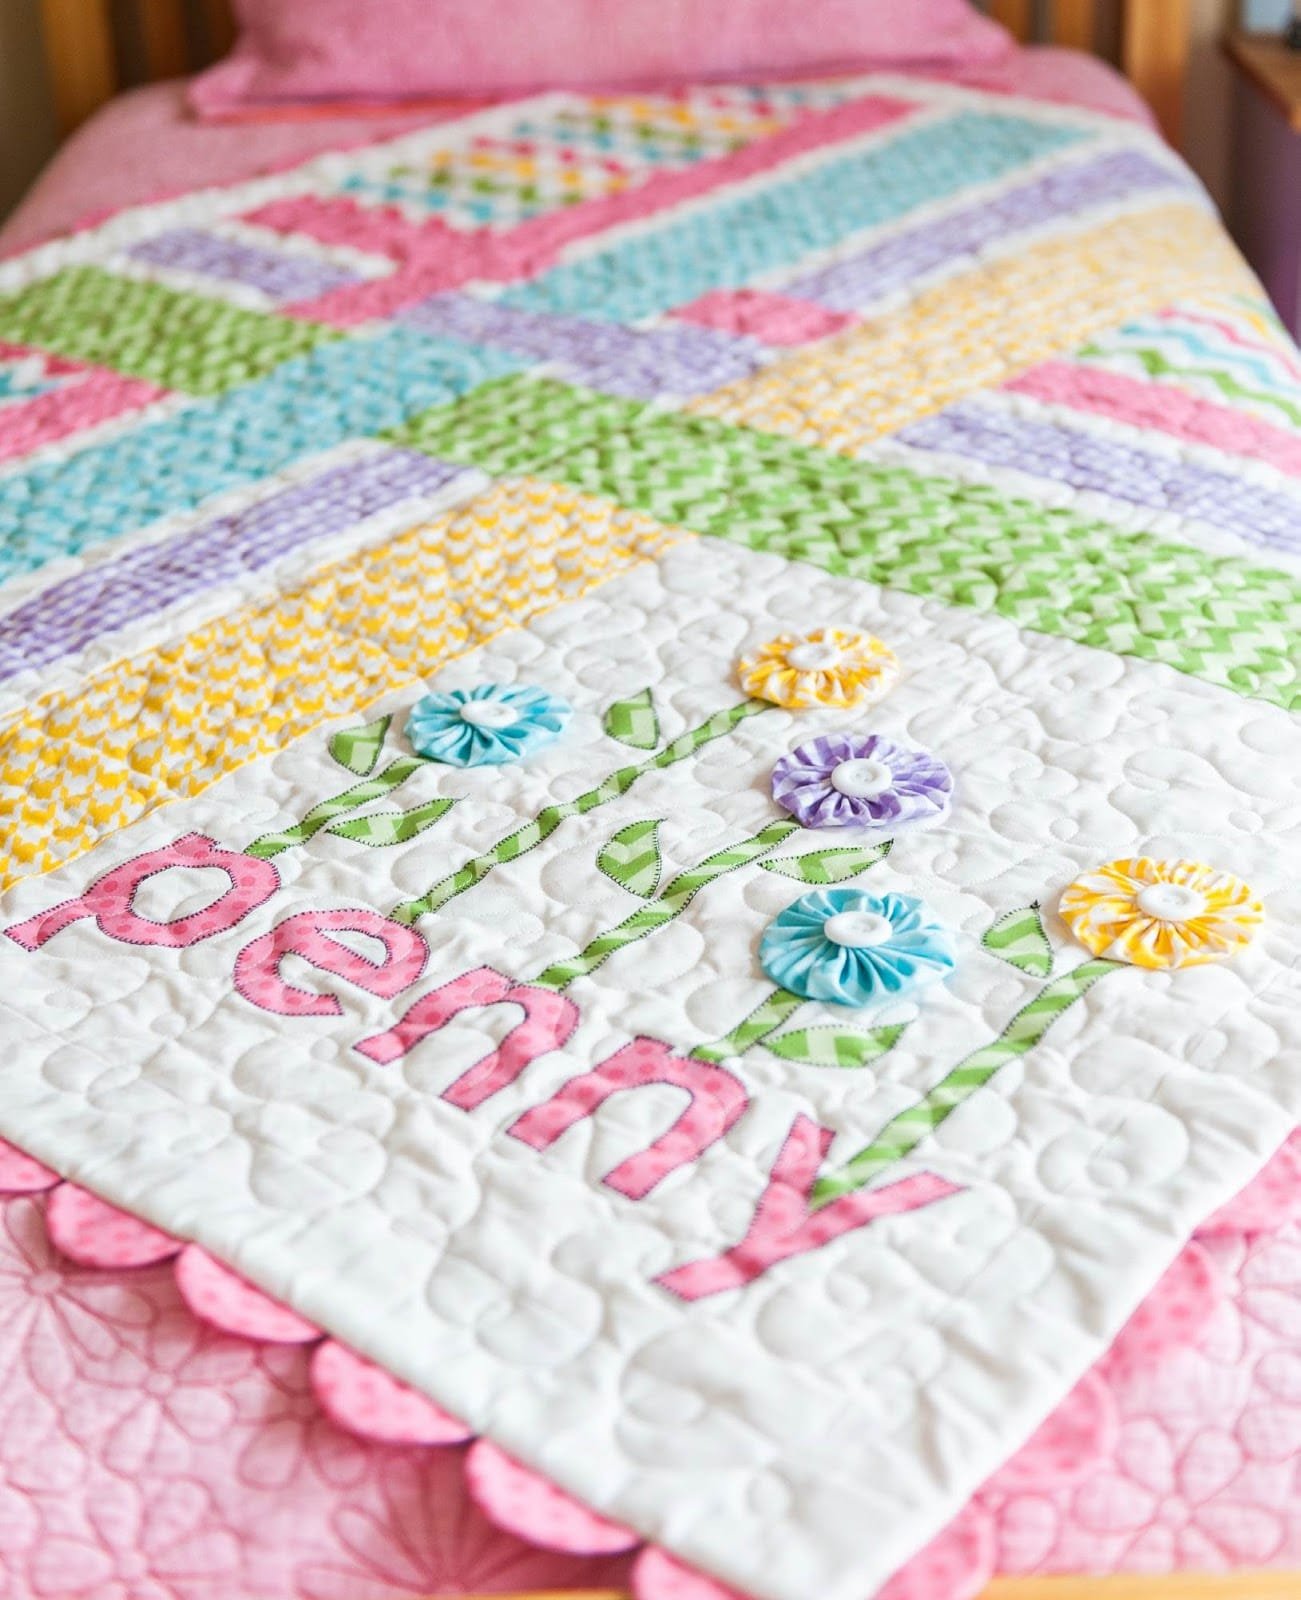
This free pattern is versatile and can be customized with your favorite colors and fabrics. Whether you prefer soft pastels for a spring-inspired look or bold, vibrant colors to make a statement, the Penny’s Garden quilt offers endless creative possibilities. Let’s dive into the details and begin crafting your perfect garden quilt.
1. Materials and Fabric Selection
The first step to creating your Penny’s Garden quilt is gathering the right materials and choosing the perfect fabrics for your design. The success of your quilt largely depends on having high-quality materials that will last for years to come.
- Fabric: For the Penny’s Garden quilt – free pattern, you will need a variety of fabrics to create the garden-inspired look. Select floral prints, solids, and coordinating patterns. You will need fabric for the quilt top, backing, and binding. Make sure to prewash your fabric to avoid shrinkage after the quilt is completed.
- Quilt Batting: Batting is the layer that goes between your quilt top and the backing, giving your quilt warmth and thickness. Cotton or polyester batting works well for this project.
- Rotary Cutter and Cutting Mat: A rotary cutter ensures precise cuts, and a cutting mat protects your workspace. These tools are essential for making clean and even fabric cuts.
- Ruler: A clear quilting ruler helps measure and cut fabric accurately. This is crucial for maintaining consistency across all your quilt blocks.
- Sewing Machine and Thread: A sewing machine with a quarter-inch foot is ideal for piecing quilt blocks. Choose a high-quality thread that matches your fabric to ensure durability.
- Pins and Clips: Use pins or clips to hold your fabric pieces together as you sew. These tools are helpful in maintaining the alignment of your fabric layers.
Once you have all your materials, you’re ready to start working on your Penny’s Garden quilt!
2. Cutting and Piecing Your Quilt Blocks
Now that your materials are ready, it’s time to begin cutting and piecing the quilt blocks. In Penny’s Garden quilt, the blocks are the key elements that form the beautiful floral design.
- Cutting Your Fabric: Begin by cutting your fabric into the required shapes and sizes for the blocks. This pattern typically uses squares, triangles, and rectangles to create a garden-like patchwork design. Precision is important here—make sure to measure twice and cut once!
- Arranging the Blocks: Lay out your fabric pieces in the desired arrangement. For Penny’s Garden quilt, it’s common to create a symmetrical pattern that mimics the layout of a garden, with alternating blocks of floral prints and coordinating solids. Feel free to experiment with different arrangements until you find a design you love.
- Sewing the Blocks Together: Start by sewing smaller pieces together to form larger blocks. Use a quarter-inch seam allowance for consistency, and press your seams flat as you go to avoid bulk.
- Creating Rows and Columns: Once you have all your blocks sewn, arrange them into rows and columns. Sew each row together, making sure to match up the seams for a clean and polished look.
- Joining the Rows: After your rows are complete, sew them together to form the full quilt top. Be sure to pin at every seam intersection to keep everything lined up.
- Pressing the Quilt Top: Give the entire quilt top a final press. This will help the quilt lie flat and make the quilting process smoother later on.
By following these steps, you will have a beautiful quilt top that showcases the stunning design of Penny’s Garden quilt.
3. Assembling the Quilt
Once the quilt top is complete, it’s time to assemble the full Penny’s Garden quilt. This involves layering the quilt top, batting, and backing fabric together.
- Preparing the Quilt Backing: Cut your backing fabric to the size of your quilt top, leaving a few extra inches on all sides. This will allow for any shifting during the quilting process. If necessary, piece together multiple sections of fabric to create the backing.
- Layering the Quilt: Lay the backing fabric on a flat surface with the right side facing down. Place the quilt batting on top of the backing, followed by the quilt top with the right side facing up. Smooth out any wrinkles to ensure a flat and even surface.
- Basting the Quilt: To keep the layers from shifting during quilting, use safety pins or basting spray to secure the quilt sandwich. Start from the center and work your way out, placing pins every few inches.
- Choosing a Quilting Design: The quilting design you choose will add texture and depth to your Penny’s Garden quilt. You can opt for simple straight-line quilting, a free-motion design, or even a floral motif to complement the garden theme.
- Quilting the Layers Together: Using your sewing machine or a longarm quilting machine, stitch through all three layers, starting from the center and working outward. Take your time to ensure the quilting is even and consistent.
- Trimming the Edges: After quilting is complete, trim the excess batting and backing fabric to match the edges of your quilt top. This will prepare your quilt for binding.
Now that your quilt is assembled and quilted, you’re almost done!
4. Binding and Finishing the Quilt
The final step in completing your Penny’s Garden quilt is binding the edges. This gives the quilt a neat and finished look, protecting the edges from fraying.
- Preparing the Binding: Cut strips of fabric for the binding. The width of the strips should be about 2.5 inches. Fold the strips in half lengthwise with the wrong sides together and press them flat.
- Attaching the Binding: Start by sewing the binding to the front of the quilt, aligning the raw edges of the binding with the raw edges of the quilt. Use a quarter-inch seam allowance and leave a tail of about 6 inches to join the ends later.
- Mitering the Corners: When you reach a corner, stop sewing a quarter-inch from the edge. Fold the binding up and then back down to create a neat mitered corner. Continue sewing along the next side.
- Joining the Binding Ends: Once you’ve sewn all the way around the quilt, join the ends of the binding by tucking one end into the other and sewing them together.
- Hand-Stitching the Binding: Fold the binding over to the back of the quilt and hand-stitch it in place using a blind stitch. This creates a clean and professional finish.
- Final Pressing: Give your finished quilt a final press to smooth out any wrinkles and ensure the binding lies flat.
Your Penny’s Garden quilt is now complete! It’s ready to be displayed, gifted, or used as a cozy addition to your home.
FAQ: Frequently Asked Questions About Penny’s Garden Quilt – Free Pattern
- What fabric works best for Penny’s Garden quilt?
Floral prints and coordinating solids in 100% cotton fabric are ideal for the Penny’s Garden quilt. Cotton is easy to work with and creates a durable, beautiful quilt. - Can beginners make the Penny’s Garden quilt?
Yes! This pattern is beginner-friendly, with simple piecing techniques that are easy to follow. It’s a great project for quilters looking to improve their skills. - How long does it take to complete the Penny’s Garden quilt?
The time it takes depends on your experience level and how much time you dedicate to quilting. On average, it can take anywhere from a few days to a couple of weeks. - Can I customize the colors of the quilt?
Absolutely! While traditional garden colors are popular, you can customize the quilt with any colors or patterns that suit your taste and home decor. - What size is the finished Penny’s Garden quilt?
The size of the finished quilt will vary depending on the number of blocks you create. The pattern can easily be adapted for a lap quilt, twin, or even king-sized quilt. - How should I care for my Penny’s Garden quilt?
To care for your quilt, machine wash it in cold water on a gentle cycle, and tumble dry on low heat. Avoid using bleach or harsh detergents to preserve the fabric and colors.
Join our VIP broadcast list and gain access to exclusive patterns, all for free. As a VIP member, you’ll receive the best patterns daily, delivered directly to your device. ✨📱 It’s a unique opportunity to stay up-to-date with the latest trends and designs, curated just for you. Don’t miss out on enhancing your projects and discovering new inspirations with the best patterns every day! 🎨🔝
Conclusion
In this article, we have covered everything you need to know about making the Penny’s Garden quilt – free pattern. From gathering materials and piecing the quilt blocks to assembling and binding your quilt, this guide provides all the steps necessary to create a beautiful and timeless quilt. We hope you found this tutorial helpful and inspiring.
Please feel free to leave a comment with your thoughts or suggestions. We’d love to hear about your quilting experience and see your finished Penny’s Garden quilt!

