As the holiday season approaches, many of us begin to decorate our homes with festive ornaments and cheerful accents. One charming addition to your decor can be the Crochet Christmas Tree Table Centre – Free Pattern.
This delightful piece not only enhances your table setting but also adds a personal touch that can be cherished for years to come. Crocheting your own Christmas decorations is not only enjoyable but also allows you to create unique items that reflect your style and creativity.
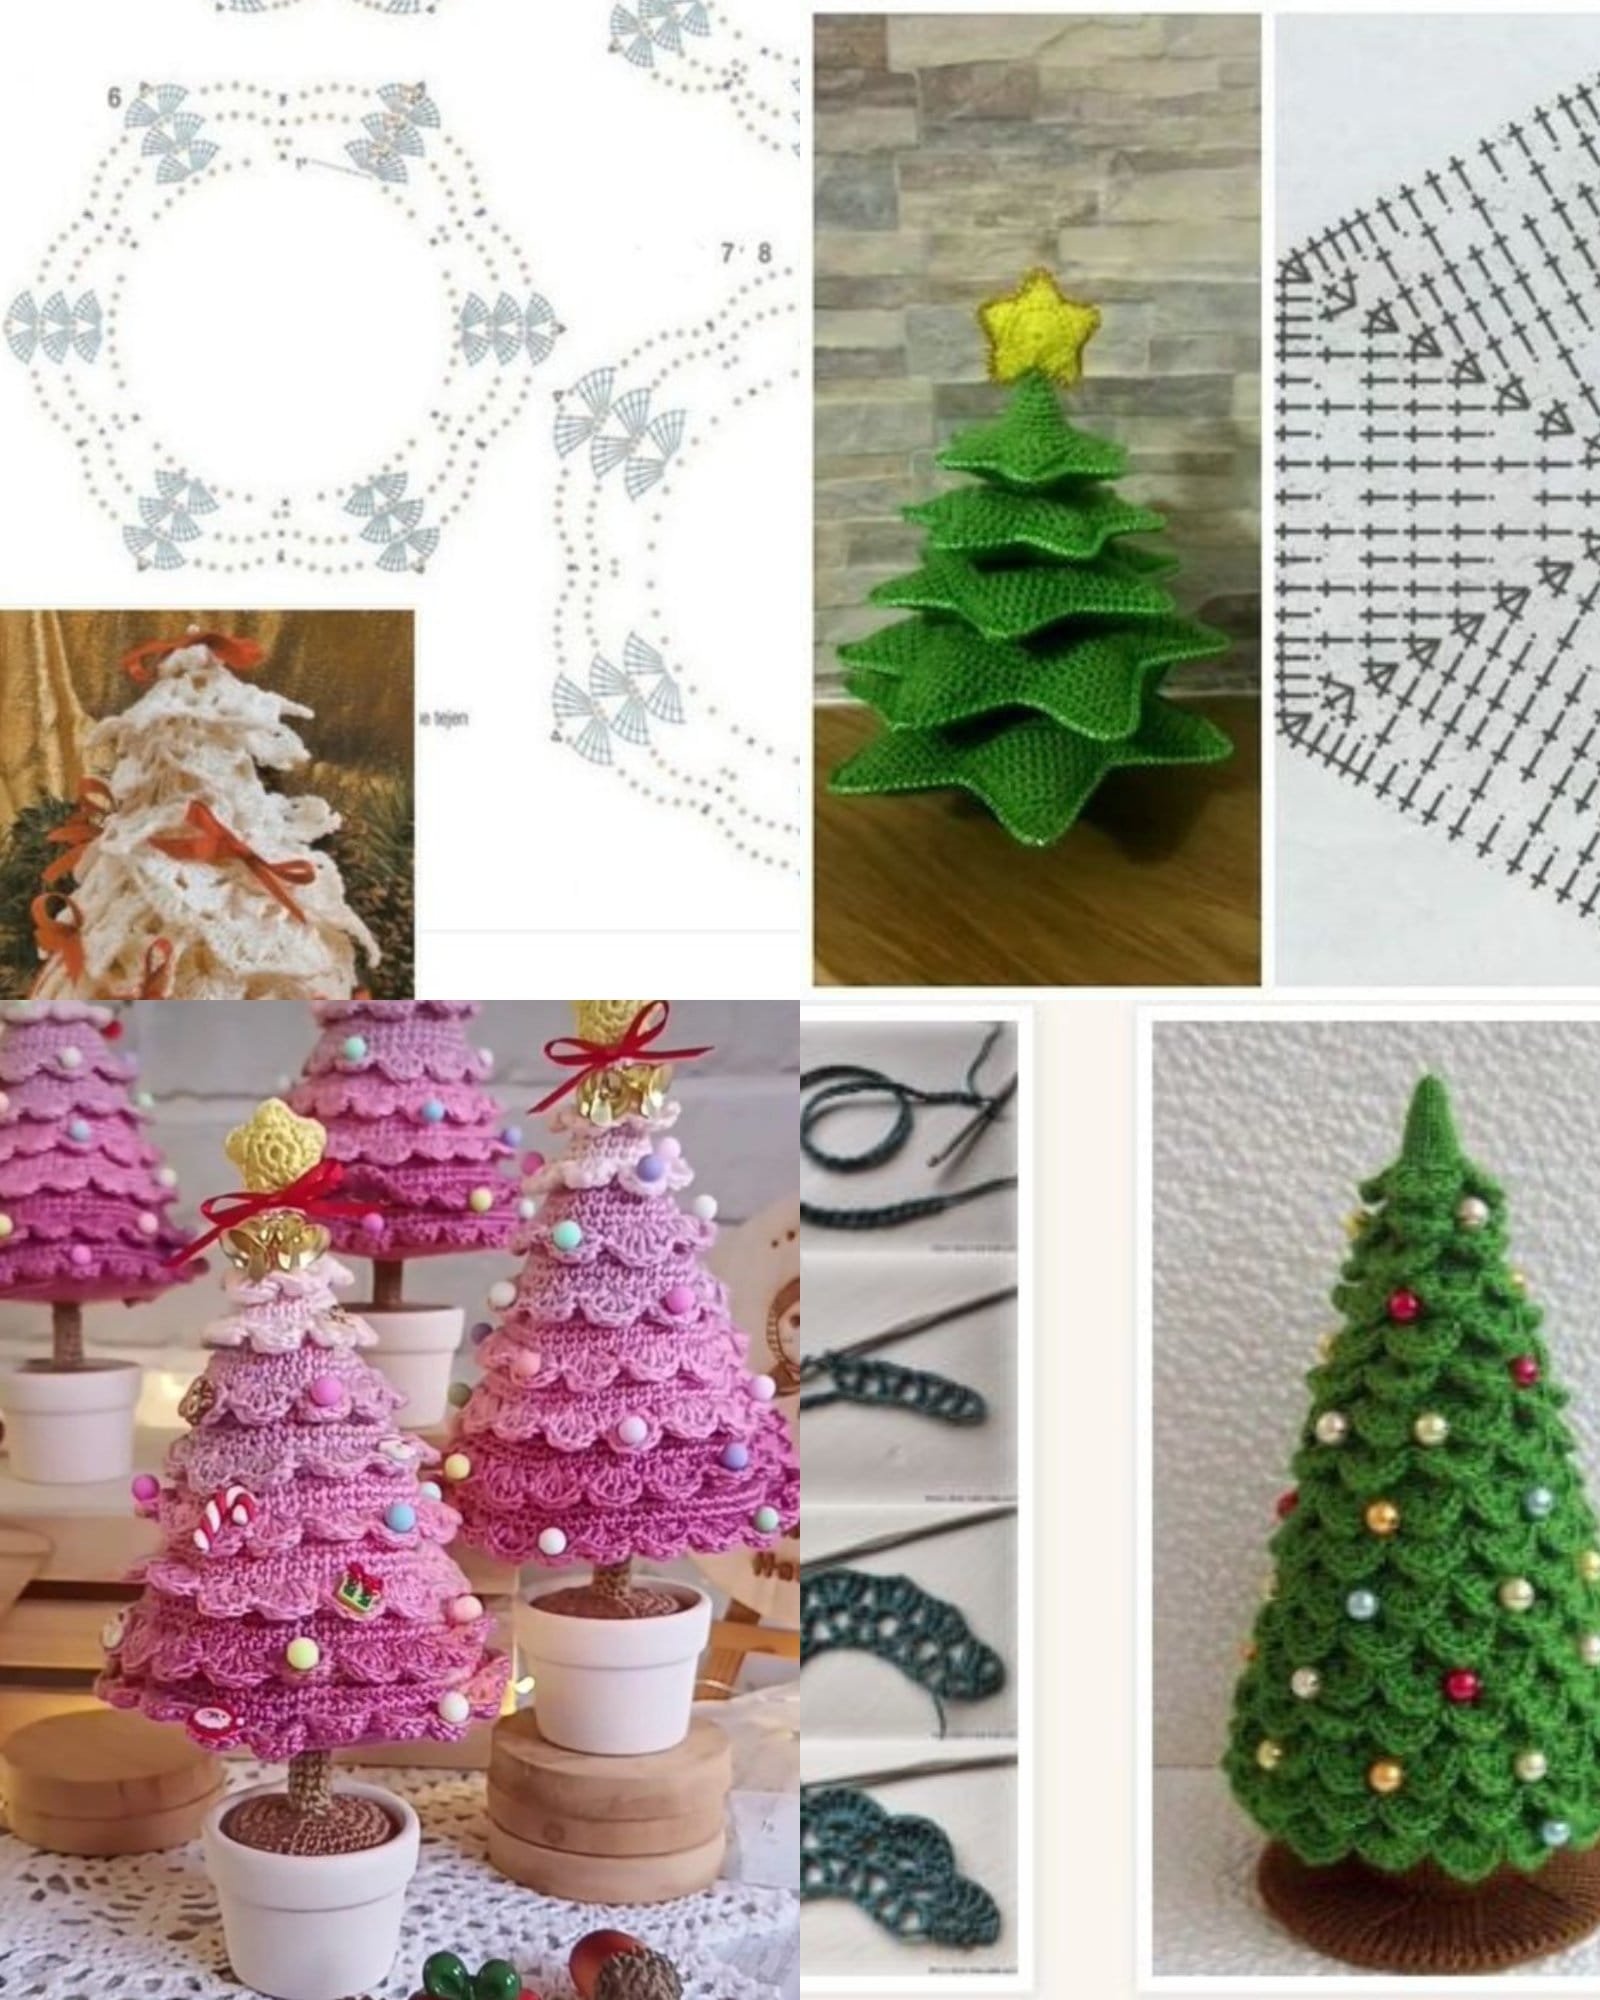
The beauty of crocheting is that you can customize colors and patterns to match your existing decor. A Crochet Christmas Tree Table Centre can be designed in various shades of green, accented with vibrant colors that mimic ornaments, or even done in classic white for a snowy effect.
Whether you’re hosting a holiday dinner or simply looking to spruce up your space, this project can be a perfect centerpiece for your table. Plus, it’s a wonderful way to spread holiday cheer.
This article will guide you through the process of creating your very own Crochet Christmas Tree Table Centre – Free Pattern. From gathering materials to step-by-step instructions, we will cover everything you need to know to make this festive decoration. Let’s embark on this joyful crochet journey together!
1. Materials Needed for Your Crochet Christmas Tree Table Centre
Before you dive into your crochet project, it’s essential to gather all the necessary materials for the Crochet Christmas Tree Table Centre – Free Pattern. Having everything prepared will ensure a smooth and enjoyable crafting experience. Here’s a list of materials you will need:
- Yarn: Select a worsted-weight yarn in shades of green for the tree and other colors for decorations. A cotton or acrylic blend works well for this project. You’ll need approximately 200-300 yards of yarn.
- Crochet Hook: Use a size H (5 mm) crochet hook, but always check your yarn label for recommended hook sizes.
- Tapestry Needle: This needle is essential for weaving in the ends and sewing on any embellishments like buttons or beads.
- Scissors: A good pair of scissors will help you snip yarn neatly as you finish your project.
- Measuring Tape: Keep a measuring tape handy to ensure your project meets the desired dimensions.
- Embellishments: Consider adding beads, buttons, or other decorations to give your Christmas tree centre a unique flair.
With these materials in hand, you’re ready to begin creating your Crochet Christmas Tree Table Centre!
2. Step-by-Step Instructions for Crocheting the Table Centre
Now that you have your materials ready, it’s time to get started on the Crochet Christmas Tree Table Centre – Free Pattern. Follow these step-by-step instructions to create your festive centerpiece:
- Start with a Magic Circle: Begin your crochet project by creating a magic circle, which will serve as the foundation for your Christmas tree. This technique allows for a tightly closed center.
- Crochet the Tree Base: Chain the required number of stitches and then work in rounds using double crochet stitches to create the trunk of the tree. Continue to add rounds until you reach your desired height.
- Add Tree Layers: To create the branches of the Christmas tree, increase your stitch count in each round. This will give your tree a layered look. You can alternate colors for added depth and interest.
- Form the Tree Shape: As you progress, shape the tree by decreasing stitches at the top. This will give your tree a more defined shape, resembling a traditional Christmas tree.
- Create the Edges: Once you’ve completed the tree, use a contrasting color to crochet around the edges. This can be done with single crochet or slip stitches to provide a finished look.
- Embellish Your Centre: Finally, add your chosen embellishments. Sew on beads, buttons, or any decorations that reflect your personal style and make your Crochet Christmas Tree Table Centre shine.
By following these instructions, you will have a beautiful and festive centerpiece for your holiday celebrations!
3. Customization Ideas for Your Crochet Christmas Tree Centre
One of the most enjoyable aspects of crocheting is the opportunity to personalize your projects. The Crochet Christmas Tree Table Centre – Free Pattern can be tailored to fit your unique style. Here are some customization ideas to consider:
- Color Variations: Choose colors that complement your holiday decor. Traditional green and red are classic choices, but consider using gold, silver, or even blue for a more modern aesthetic.
- Different Sizes: Adjust the pattern to create larger or smaller table centers. If you have a big dining table, consider making a larger centrepiece to fill the space effectively.
- Layered Designs: For added dimension, create multiple trees in different sizes and stack them together. This creates a beautiful layered effect on your table.
- Unique Embellishments: Get creative with embellishments. Use tiny ornaments, faux snow, or even glitter to enhance the festive feel of your centrepiece.
- Themed Decor: Consider making your centrepiece themed to match other decorations in your home. For example, if you have a rustic decor theme, you might add burlap or wooden accents.
- Personal Touches: Add a personal touch by incorporating your family’s initials or the year on your centrepiece. This can be done with embroidery or by attaching decorative letters.
These customization options will allow you to create a Crochet Christmas Tree Table Centre that truly reflects your holiday spirit.
4. Tips for a Successful Crochet Project
To ensure your crocheting experience is as enjoyable and successful as possible, here are some helpful tips for working on the Crochet Christmas Tree Table Centre – Free Pattern:
- Read the Pattern Carefully: Before starting, read through the entire pattern to understand the instructions and ensure you have all the necessary materials.
- Practice Basic Stitches: If you’re new to crocheting, take some time to practice basic stitches like single and double crochet before beginning your project.
- Check Gauge: Although this is a decorative piece, checking your gauge can help ensure that your final product is the right size. This is especially important if you plan to create multiple pieces.
- Keep Tension Consistent: Maintaining consistent tension in your stitches will lead to a more uniform appearance. If you notice your tension changing, take a moment to relax and refocus.
- Don’t Rush: Enjoy the process! Crocheting should be a relaxing and fulfilling activity. Take your time, and don’t be afraid to take breaks.
- Seek Help if Needed: If you run into any difficulties, don’t hesitate to seek help from crochet communities online or local crafting groups. There are plenty of resources available to assist you.
By following these tips, you’ll enhance your crocheting experience and create a beautiful Crochet Christmas Tree Table Centre.
FAQ
Q1: How long does it take to crochet a Christmas tree table centre?
A: The time it takes can vary based on your experience level, but generally, it can take anywhere from a few hours to a couple of days.
Q2: Can I use different yarn types?
A: Yes! While worsted-weight yarn is recommended, you can experiment with different yarn types. Just ensure they are suitable for the project and your desired look.
Q3: Is this pattern suitable for beginners?
A: Absolutely! The Crochet Christmas Tree Table Centre – Free Pattern is beginner-friendly, making it a great project for those new to crocheting.
Q4: How can I care for my finished piece?
A: Hand washing is recommended for any crochet items. Use cold water and mild detergent, then lay flat to dry to maintain the shape and quality.
Q5: Can I use this pattern to make other holiday decorations?
A: Definitely! The techniques used in this pattern can be adapted to create various holiday decorations, such as ornaments or wreaths.
Q6: What if I don’t have a magic circle technique mastered?
A: If you’re not comfortable with the magic circle, you can start with a chain and join it to form a ring. The magic circle is simply a preferred method for a tighter center.
Join our VIP broadcast list and gain access to exclusive patterns, all for free. As a VIP member, you’ll receive the best patterns daily, delivered directly to your device. ✨📱 It’s a unique opportunity to stay up-to-date with the latest trends and designs, curated just for you. Don’t miss out on enhancing your projects and discovering new inspirations with the best patterns every day! 🎨🔝
Conclusion
In this comprehensive guide to the Crochet Christmas Tree Table Centre – Free Pattern, you have learned how to create a beautiful and personalized centerpiece for your holiday decor. From gathering materials and following step-by-step instructions to customizing your project and applying helpful tips, this article has covered all the essential aspects of crocheting your own festive decoration.
By engaging in this project, you not only create a stunning piece for your table but also enjoy the therapeutic benefits of crocheting. We hope this guide inspires you to craft with joy and creativity. Please share your thoughts and suggestions in the comments below; we would love to hear about your experiences and ideas! Happy crocheting and happy holidays!

