If you’re looking to create a beautiful and classic quilt, the Four Patch Charm Quilt with Tutorial is a perfect project to get started. This quilt pattern is versatile, beginner-friendly, and can be easily customized to suit your personal style.
Using charm squares, which are pre-cut fabric pieces, makes the process faster and more enjoyable. Whether you’re new to quilting or a seasoned quilter, this pattern offers simplicity and elegance that can be mastered by anyone.
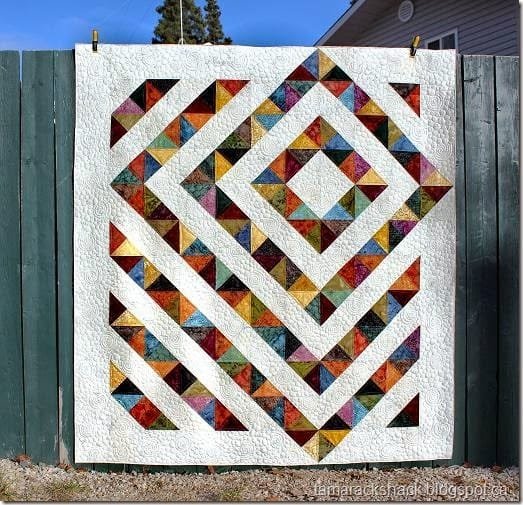
The Four Patch Charm Quilt is a timeless design that consists of four squares sewn together in a grid, creating a simple yet visually appealing pattern.
This quilt is great for using up leftover fabric or pre-cut charm packs, which come in various colors and patterns, allowing you to create a quilt that’s uniquely yours.
With this tutorial, we’ll guide you through each step of the process, from selecting your materials to finishing your quilt.
By following this Four Patch Charm Quilt with Tutorial, you’ll learn how to make a charming quilt that is perfect for gifting or decorating your home. Let’s get started on this exciting project!
1. Choosing the Right Materials for Your Four Patch Charm Quilt
The first step in creating your Four Patch Charm Quilt is selecting the right materials. Gathering high-quality fabric and the right tools will ensure your quilt turns out beautifully.
Selecting Your Charm Squares
- Charm Packs: A charm pack is a set of pre-cut fabric squares, usually measuring 5×5 inches. These pre-cut squares make it easy to jump right into sewing without needing to cut large pieces of fabric. Look for charm packs that match your desired color scheme or theme for the quilt.
- Fabric Variety: Choose charm squares that have a mix of solids, prints, and different textures. This adds visual interest to your Four Patch Charm Quilt and helps the design stand out.
Fabric for the Backing
- Backing Fabric: The backing is just as important as the front of your quilt. Choose a fabric that complements your charm squares. Typically, quilters opt for solid or lightly patterned fabric for the backing so that the focus remains on the quilt top.
- Yardage: Depending on the size of your quilt, you’ll need to calculate the appropriate yardage for the backing. Measure the width and length of your quilt top to ensure you purchase enough fabric.
Batting Selection
- Batting Type: The batting is the middle layer of your quilt that adds warmth and thickness. Cotton batting is a popular choice due to its durability and softness. For a lightweight quilt, consider polyester batting, which also washes well.
- Thickness: The thickness of the batting will impact the quilt’s overall feel. Choose a thin batting if you want a lighter, more flexible quilt, or go for thicker batting if you want a warmer quilt that’s great for winter.
Having the right materials will make the quilting process smoother and more enjoyable, allowing you to focus on crafting your Four Patch Charm Quilt.
2. Cutting and Piecing Together Your Quilt Blocks
Once you’ve gathered your materials, it’s time to dive into the most exciting part—cutting and piecing your fabric to create the Four Patch Charm Quilt design. This step is the foundation of your quilt and determines how well the pieces fit together.
Cutting Your Charm Squares
- Pre-cut Charm Packs: One of the benefits of using charm packs is that the squares are already cut to size, so you can skip the cutting step. However, if you’re cutting your fabric from yardage, ensure that each square is cut precisely to 5×5 inches.
- Rotary Cutter and Ruler: If you’re cutting your own fabric, use a rotary cutter and ruler to ensure clean, straight edges. Accuracy is key in this step to ensure that your four-patch blocks fit together perfectly.
Arranging the Squares
- Laying Out the Pattern: Before sewing, lay out your charm squares on a flat surface to arrange the pattern. Mix and match colors and prints until you’re satisfied with the layout. The goal is to create a balanced design that isn’t too heavy on any one color or print.
- Creating the Four Patch Blocks: To create the signature four-patch pattern, pair two charm squares together and sew them with a ¼-inch seam allowance. Then, sew the other two squares in the same way, and finally join the two sets of squares together to form a four-patch block.
Pressing Your Seams
- Pressing Seams: After sewing each seam, use an iron to press the seams flat. Pressing your seams is essential for ensuring that the blocks lie flat and line up correctly when pieced together. Press the seams to one side or open, depending on your preference.
- Squaring Up the Blocks: Once your four-patch blocks are sewn and pressed, use a square ruler to check that each block is square and even. Trim any excess fabric to ensure the blocks are uniform in size.
Taking your time with cutting and piecing ensures your Four Patch Charm Quilt will come together smoothly and look professional.
3. Assembling the Quilt Top and Quilting
Now that your four-patch blocks are ready, it’s time to assemble the quilt top and start quilting. This stage is where your Four Patch Charm Quilt with Tutorial really starts to take shape.
Arranging the Quilt Top
- Layout the Blocks: Lay out your four-patch blocks on a large surface, such as a table or the floor, to visualize the final layout. Play around with the placement until you’re happy with how the colors and patterns are balanced across the quilt.
- Sew the Rows: Once you’re satisfied with the layout, begin sewing the blocks together row by row. Use a ¼-inch seam allowance and ensure that the blocks align perfectly. After sewing each row, press the seams flat.
Joining the Rows Together
- Connecting the Rows: After completing all the rows, it’s time to join them together to create the full quilt top. Pin the rows together carefully, matching up the seams to create sharp corners where the blocks meet.
- Seam Allowance: Use a ¼-inch seam allowance for sewing the rows together. Once all the rows are joined, press the entire quilt top to remove any wrinkles and ensure the seams are flat.
Preparing to Quilt
- Layering the Quilt: Once your quilt top is assembled, layer it with the batting and backing fabric. Make sure all three layers are smooth and free of wrinkles. Pin the layers together with quilting safety pins or use basting spray to keep them in place.
- Quilting: Choose a quilting method that complements your Four Patch Charm Quilt. Straight-line quilting is simple and modern, while free-motion quilting adds texture and complexity. Quilt from the center outward to avoid bunching the fabric.
With your quilt top complete, the quilting process is what transforms your fabric layers into a cohesive, functional quilt.
4. Binding and Finishing Your Four Patch Charm Quilt
The final step in this Four Patch Charm Quilt with Tutorial is adding the binding and giving your quilt a professional finish. Binding not only protects the edges but also adds a polished look to your quilt.
Preparing the Binding
- Cutting the Binding Strips: To create the binding, cut strips of fabric that are 2.5 inches wide. You’ll need enough strips to go around the entire perimeter of the quilt. For a clean finish, use the same fabric for all the strips.
- Joining the Strips: Sew the binding strips together end to end, forming a continuous strip that’s long enough to go around the quilt’s edges. Press the seams open to reduce bulk.
Attaching the Binding
- Sewing the Binding to the Quilt: With the quilt right side up, align the raw edge of the binding with the raw edge of the quilt. Sew the binding to the quilt using a ¼-inch seam allowance. Miter the corners for a neat, professional look.
- Hand Sewing the Binding: Once the binding is attached to the front of the quilt, fold it over to the back and hand-sew it in place using a blind stitch. This creates a clean, invisible seam on the back of the quilt.
Final Touches
- Labeling Your Quilt: If you’re making this quilt as a gift or for sale, consider adding a quilt label. A label with your name, the date, and any special notes adds a personal touch and makes the quilt more meaningful.
- Washing and Blocking: After the binding is attached, wash your quilt to soften the fabric and remove any marks from handling. Lay it flat to dry and block it to ensure the quilt retains its shape.
Congratulations, your Four Patch Charm Quilt is now complete and ready to be enjoyed!
FAQ: Four Patch Charm Quilt with Tutorial
1. What is a charm pack, and why is it useful for quilting?
A charm pack is a collection of pre-cut fabric squares, usually 5×5 inches. It’s convenient because it saves time on cutting and ensures uniformity in size, which is crucial for creating quilts like the Four Patch Charm Quilt.
2. How many charm squares do I need for a quilt?
The number of charm squares depends on the size of the quilt you’re making. For a lap-sized quilt, you’ll typically need around 42 charm squares. Larger quilts will require more squares.
3. Can I use leftover fabric instead of a charm pack?
Absolutely! If you have fabric scraps, you can cut them into 5×5-inch squares and use them in place of a charm pack. This is a great way to create a unique, scrappy look for your Four Patch Charm Quilt.
4. What type of batting is best for a Four Patch Charm Quilt?
Cotton batting is a popular choice because it’s durable and soft. However, polyester batting is a great alternative if you prefer a lighter quilt that’s easy to wash and dry.
5. How can I make sure my seams line up perfectly?
To ensure that your seams match up, use a ¼-inch seam allowance consistently and press the seams flat after each step. Pinning the seams where the blocks meet can also help to achieve sharp, aligned corners.
6. Can I quilt by hand, or do I need a sewing machine?
While a sewing machine makes the process faster, quilting by hand is entirely possible. It just requires more time and patience. Hand quilting can also add a beautiful, traditional touch to your Four Patch Charm Quilt.
Join our VIP broadcast list and gain access to exclusive patterns, all for free. As a VIP member, you’ll receive the best patterns daily, delivered directly to your device. ✨📱 It’s a unique opportunity to stay up-to-date with the latest trends and designs, curated just for you. Don’t miss out on enhancing your projects and discovering new inspirations with the best patterns every day! 🎨🔝
Conclusion
By following this Four Patch Charm Quilt with Tutorial, you’ve learned how to create a beautiful, classic quilt that’s both practical and stylish. From selecting your charm squares to binding the final quilt, each step has been designed to make the process enjoyable and accessible for quilters of all skill levels.
I hope this tutorial has inspired you to start your next quilting project. Please share your thoughts, suggestions, or even photos of your finished quilt in the comments below. Happy quilting!

