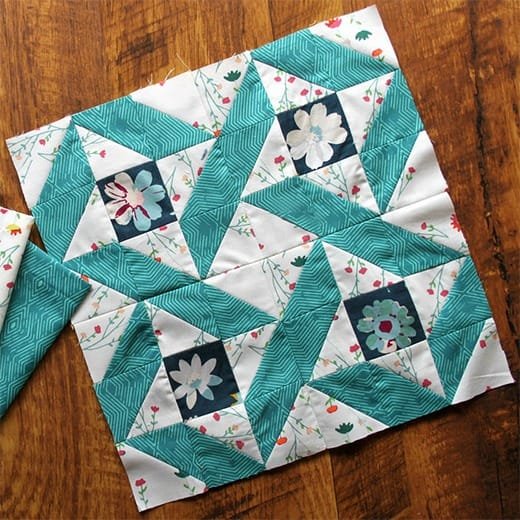
If you’re a quilting enthusiast looking for your next creative project, the Circle of Friends Block by Maureen Cracknell Handmade – Tutorial is a perfect choice. This beautiful block design combines traditional quilting techniques with a modern flair, making it an ideal project for both beginners and experienced quilters.
In this tutorial, we’ll walk you through the steps needed to create your own Circle of Friends Block, providing all the tips and tricks to ensure your success.
The Circle of Friends Block by Maureen Cracknell Handmade – Tutorial offers a unique design that is not only visually striking but also full of sentimental value. This block is named to symbolize friendship and community, perfect for making quilts that carry personal meaning.
Whether you’re making this block as part of a larger quilt or using it on its own for smaller projects, the design allows for endless creativity and customization.
Before diving into the tutorial, it’s essential to gather all your materials. You’ll need your favorite fabrics, rotary cutter, ruler, and of course, your sewing machine. Selecting the right fabrics is key to creating a Circle of Friends Block that stands out.
Whether you opt for bright, bold prints or subtle, neutral tones, your choices will greatly influence the final outcome. Now, let’s explore how to make this block step by step.
1. Choosing the Right Fabrics for the Circle of Friends Block
When creating the Circle of Friends Block by Maureen Cracknell Handmade – Tutorial, the first step is selecting the right fabrics. The fabric you choose will set the tone for the entire project, so it’s important to pick colors and patterns that reflect your vision.
- Fabric selection: To start, choose at least three different fabrics for this block. You’ll need a background fabric, a fabric for the circle, and another for the inner square. Try to pick colors that contrast well to make the design pop.
- Prints vs. solids: Using solid fabrics for the background and circle will allow the inner square to stand out, especially if you use a bold print for the center. On the other hand, mixing prints can create a more playful, eclectic look.
- Pre-washing fabrics: Make sure to pre-wash your fabrics to prevent any shrinking or bleeding of colors after your quilt is complete. This is especially important if you’re using darker colors next to lighter ones.
- Color harmony: While you have creative freedom, consider using complementary colors to create harmony in the block. Blues and yellows, for example, work well together to create contrast without clashing.
- Scrappy style: The Circle of Friends Block also works beautifully as a scrappy block. Use leftover fabric from previous projects to add a personal and sustainable touch to your quilt.
- Theme-based fabrics: If you’re making this block for a special occasion, such as a wedding quilt or baby blanket, choose fabrics that reflect the theme. Pastels for a baby quilt or soft florals for a spring-inspired project can add extra meaning to your design.
By selecting the right fabrics, you’ll ensure your Circle of Friends Block looks cohesive and professional. Once you’ve picked your fabrics, it’s time to move on to cutting and piecing.
2. Cutting and Preparing Your Fabric Pieces
In this section of the Circle of Friends Block by Maureen Cracknell Handmade – Tutorial, we’ll focus on how to accurately cut and prepare your fabric pieces. Precision is key when quilting, and cutting the fabric correctly will ensure your block comes together smoothly.
- Cutting the background fabric: First, cut your background fabric into squares. The size of the squares will depend on how large you want your block to be. Most quilters opt for 4.5-inch or 5-inch squares for the background.
- Cutting the circle fabric: For the circle, you’ll need to cut a circle shape from your second fabric. Use a template or a round object like a plate to trace a perfect circle, then carefully cut it out with fabric scissors.
- Cutting the inner square: The inner square should be much smaller than the circle, as it will sit inside the circle. A 2.5-inch square is a good starting point, but feel free to adjust the size depending on your preferences.
- Using a rotary cutter: A rotary cutter and ruler are essential tools for achieving clean, straight edges on your squares. Make sure your rotary blade is sharp to avoid fraying the fabric.
- Preparing for applique: Since the circle will be appliqued onto the background fabric, you may want to use fusible interfacing to stabilize the fabric. This will make it easier to sew the circle without shifting.
- Marking your fabric: Before sewing, mark the center points of your background square and circle using a fabric marker. This will help you align the pieces correctly when it’s time to sew.
Once all your fabric pieces are cut and prepared, you’re ready to move on to the sewing phase of the Circle of Friends Block by Maureen Cracknell Handmade – Tutorial.
3. Sewing the Circle of Friends Block Together
Now that you’ve cut your fabric, it’s time to sew the pieces together. The sewing process in the Circle of Friends Block by Maureen Cracknell Handmade – Tutorial involves both straight stitching and some applique work, so make sure your sewing machine is ready to handle both techniques.
- Positioning the circle: First, place the fabric circle on the center of your background square. Use the center markings you made earlier to ensure it’s properly aligned. Pin the circle in place or use fabric glue to hold it steady while sewing.
- Appliqueing the circle: To attach the circle to the background, sew around the edge using a small zigzag or straight stitch. Take your time and make sure the circle stays flat against the background fabric.
- Positioning the inner square: Once the circle is securely stitched, place the inner square in the center of the circle. As with the circle, make sure it’s properly aligned and pin it in place.
- Sewing the inner square: Sew around the edge of the inner square using a straight stitch. This will complete the focal point of the Circle of Friends Block.
- Pressing the block: After sewing, press your block with a hot iron to set the seams. Make sure to press, not iron, to avoid distorting the fabric.
- Checking your measurements: Once your block is complete, measure it to ensure it’s the correct size. Trim any excess fabric if necessary to make sure your block fits with the others in your quilt.
With the sewing complete, your Circle of Friends Block is ready for the next step: joining it with other blocks to create a full quilt.
4. Assembling the Quilt with Circle of Friends Blocks
After completing several Circle of Friends Blocks, the final step is assembling them into a quilt. This part of the Circle of Friends Block by Maureen Cracknell Handmade – Tutorial is where your hard work comes together to create a stunning quilt.
- Laying out the blocks: Lay out your completed blocks on a flat surface to decide the arrangement. You can alternate colors, patterns, or keep the blocks uniform depending on your design vision.
- Sashing and borders: To separate the blocks and add more structure to the quilt, you can add sashing between the blocks. A simple white or neutral sashing works well to highlight the Circle of Friends Block design.
- Joining the blocks: Once you’ve arranged the blocks to your liking, start sewing them together row by row. Use a quarter-inch seam allowance to keep your seams neat and uniform.
- Adding a quilt border: Adding a border around the edge of the quilt is a great way to frame the Circle of Friends Blocks. Choose a fabric that complements the colors in your blocks for a cohesive finish.
- Quilting the layers: After assembling the quilt top, layer it with batting and backing fabric. Quilt the layers together using straight-line quilting, free-motion quilting, or hand quilting, depending on your preference.
- Binding the quilt: The final step is to bind the edges of your quilt. Use a binding fabric that coordinates with your quilt top, and sew it in place using your preferred binding method.
Once the quilt is assembled and quilted, you’ll have a beautiful finished piece made from the Circle of Friends Block by Maureen Cracknell Handmade – Tutorial.
FAQ about Circle of Friends Block by Maureen Cracknell Handmade – Tutorial
1. How long does it take to make a Circle of Friends Block?
The time varies depending on your skill level and how much time you dedicate to the project. On average, each block takes a few hours to complete.
2. Can I make this block using different fabrics?
Yes, the Circle of Friends Block is highly customizable. You can use any fabric colors or patterns that suit your design preferences.
3. Do I need special tools to make the Circle of Friends Block?
You’ll need basic quilting tools such as a rotary cutter, ruler, sewing machine, and fabric scissors. A circle template is also helpful for cutting the fabric circle.
4. Is the Circle of Friends Block suitable for beginners?
Yes, this block is beginner-friendly. It involves basic cutting and sewing techniques, with some simple applique work for the circle.
5. Can I resize the Circle of Friends Block?
Absolutely! You can make the block larger or smaller by adjusting the size of the fabric squares and circles.
6. How do I quilt the Circle of Friends Block?
You can quilt the block using straight-line quilting, free-motion quilting, or hand quilting. The choice depends on your skill level and the look you want to achieve.
Join our VIP broadcast list and gain access to exclusive patterns, all for free. As a VIP member, you’ll receive the best patterns daily, delivered directly to your device. ✨📱 It’s a unique opportunity to stay up-to-date with the latest trends and designs, curated just for you. Don’t miss out on enhancing your projects and discovering new inspirations with the best patterns every day! 🎨🔝
Conclusion
The Circle of Friends Block by Maureen Cracknell Handmade – Tutorial is a beautiful and meaningful quilt block that symbolizes friendship and creativity. We’ve covered everything from choosing fabrics to assembling the finished quilt, providing you with the tools and knowledge to create your own masterpiece.
Whether you’re making a full quilt or using this block in smaller projects, we hope this tutorial has inspired you to try something new. We would love to hear your thoughts and suggestions, so please leave a comment below! Happy quilting!

