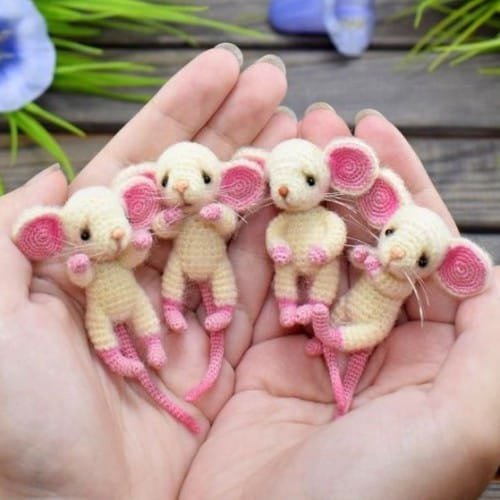
Welcome to our delightful guide on creating Cute Tiny Mice! This free crochet pattern is perfect for anyone looking to add a bit of whimsy to their crochet collection.
Whether you’re a seasoned crocheter or a beginner looking for a fun project, these adorable little mice will capture your heart. With their charming details and soft textures, they make wonderful gifts, decorations, or even toys for children.
In this article, we’ll guide you through the entire process, ensuring you have everything you need to create these sweet little creatures.
Crocheting tiny mice is a fantastic way to use up scrap yarn and practice your skills. The pattern is versatile, allowing you to customize your mice with various colors and embellishments.
You can make them in a variety of sizes, depending on the yarn and hook you choose. Moreover, these Cute Tiny Mice can be personalized with unique features, like different colors, accessories, or expressions, making each one special. Let’s dive into this charming project and get those hooks moving!
Before we get into the details of the crochet pattern, it’s essential to gather your materials and understand the basic stitches involved.
You’ll need to be familiar with basic crochet techniques, but don’t worry if you’re new to amigurumi; we’ll provide clear instructions every step of the way. So, let’s roll up our sleeves and get started on our journey to crafting these Cute Tiny Mice!
1. Materials Needed for Cute Tiny Mice
To begin your crochet adventure with Cute Tiny Mice, you’ll need a few essential materials. Gathering everything beforehand will make the process smooth and enjoyable.
First, select your yarn. Light worsted weight yarn (such as acrylic or cotton) works best for this project. Choose colors that inspire you—perhaps a classic gray for a traditional mouse, or vibrant hues for a more whimsical design. The beauty of this pattern is that you can use any color you like, so let your creativity shine!
Next, you will need a crochet hook. A 3.5 mm (E) or 4 mm (G) hook is typically ideal for worsted weight yarn. The size of the hook affects the tightness of your stitches, so feel free to adjust based on your tension. If you’re unsure, practice with a small swatch to see what feels comfortable.
You will also need safety eyes or yarn to create the mouse’s eyes. Safety eyes are a fantastic option for a polished look, but if you’re making these for small children, you might prefer to embroider the eyes for safety. Remember, making the eyes adds personality to your Cute Tiny Mice, so consider different styles or sizes for fun effects.
Don’t forget stuffing for your mice! Polyester fiberfill is commonly used in amigurumi projects, as it’s soft and provides the right amount of cushion. If you prefer a more eco-friendly option, you can also use natural cotton or wool stuffing.
Lastly, gather your basic crochet tools: scissors, a yarn needle for weaving in ends, and stitch markers to keep track of your rounds. With these materials ready, you’re all set to begin your journey into the whimsical world of crochet mice!
2. Understanding the Basic Stitches
Before starting your Cute Tiny Mice crochet pattern, it’s helpful to familiarize yourself with the basic stitches used in amigurumi. This knowledge will not only aid in creating these charming mice but also enhance your overall crochet skills.
The foundation of amigurumi is the magic ring (or magic circle). This technique allows you to start your crochet project in the round without leaving a hole in the center. To make a magic ring, wrap your yarn around your fingers to create a loop, then work your stitches into the loop. Pull the tail to tighten, and you’re ready to begin!
Next, you’ll commonly use single crochet stitches (sc) throughout the pattern. This stitch is simple yet effective, forming a tight fabric that’s perfect for stuffing. To do a single crochet, insert your hook into the next stitch, yarn over, pull up a loop, yarn over again, and pull through both loops on your hook.
Another important stitch is the increase (inc), which involves adding extra stitches into the same space to create more volume. For example, if your pattern instructs you to increase in the next stitch, you would work two single crochets into that stitch.
Conversely, the decrease (dec) stitch is used to shape your mice by reducing the stitch count. The most common way to do this in amigurumi is by crocheting two stitches together. This method helps create a rounded shape, giving your mice their adorable, plump appearance.
Lastly, you’ll want to be comfortable with slip stitches (sl st) for closing off rounds and joining pieces together. This stitch is worked by inserting the hook into the stitch, yarning over, and pulling the yarn through both the stitch and the loop on your hook.
Understanding these basic stitches will empower you to tackle the Cute Tiny Mice pattern with confidence. Don’t hesitate to refer back to this section as you crochet!
3. Step-by-Step Crochet Pattern for Cute Tiny Mice
Now that you have your materials and basic stitches down, let’s dive into the step-by-step pattern for your Cute Tiny Mice! Follow along closely, and don’t forget to enjoy the process.
- Head and Body: Start with a magic ring, then work six single crochets into the ring. Pull the tail to close the loop. Continue to crochet in rounds, increasing the stitch count as directed by the pattern until you reach the desired body size. This round structure gives the mice their rounded shapes.
- Ears: To make the ears, create another magic ring and work a few single crochets, then follow the pattern for increases and shape. The ears can be a different color to add contrast and personality to your Cute Tiny Mice.
- Limbs: Using the same technique, crochet the legs and arms separately. These parts are often smaller than the body, so adjust the stitch count accordingly. Once finished, attach the limbs securely to the body using your yarn needle.
- Adding Eyes and Features: Once the main body and limbs are assembled, it’s time to give your mice some personality! Attach safety eyes at this stage or embroider eyes if you prefer. You can also add a small nose using a different color yarn or thread.
- Stuffing: Before closing up the body, add stuffing to ensure your mice have a plump, huggable feel. Use small amounts of stuffing and work it into the corners and edges to avoid lumps.
- Finishing Touches: Finally, weave in any loose ends, ensuring that everything is secured. You can also embellish your Cute Tiny Mice with tiny accessories, like a crocheted hat or a scarf, for a unique touch.
By following these steps, you will have created adorable Cute Tiny Mice ready to charm anyone who sees them. These mice make great gifts, and their cute features are sure to bring joy!
4. Creative Variations and Customization
One of the best aspects of crocheting Cute Tiny Mice is the opportunity for customization. Here are some fun ideas to personalize your creations and make them truly unique.
Start by experimenting with colors. While classic gray or brown mice are adorable, you can use bright and cheerful colors to create a more whimsical appearance. Pastel shades can create a soft and sweet aesthetic, while vibrant tones can give a playful touch.
Consider different yarn textures as well. For example, using fuzzy yarn for a mouse’s body can make them even more cuddly. Similarly, you can mix textures by using cotton for the body and wool for the ears or tail, adding dimension to your mice.
Don’t shy away from adding accessories. Small crocheted hats, bows, or scarves can enhance the charm of your Cute Tiny Mice. You could also crochet tiny pieces of food for them to “hold,” like a piece of cheese or a little flower, which adds to their character.
For a seasonal twist, create themed mice for different holidays. For instance, you can make a little Santa mouse for Christmas, complete with a red hat, or a mouse wearing a pumpkin hat for Halloween. The possibilities are endless!
Additionally, you could use different techniques to embellish your mice, such as embroidery for facial features or adding beads for eyes. Be creative and let your imagination guide you as you develop your own unique patterns!
Finally, consider making these mice as a gift. Pair them with a cute little card or a handmade basket to enhance their charm. They make wonderful gifts for children or even as part of a whimsical decor theme for your home.
FAQ
1. What skill level is required for this pattern?
This pattern is beginner-friendly, but basic crochet skills are recommended.
2. Can I use different yarn types for this project?
Yes, you can experiment with various yarn types, but light worsted weight yarn is recommended for best results.
3. How do I attach safety eyes?
Safety eyes are attached by pushing the post through the fabric and securing it with a washer on the back.
4. What if I don’t have safety eyes?
If you don’t have safety eyes, you can embroider the eyes using yarn or thread for safety.
5. Can I wash my Cute Tiny Mice?
Yes, but it’s best to hand wash them with mild soap and air dry to maintain their shape and integrity.
6. How long does it take to crochet one mouse?
The time to complete one mouse can vary but typically takes about 1-3 hours, depending on your skill level and experience.
Join our VIP broadcast list and gain access to exclusive patterns, all for free. As a VIP member, you’ll receive the best patterns daily, delivered directly to your device. ✨📱 It’s a unique opportunity to stay up-to-date with the latest trends and designs, curated just for you. Don’t miss out on enhancing your projects and discovering new inspirations with the best patterns every day! 🎨🔝
Conclusion
In this article, we explored the enchanting world of Cute Tiny Mice through a free crochet pattern that is both fun and rewarding. From gathering materials to understanding essential stitches, we provided you with all the tools needed to embark on this charming project. We also discussed ways to customize your mice, ensuring each creation is unique and special.
We hope you found this guide helpful and inspiring. If you have any questions or suggestions, please feel free to share your thoughts in the comments below! Your feedback is invaluable and helps us create more engaging content for fellow crochet enthusiasts. Happy crocheting!

