The Blooming Love Quilt Pattern – Free Tutorial is the perfect guide for any quilting enthusiast looking to create a stunning and heartfelt quilt. Whether you’re a beginner or a seasoned quilter, this pattern combines beauty and simplicity, allowing you to make a quilt that stands out.
Quilting has been a beloved craft for centuries, and with the Blooming Love Quilt Pattern, you can continue that tradition while adding a modern touch.
In this tutorial, we’ll walk you through each step of the process, from selecting your fabrics to assembling your quilt.
The Blooming Love Quilt Pattern is known for its floral-inspired design and heartwarming appeal, making it an ideal gift for loved ones or a personal project to brighten your home.
The free tutorial will guide you in creating the quilt with ease and joy, all while enhancing your quilting skills.
Before we dive into the details, let’s explore why the Blooming Love Quilt Pattern has become so popular in the quilting community. Its versatility allows for a range of color choices, giving you the freedom to personalize your quilt according to your style. So grab your materials, and let’s get started with this comprehensive guide!
1. Choosing the Right Fabric for Your Blooming Love Quilt
Selecting the perfect fabric is the foundation of any quilt, and the Blooming Love Quilt Pattern is no different. The fabric you choose will determine the overall look and feel of your finished quilt, so it’s important to make thoughtful decisions.
First, decide on the color palette. Since the Blooming Love Quilt Pattern has a floral theme, many quilters opt for soft, pastel colors or bold, vibrant shades. Consider the recipient of the quilt or the room it will be placed in when making your selection.
Next, think about the fabric type. Cotton is a popular choice for quilting because it’s durable, easy to work with, and available in countless designs. However, you can experiment with other fabrics, such as linen or even silk, depending on the desired texture and effect.
Patterns also play a crucial role in the aesthetic of the quilt. Floral prints naturally complement the Blooming Love Quilt Pattern, but don’t hesitate to mix in geometric or abstract designs for a unique twist.
Before purchasing your fabric, be sure to measure carefully. Having extra fabric is always better than running out halfway through the project. Now that you’ve selected your fabric, it’s time to move on to cutting and preparation.
2. Cutting and Preparing Your Fabric
Properly cutting and preparing your fabric ensures that your quilt comes together smoothly. The Blooming Love Quilt Pattern involves a series of simple blocks that are pieced together to create a larger, cohesive design.
Begin by washing and ironing your fabric. Pre-washing ensures that the fabric won’t shrink after the quilt is assembled, and ironing will remove any wrinkles that could affect your cutting precision.
Next, gather your rotary cutter, ruler, and cutting mat. These tools will help you cut the fabric with accuracy, which is crucial for the overall look of your quilt. The Blooming Love Quilt Pattern typically involves a combination of squares and rectangles, but refer to the specific pattern measurements provided in the tutorial.
Once your fabric is cut, organize the pieces by color or pattern. This will make the assembly process much easier and quicker. Lay out your pieces in the order they will be sewn, and double-check your measurements to avoid any mistakes during sewing.
Now that your fabric is prepared, you’re ready to start assembling the quilt blocks!
3. Assembling the Quilt Blocks
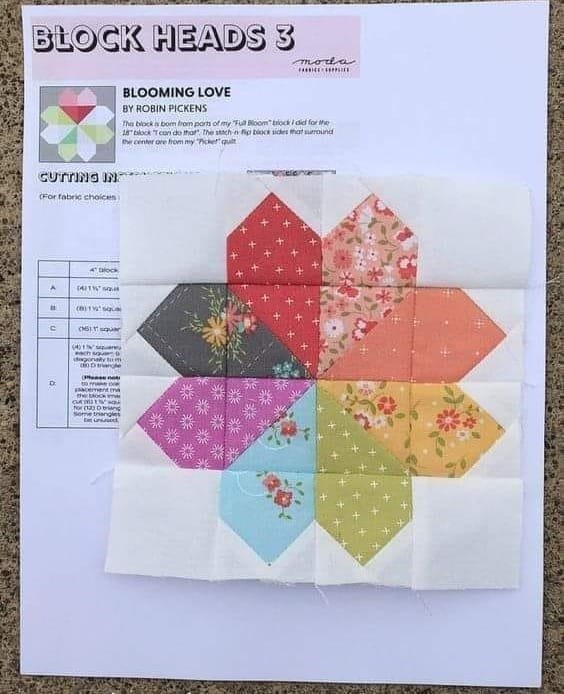
The heart of the Blooming Love Quilt Pattern lies in its beautiful quilt blocks. These blocks come together to form the intricate floral design that makes this quilt pattern so special.
Start by pairing your fabric pieces according to the pattern instructions. Using a quarter-inch seam allowance, begin sewing the fabric pieces together. Take your time to ensure that your seams are straight and even.
As you complete each block, press the seams flat with an iron. This step is crucial in making sure your quilt lies flat and looks polished. Continue assembling the blocks, making sure to follow the pattern closely.
Once all the blocks are assembled, lay them out on a flat surface to check the arrangement. This is your chance to adjust any blocks that may look out of place or to play around with the color arrangement before sewing everything together.
After you’re satisfied with the layout, it’s time to sew the blocks together. Be sure to align the seams carefully to create a smooth and cohesive design.
4. Quilting and Finishing Your Blooming Love Quilt
Once your quilt top is assembled, the next step is to quilt it. This involves layering the quilt top, batting, and backing fabric together and stitching them to hold everything in place.
Choose your quilting method. You can hand-quilt for a traditional look or use a sewing machine for a faster finish. The Blooming Love Quilt Pattern lends itself well to various quilting designs, such as straight lines, meandering, or even floral motifs that echo the pattern.
Start quilting from the center and work your way out to prevent any fabric bunching. Take your time to ensure that each stitch is even and that the quilt layers are securely fastened.
Once the quilting is complete, the final step is binding the quilt edges. Cut strips of fabric for the binding and sew them around the edges of the quilt. This not only gives the quilt a finished look but also protects the edges from fraying.
After binding, give your quilt a final press, and your Blooming Love Quilt is ready to be admired!
FAQ: Blooming Love Quilt Pattern
1. What skill level is required for the Blooming Love Quilt Pattern?
The Blooming Love Quilt Pattern is suitable for both beginners and intermediate quilters. The simple block assembly makes it accessible, while the floral design offers a challenge for those looking to enhance their skills.
2. Can I use different fabrics for this quilt?
Yes! The pattern is versatile and can be adapted to any fabric choice. Many quilters use cotton, but you can experiment with other materials for a unique texture.
3. How long does it take to complete the quilt?
The time required depends on your skill level and the amount of time you dedicate to the project. On average, it can take anywhere from a few days to a couple of weeks.
4. What size is the finished quilt?
The standard size for the Blooming Love Quilt is a throw, but you can easily adjust the pattern to make a smaller or larger quilt based on your needs.
5. Can I machine quilt this pattern?
Absolutely! Machine quilting is a popular method for finishing the Blooming Love Quilt Pattern and can save you time while still giving a beautiful result.
6. How do I care for my finished quilt?
To ensure the longevity of your quilt, wash it in cold water on a gentle cycle, and air dry or use a low heat setting in the dryer.
Join our VIP broadcast list and gain access to exclusive patterns, all for free. As a VIP member, you’ll receive the best patterns daily, delivered directly to your device. ✨📱 It’s a unique opportunity to stay up-to-date with the latest trends and designs, curated just for you. Don’t miss out on enhancing your projects and discovering new inspirations with the best patterns every day! 🎨🔝
Conclusion
The Blooming Love Quilt Pattern – Free Tutorial is an excellent project for quilters of all levels, offering both simplicity and the opportunity to create a stunning, personalized quilt. By following this step-by-step guide, you can complete a quilt that is sure to impress and bring warmth to any home.
PATTERN HERE
We hope this tutorial has been helpful and that you enjoy creating your Blooming Love Quilt. Feel free to share your experience in the comments and let us know if you have any tips, suggestions, or questions. Happy quilting!

