Welcome to our detailed guide on the Oopsie Daisy Quilt Pattern – Tutorial! If you’re looking for a fun and vibrant quilt design, you’ve come to the right place.
This pattern is perfect for quilters of all skill levels, combining playful floral motifs with charming geometric shapes.
Whether you’re creating a cozy blanket for your home or a delightful gift for a loved one, the Oopsie Daisy Quilt offers a perfect blend of creativity and simplicity.
The beauty of the Oopsie Daisy Quilt Pattern lies in its versatility. You can use a wide variety of fabric combinations to express your personal style. Bright colors can create a cheerful vibe, while soft pastels can bring a touch of elegance.
No matter your fabric choice, this quilt will surely add warmth and personality to any space. In this tutorial, we’ll walk you through each step, ensuring you feel confident and inspired as you create your own masterpiece.
In addition to the step-by-step instructions, we’ll cover tips for fabric selection, cutting, piecing, and finishing your quilt. Plus, we’ll answer some frequently asked questions to ensure you have all the information you need for a successful quilting experience. Let’s jump in and get started on your Oopsie Daisy Quilt Pattern journey!
1. Choosing Your Fabrics
The first step in creating your Oopsie Daisy Quilt Pattern is selecting the right fabrics. The fabric choice is crucial as it sets the tone for your entire quilt. Consider a combination of prints and solids that will enhance the floral design of the quilt. Bright, vibrant colors can make your quilt lively and energetic, while softer hues can create a calming effect.
When choosing fabrics, think about the overall theme or mood you want to convey. Floral prints work exceptionally well for this pattern, giving a nod to the name “Oopsie Daisy.” You might want to pair larger floral prints with smaller patterns to add depth and interest. For instance, using a bold flower print for the main blocks and a delicate polka dot or stripe for the borders can create a beautiful contrast.
It’s also essential to consider the fabric type. Cotton is the most common choice for quilting, as it’s durable, easy to work with, and comes in a wide variety of prints. If you’re feeling adventurous, you can mix in some cotton blends for texture and variety. However, ensure that all your fabrics are compatible in terms of weight and washability.
Before purchasing your fabrics, make a small swatch or a color palette to see how they work together. This step can save you from making costly mistakes and help you visualize the final product. Once you have your fabrics selected, you’re ready to move on to cutting them for your Oopsie Daisy Quilt.
2. Cutting Your Fabric
Now that you’ve chosen your fabrics, it’s time to cut them for your Oopsie Daisy Quilt Pattern. Accurate cutting is crucial to ensure all pieces fit together perfectly. Start by pre-washing your fabrics to remove any chemicals and to minimize future shrinkage. After washing, iron the fabrics to eliminate wrinkles, making cutting easier and more precise.
For the Oopsie Daisy Quilt, you will need to cut several different shapes: squares for the daisy blocks, rectangles for the sashing, and borders. The specific dimensions will depend on the size of the quilt you wish to create. Generally, for the daisy blocks, cut a mix of 5-inch squares for the floral fabrics and 3-inch squares for the background.
Use a rotary cutter, ruler, and cutting mat for the best accuracy. When cutting squares, stack a few layers of fabric together to save time, but ensure you’re not cutting through too many layers at once, as this can lead to inaccuracies. After cutting, keep the pieces organized—labeling them or placing them in separate containers can help keep everything in order.
Once you have all your pieces cut, lay them out according to your design plan. This step is a great opportunity to play around with the layout and make adjustments before you start sewing. Ensuring that your colors and prints are balanced will enhance the overall look of your quilt.
Having all your pieces prepared and organized sets you up for a smooth sewing process. Once you’re satisfied with the arrangement, it’s time to start piecing your quilt together!
3. Piecing the Quilt Blocks
Now that you have all your pieces cut and arranged, it’s time to start piecing the blocks for your Oopsie Daisy Quilt Pattern. Begin with the daisy blocks. Take the floral squares and place them right sides together with the background squares. Pin them in place to prevent shifting while sewing.
Sew along one edge using a quarter-inch seam allowance, which is the standard for quilting. After sewing, press the seams open to reduce bulk, ensuring that your blocks will lay flat. Repeat this process for all the squares that make up your daisy blocks.
Once the daisy blocks are complete, it’s time to assemble the quilt top. Begin by sewing the blocks together in rows. Pin them carefully to keep the seams aligned, and continue to use a quarter-inch seam allowance. After sewing the rows, press the seams again.
When all rows are assembled, join them together to complete the quilt top. Be sure to pin at the seams for accuracy, which will help maintain the integrity of your design. Once you’ve sewn the rows together, take a moment to admire your work! Your Oopsie Daisy Quilt is starting to take shape.
If you choose to add sashing between your blocks, now is the time to do so. Cut the sashing strips according to your design and sew them in place, following the same techniques as before. The sashing can help frame your daisy blocks and add visual interest to the quilt top.
4. Finishing Your Quilt
With your quilt top pieced together, it’s time to finish your Oopsie Daisy Quilt Pattern! The finishing process typically involves layering, basting, quilting, and binding your quilt. Start by creating a quilt sandwich, which consists of the quilt top, batting, and backing fabric. Choose a backing fabric that complements your quilt top, and make sure it’s at least 2 inches larger on all sides than your quilt top.
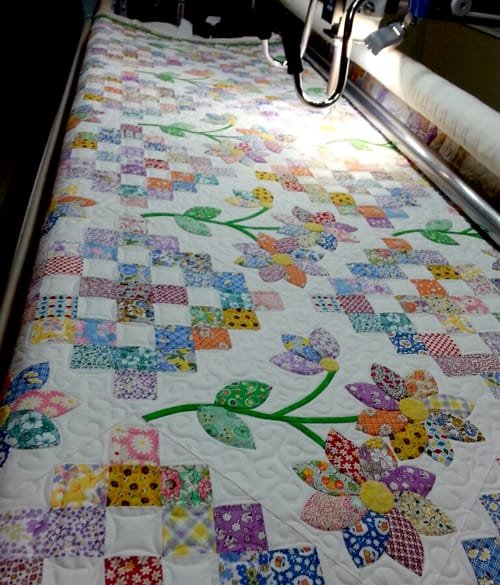
Once you have your layers arranged, use safety pins or basting spray to hold them together. This step is essential to prevent shifting while you quilt. After basting, you can begin quilting your quilt. Choose a quilting pattern that enhances your design; you can opt for straight-line quilting, free-motion quilting, or any other technique that suits your style.
Once you’ve completed the quilting, trim any excess batting and backing fabric. Next, it’s time to bind your quilt. Cut strips of fabric for the binding, typically 2.5 inches wide. Join the strips together to create a long continuous strip. Attach the binding to the edges of your quilt, folding it over to the back and stitching it in place.
Finally, give your quilt a good press to smooth out any wrinkles and highlight your beautiful work. Your Oopsie Daisy Quilt is now complete and ready to be displayed or gifted. Remember to take some time to appreciate the effort you put into creating this charming quilt!
FAQ
Q1: What is the Oopsie Daisy Quilt Pattern?
A: The Oopsie Daisy Quilt Pattern is a charming quilt design that features floral motifs combined with geometric shapes, creating a playful and vibrant look.
Q2: What type of fabric is best for the Oopsie Daisy Quilt?
A: Cotton fabric is ideal for quilting due to its durability and ease of use. Bright prints or soft pastels can enhance the overall aesthetic of the quilt.
Q3: How do I choose colors for my quilt?
A: Consider the mood you want to create. Bright colors offer energy, while soft colors provide calmness. Mixing floral prints with solids adds depth and interest.
Q4: Can I use scraps for the Oopsie Daisy Quilt?
A: Absolutely! Using scrap fabric is a fantastic way to make a unique quilt while minimizing waste.
Q5: What techniques can I use to quilt my Oopsie Daisy Quilt?
A: You can use straight-line quilting, free-motion quilting, or any pattern that complements your quilt design. Experimenting with different techniques can add uniqueness to your quilt.
Q6: How do I care for my completed quilt?
A: It’s best to wash your quilt on a gentle cycle with mild detergent. Air drying or tumble drying on low heat helps maintain the quilt’s integrity and colors.
Join our VIP broadcast list and gain access to exclusive patterns, all for free. As a VIP member, you’ll receive the best patterns daily, delivered directly to your device. ✨📱 It’s a unique opportunity to stay up-to-date with the latest trends and designs, curated just for you. Don’t miss out on enhancing your projects and discovering new inspirations with the best patterns every day! 🎨🔝
Conclusion
In this Oopsie Daisy Quilt Pattern – Tutorial, we’ve explored everything from choosing the right fabrics to piecing and finishing your quilt. Each step is designed to help you create a charming quilt that reflects your unique style. Remember that the journey of quilting is just as important as the finished product, so take your time and enjoy the process.
We hope this tutorial has inspired you to embark on your quilting adventure! Please share your thoughts and any suggestions for future tutorials in the comments below. Happy quilting!


