Creating unique quilt blocks can be a rewarding way to express your creativity, and the Space Shuttle block – Tutorial is an exciting project for quilters of all skill levels.
This block not only pays homage to the incredible engineering of space travel but also allows you to explore various techniques and colors. Whether you’re a beginner or an experienced quilter, you’ll find joy in constructing this fun and meaningful design.
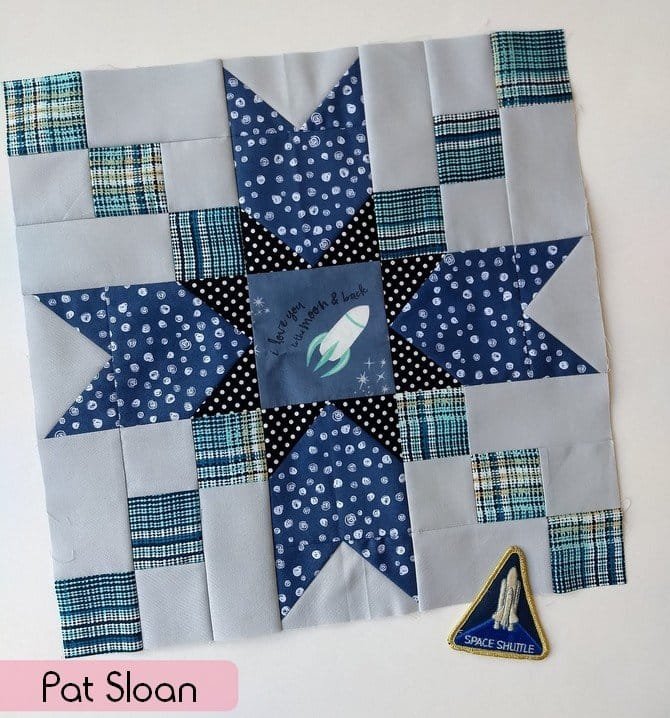
The Space Shuttle block – Tutorial guides you through each step, from selecting fabrics to piecing the block together. You will learn how to create a visually striking block that represents the iconic shape of a space shuttle, adding a touch of whimsy and adventure to your quilt. This project is perfect for a space-themed quilt or as a stand-alone piece that sparks conversation.
As you embark on this quilting journey, we’ll cover everything from the materials needed to helpful tips for assembly. Let’s dive into the details of creating your very own Space Shuttle block and discover the joy of quilting in a new dimension.
1. Materials Needed for the Space Shuttle Block
Before starting the Space Shuttle block – Tutorial, it’s essential to gather all the necessary materials. Here’s a comprehensive list to ensure you’re fully prepared for this project.
- First, you’ll need fabric in various colors. A typical space shuttle block uses three main colors: one for the shuttle body, one for the rocket boosters, and one for the background. Cotton quilting fabric is a great choice due to its durability and ease of use.
- A rotary cutter, cutting mat, and quilting ruler will be crucial for cutting your fabric accurately. Precision is vital in quilting, so take your time during this step.
- You’ll also need a sewing machine for piecing your block together. Ensure your machine is in good working order and that you have the appropriate needle and thread for your fabric.
- A pair of scissors will come in handy for trimming threads and any fabric edges, and a seam ripper is a must-have for correcting any mistakes.
- Finally, consider using quilting pins to hold your pieces together while you sew. This will help ensure that everything stays aligned.
Having all your materials ready will streamline the process and allow you to focus on the creative aspects of the Space Shuttle block – Tutorial.
2. Cutting the Fabric Pieces
With your materials at the ready, it’s time to start cutting the fabric for your Space Shuttle block.
- Begin by laying out your fabric on a cutting mat. Make sure to smooth out any wrinkles to get accurate cuts. This step is crucial for maintaining the integrity of your block.
- Using your quilting ruler, measure and cut out the required pieces for your shuttle block. Typically, you’ll need a few rectangles for the body and the boosters, and triangles for the wings.
- For the shuttle body, cut two rectangles of the main color. Ensure they are the same size to keep your block symmetrical.
- Next, cut two rectangles for the rocket boosters. These should be a different color, adding contrast to your design.
- Don’t forget to cut the background pieces as well. These will frame your shuttle block, so choose a color that complements your shuttle fabric.
- As you cut, it’s helpful to label each piece or keep them organized to avoid confusion later on during the assembly.
Taking your time during the cutting process will set the foundation for a successful quilt block and ensure that your Space Shuttle block turns out beautifully.
3. Assembling the Space Shuttle Block
Now that you have your fabric pieces cut, the next step in the Space Shuttle block – Tutorial is to assemble the block itself.
- Start by sewing the shuttle body pieces together. Place the right sides of the fabric facing each other and sew along the edges with a quarter-inch seam allowance. This is standard in quilting and helps create a neat finish.
- After sewing, press the seams open with an iron. This helps flatten the fabric and makes it easier to join additional pieces.
- Next, attach the rocket boosters to the shuttle body. Again, place the right sides together and sew. Ensure that the boosters are aligned correctly for a cohesive look.
- Once the main components are joined, it’s time to add the wings. Use the triangle pieces you cut earlier and position them on either side of the shuttle body. Pin them in place to keep everything secure while you sew.
- After sewing the wings, you can add the background pieces. This will complete your block. Attach the background pieces in a similar manner, ensuring that they frame the shuttle nicely.
- Finally, trim any excess threads and give your completed block a good press with the iron to remove any creases.
Assembling the block is where your design comes to life, and seeing the pieces come together is incredibly satisfying.
4. Finishing Touches and Tips
With your Space Shuttle block assembled, it’s time to add some finishing touches and consider tips for making your project even better.
- First, evaluate your block for any uneven seams or misaligned pieces. If you find any, use your seam ripper to correct them before moving on.
- Consider adding decorative elements, such as stitching details or appliqué, to enhance the shuttle design. This adds a unique touch and can showcase your creativity.
- If you’re making multiple blocks, maintain consistent fabric choices across all blocks for a cohesive look. This is especially important if you’re creating a quilt.
- Keep an eye on the dimensions of your block. If you’re planning to piece it into a larger quilt, ensure that each block is the same size for a better fit.
- Before assembling your quilt, lay out all your blocks to see how they interact. This can inspire you to make adjustments to colors or layouts.
- Lastly, don’t forget to enjoy the process! Quilting is about creativity and expression, so allow yourself to experiment and make it your own.
By following these tips, your Space Shuttle block will not only be well-crafted but also uniquely yours.
FAQ
1. What is a quilt block?
A quilt block is a section of a quilt that can be made using various techniques and patterns. Each block is typically square or rectangular and is pieced together with other blocks to form a quilt.
2. How big should the Space Shuttle block be?
A typical size for quilt blocks is 12.5 inches square before sewing into a quilt, but you can adjust based on your project needs.
3. Can I use different fabrics for the shuttle block?
Absolutely! Feel free to experiment with different fabrics, colors, and patterns to create a unique design.
4. What techniques are best for sewing quilt blocks?
Using a quarter-inch seam allowance, pressing seams open, and pinning pieces together are essential techniques for sewing quilt blocks accurately.
5. How do I wash my quilt after completing it?
It’s best to wash quilts on a gentle cycle with cold water to preserve the fabric and stitching. Air drying is recommended to maintain its shape.
6. What if I make a mistake while piecing the block?
Mistakes are part of the process! Use a seam ripper to carefully remove any incorrect stitches and re-sew as needed.
Join our VIP broadcast list and gain access to exclusive patterns, all for free. As a VIP member, you’ll receive the best patterns daily, delivered directly to your device. ✨📱 It’s a unique opportunity to stay up-to-date with the latest trends and designs, curated just for you. Don’t miss out on enhancing your projects and discovering new inspirations with the best patterns every day! 🎨🔝
Conclusion
The Space Shuttle block – Tutorial is a fantastic way to create a unique quilt piece that reflects your creativity and love for space. By following the steps outlined in this article, you can craft a beautiful block that showcases your quilting skills. From selecting your materials to piecing and finishing touches, each phase of the process is rewarding.
We hope you found this tutorial helpful and inspiring! Please share your thoughts, opinions, or suggestions in the comments below. Your feedback is invaluable and contributes to our crafting community!

