The Log Cabin Quilt Tutorial is one of the most popular and timeless quilting techniques. This pattern has been a favorite among quilters for generations due to its versatility and beauty. Whether you’re a beginner or an experienced quilter, learning the Log Cabin Quilt Tutorial will expand your skills and allow you to create stunning pieces.
In this Log Cabin Quilt Tutorial, you’ll discover the step-by-step process of creating this classic design, where each block resembles the shape of a log cabin. It’s an excellent project for using up fabric scraps and experimenting with different color combinations. With its straightforward construction and endless design possibilities, the Log Cabin Quilt is a must-have in your quilting repertoire.
Let’s dive into this Log Cabin Quilt Tutorial to understand the materials you’ll need, how to cut the fabric, sew the blocks, and assemble the quilt top, ensuring a beautiful and professional finish.
1. Understanding the Log Cabin Quilt Block
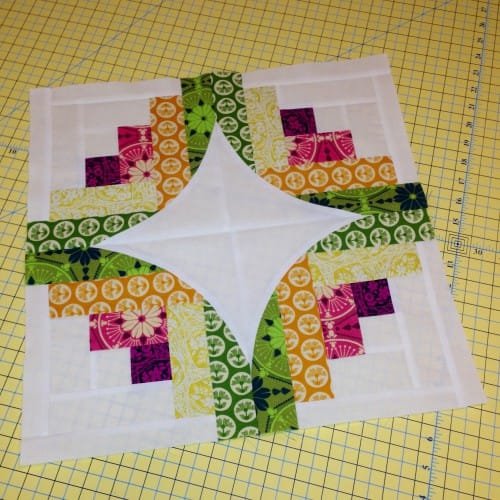
The Log Cabin Quilt Block is the foundation of this design. Each block starts with a center square, and strips of fabric, known as “logs,” are added around it in a circular or spiral pattern. The key to a successful Log Cabin Quilt is precision in cutting and sewing each piece.
- Center Square: The heart of the block is the center square. Traditionally, this square represents the hearth of a home. You can choose a bold color to make it stand out or a neutral one for a subtler effect.
- Logs Around the Center: The logs are added in a spiral or circular fashion. Start with shorter strips and gradually move to longer ones as you work your way around the center.
- Light and Dark Fabrics: One of the most distinctive features of a Log Cabin Quilt is the contrast between light and dark fabrics. This contrast creates depth and visual interest in the design. You can play with shades and colors to achieve the look you desire.
- Fabric Selection: Choosing the right fabric is crucial. Cotton is often preferred because it’s easy to work with, but you can experiment with other materials as well. Keep in mind the texture and weight of the fabric to avoid unnecessary bulk.
- Layout Options: The beauty of the Log Cabin Quilt lies in its flexibility. Once you have your blocks, you can arrange them in various ways to create different patterns like the Barn Raising, Straight Furrows, or Chevron.
- Precision in Cutting and Sewing: Accurate measurements are essential. Cutting and sewing precisely will ensure that your blocks align correctly when assembling the quilt top.
2. How to Cut Fabric for a Log Cabin Quilt
Cutting fabric for a Log Cabin Quilt requires careful planning and precision. Here’s how to do it step by step:
- Choose Your Fabrics: Select a combination of light and dark fabrics for the logs and a contrasting fabric for the center square.
- Measure the Center Square: The size of the center square will determine the overall dimensions of the quilt. For a standard block, the center square is typically 2 to 3 inches.
- Cutting the Logs: Once the center square is ready, cut your fabric strips (logs) according to the width of the block. Start with shorter strips and gradually increase the length as you build the block.
- Use a Rotary Cutter: To ensure clean and accurate cuts, use a rotary cutter and a cutting mat. This tool will help you cut multiple strips at once, saving time and maintaining consistency.
- Cutting Accuracy: Double-check your measurements before cutting each strip. Even a slight miscalculation can throw off the entire block, so accuracy is key.
- Organize Your Fabric Strips: Keep your fabric strips organized by length and color. This will make the sewing process smoother and more efficient.
3. Sewing the Log Cabin Quilt Blocks
Now that you have your fabric pieces cut, it’s time to sew the blocks. Follow these steps for a seamless construction process:
- Start with the Center Square: Begin by sewing the first log to one side of the center square. Use a 1/4-inch seam allowance for all seams.
- Press the Seams: After sewing each log, press the seam towards the log. This step is essential for keeping your blocks flat and ensuring a neat finish.
- Continue Adding Logs: Add the next log to the adjacent side of the block and continue in a spiral or clockwise pattern. Always press the seams after adding each log.
- Maintain Consistent Seams: Consistency is key to a professional-looking quilt. Ensure that all your seams are the same width throughout the project.
- Trim as You Go: After adding each log, check the block for any uneven edges and trim if necessary. This will help keep your blocks uniform in size.
- Complete the Block: Once all the logs are sewn around the center square, your block is complete. Repeat the process to create as many blocks as needed for your quilt.
4. Assembling and Finishing the Quilt
After completing all your blocks, the final steps involve assembling and finishing the Log Cabin Quilt.
- Arrange the Blocks: Lay out your blocks on a flat surface to decide on the arrangement. Experiment with different layouts until you find one that suits your vision.
- Sew the Blocks Together: Begin sewing the blocks together row by row. Use pins to secure the blocks and ensure that the seams align properly.
- Add a Border: A border can enhance the overall design of your quilt. Choose a fabric that complements the colors of your quilt and cut strips to the desired width.
- Quilt the Layers: Once the quilt top is assembled, it’s time to quilt the layers together. You can do this by hand or using a sewing machine. Stitch in the ditch or use free-motion quilting to secure the layers.
- Binding the Quilt: The final step is to bind the quilt. Cut strips of fabric for the binding and sew them around the edges of the quilt to give it a finished look.
- Final Press: After binding, give your quilt a final press to remove any wrinkles and ensure that all seams lay flat.
FAQ
1. What size should a Log Cabin quilt block be? Most Log Cabin Quilt Blocks are around 10 to 14 inches, but the size can vary based on personal preference and the quilt’s design.
2. What fabrics are best for a Log Cabin quilt? Cotton fabrics are commonly used for Log Cabin Quilts due to their ease of use and availability, but you can experiment with other materials such as linen or wool.
3. How do I choose colors for a Log Cabin quilt? Select contrasting light and dark fabrics to create the classic Log Cabin Quilt look. You can also use a color wheel to find complementary colors.
4. Can I make a Log Cabin quilt without a sewing machine? Yes, you can hand-sew the blocks if you prefer. However, a sewing machine will make the process faster and more precise.
5. How much fabric do I need for a Log Cabin quilt? The amount of fabric depends on the quilt size. For a full-size quilt, you may need about 4 to 6 yards of fabric in total, including both light and dark fabrics.
6. What is the history of the Log Cabin quilt? The Log Cabin Quilt has its origins in the pioneer days of America, symbolizing home and hearth. It remains a beloved pattern in the quilting community today.
Join our VIP broadcast list and gain access to exclusive patterns, all for free. As a VIP member, you’ll receive the best patterns daily, delivered directly to your device. ✨📱 It’s a unique opportunity to stay up-to-date with the latest trends and designs, curated just for you. Don’t miss out on enhancing your projects and discovering new inspirations with the best patterns every day! 🎨🔝
Conclusion
In this Log Cabin Quilt Tutorial, we’ve covered everything from understanding the basics of the quilt block to cutting fabric, sewing the blocks, and assembling the quilt. With this guide, you’re ready to create your own Log Cabin Quilt masterpiece.
Don’t forget to leave a comment below with your thoughts and suggestions! We’d love to hear your feedback and any tips you may have for other quilters. Happy quilting!

