A Fabric Wallet with Zipper Tutorial is a practical sewing project for anyone who wants to create a handmade accessory that combines style, organization, and everyday functionality. A small fabric wallet is perfect for storing cash, cards, coins, receipts, and other essentials without carrying a large purse.
One of the biggest advantages of making your own wallet is the freedom to choose fabrics, colors, prints, and dimensions. You can create a simple minimalist design or add multiple compartments to keep everything organized.
Whether you are a beginner learning how to install zippers or an experienced sewer looking for a useful handmade project, this tutorial covers the essential materials, preparation, construction, and finishing techniques for a beautiful fabric wallet.
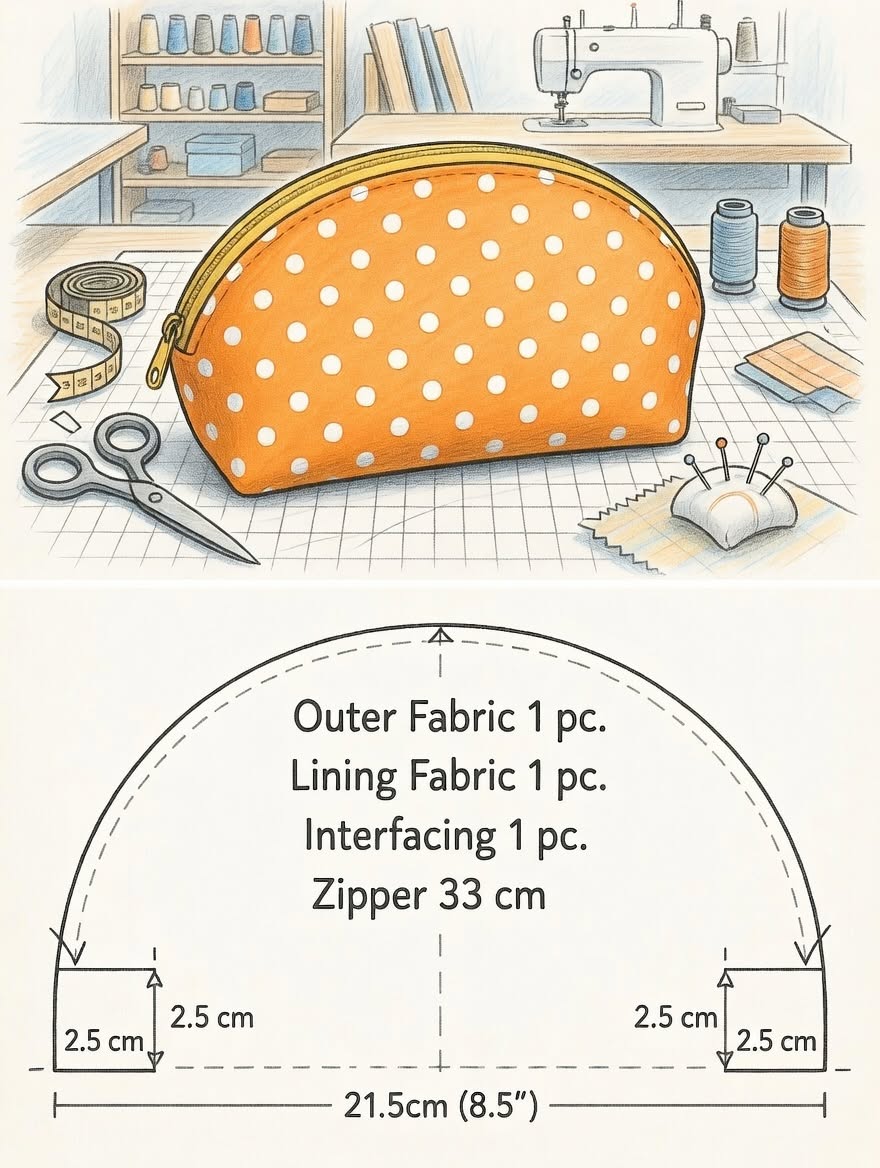
Choosing the Best Fabrics and Sewing Supplies
The first step in making a Fabric Wallet with Zipper is selecting materials that provide durability without making the finished accessory too bulky. Since wallets are handled frequently, the fabric should resist everyday wear and maintain its shape.
Quilting cotton is one of the most popular choices because it is easy to cut, sew, and find in countless colors and patterns. Floral prints, geometric designs, solid colors, and seasonal fabrics can all create attractive wallet exteriors.
For additional durability, consider canvas, denim, or cotton blends. These fabrics provide a sturdier structure, although thicker materials may require adjustments to your sewing machine settings.
You will need the following supplies:
- Exterior fabric.
- Cotton fabric for the lining.
- Lightweight or medium-weight interfacing.
- A nylon zipper, approximately 6 to 8 inches long.
- Matching polyester thread.
- Sewing machine.
- Fabric scissors or rotary cutter.
- Measuring tape and ruler.
- Sewing clips or pins.
- Iron and ironing board.
- Zipper foot for your sewing machine.
Interfacing is particularly important because it helps the wallet maintain its shape. Lightweight fusible interfacing works well for thinner cotton fabrics, while medium-weight options can provide additional structure.
Choose a nylon zipper with smooth movement and a size appropriate for the wallet opening. A zipper that is too bulky may make the finished accessory difficult to close neatly.
Before starting, wash and press your fabrics according to their care instructions. This helps prevent shrinkage and removes wrinkles that could affect cutting accuracy.
Preparing the Fabric Wallet Pattern
Accurate measurements are essential for creating a wallet that looks professional and provides enough room for everyday essentials. A simple rectangular design is an excellent starting point for beginners.
For a compact wallet, you can use the following approximate measurements:
- Exterior fabric: two rectangles measuring 9 x 6 inches.
- Lining fabric: two rectangles measuring 9 x 6 inches.
- Interfacing: two rectangles measuring 9 x 6 inches.
- Zipper: approximately 8 inches long.
These measurements create a small rectangular pouch, with the finished dimensions depending on the seam allowance and zipper placement.
If you want a wallet with card slots, prepare additional fabric pieces for the interior. Folded fabric pockets can be sewn onto one lining panel before assembling the main wallet.
Cut all pieces carefully and check that their edges match. Uneven rectangles can cause the zipper and side seams to become misaligned.
Apply the fusible interfacing to the wrong side of the exterior fabric following the manufacturer’s instructions. Use an appropriate iron temperature and allow the fabric to cool before handling it.
For a more personalized design, you can combine two coordinating fabrics. For example, use a floral print on the outside and a solid color for the lining.
You can also add a small fabric label, decorative patch, or contrasting zipper pull. Keep embellishments away from the zipper teeth so they do not interfere with opening and closing the wallet.
Installing the Zipper and Sewing the Wallet
Installing the zipper is often the most important part of a Fabric Wallet with Zipper Tutorial. Take your time during this step because accurate alignment will give the finished wallet a cleaner appearance.
Place one exterior fabric piece right side up on your work surface. Position the zipper along its upper edge, with the zipper facing down against the fabric.
Place one lining piece on top, right side facing down, so the zipper is sandwiched between the exterior and lining layers. Align the edges carefully and secure them with sewing clips.
Using a zipper foot, sew along the edge with a straight stitch. Keep the stitching close to the zipper tape without getting too close to the zipper teeth.
Fold the exterior and lining away from the zipper and press gently. Topstitch along the fabric near the zipper to keep the layers in place and create a professional finish.
Repeat the process with the remaining exterior and lining pieces on the other side of the zipper. Make sure the fabrics are aligned before sewing.
Once both sides are attached, open the fabric layers so the exterior pieces face each other and the lining pieces face each other. Keep the zipper centered between the two sides.
Important: Open the zipper halfway before sewing the final side seams. This will allow you to turn the wallet right side out later.
Sew around the perimeter using a consistent seam allowance, leaving an opening of approximately 3 inches along the bottom of the lining.
For a traditional pouch shape, trim excess fabric from the corners without cutting through the stitches. This creates cleaner corners when the wallet is turned.
Turn the wallet through the opening in the lining. Gently push out the corners, arrange the zipper area, and close the lining opening with a neat hand stitch or machine stitch.
Customizing, Finishing, and Caring for Your Fabric Wallet
The finishing details can transform a simple pouch into a beautiful handmade accessory. Once the wallet is assembled, inspect the zipper, seams, corners, and lining to make sure everything is secure.
If you want a more organized interior, consider adding card pockets, a small divider, or a separate coin compartment. These features can be incorporated into the lining before the main wallet is assembled.
There are many ways to personalize your design:
- Floral wallet: Use colorful cotton prints for a cheerful appearance.
- Minimalist wallet: Choose neutral fabrics and a matching zipper.
- Denim wallet: Reuse old jeans for a durable exterior.
- Quilted wallet: Add batting and decorative stitching for extra texture.
- Patchwork wallet: Combine several coordinating fabric scraps.
- Travel wallet: Add additional compartments for cards and receipts.
If you use thicker fabrics or multiple layers, test your sewing machine before assembling the complete project. A suitable needle and slower sewing speed can help prevent skipped stitches and uneven seams.
For maintenance, spot-clean small stains with a damp cloth and mild detergent. If the fabric is washable, follow its care instructions and consider removing any delicate decorations before cleaning.
Avoid overfilling the wallet because excessive pressure can strain the zipper and seams. Keeping the contents organized will also help the accessory maintain its original shape.
Finally, test the zipper several times and inspect the interior for loose threads. A well-finished wallet should open smoothly, close securely, and hold its contents comfortably.
Frequently Asked Questions
Is a Fabric Wallet with Zipper suitable for beginners?
Yes. A basic rectangular wallet is a great beginner sewing project. It provides practice with straight seams, fabric preparation, interfacing, and zipper installation.
What fabric is best for a handmade wallet?
Quilting cotton is an excellent option because it is easy to sew and available in many patterns. Canvas and denim are good alternatives for a sturdier exterior.
What type of zipper should I use?
A nylon zipper is generally suitable for small fabric wallets because it is lightweight and flexible. Choose a length that matches the wallet opening.
Do I need interfacing for a fabric wallet?
Interfacing is highly recommended because it helps the wallet maintain its shape. Lightweight or medium-weight fusible interfacing works well for most cotton fabrics.
Can I add card slots to the wallet?
Absolutely. You can sew folded fabric pockets onto the lining before attaching the zipper. Plan their placement carefully to avoid adding too much bulk.
How can I make the wallet more durable?
Use strong polyester thread, reinforce the zipper ends, maintain consistent seam allowances, and choose fabrics suitable for frequent handling.
Conclusion
A Fabric Wallet with Zipper Tutorial is a rewarding sewing project that combines practical construction with endless creative possibilities. With suitable fabrics, interfacing, and careful zipper installation, you can create a useful accessory that reflects your personal style.
Experiment with different prints, add card compartments, and reuse fabric scraps to make unique designs. Whether you keep it for yourself or give it as a handmade gift, a fabric zipper wallet is a small project with plenty of everyday value.