A Cat Keychain Crochet Tutorial is a wonderful project for anyone who enjoys making small handmade accessories. These adorable miniature cats are perfect for decorating keys, backpacks, purses, and zipper pulls while adding a personal touch to everyday items.
Because the design is small, it is an excellent opportunity to practice basic amigurumi techniques without needing large amounts of yarn or complicated materials. You can create different cat colors, expressions, and shapes to make each piece special.
Whether you are a beginner learning crochet or an experienced crafter looking for a quick project, this tutorial will help you understand the materials, construction, assembly, and finishing details needed to make a cute crochet cat keychain.
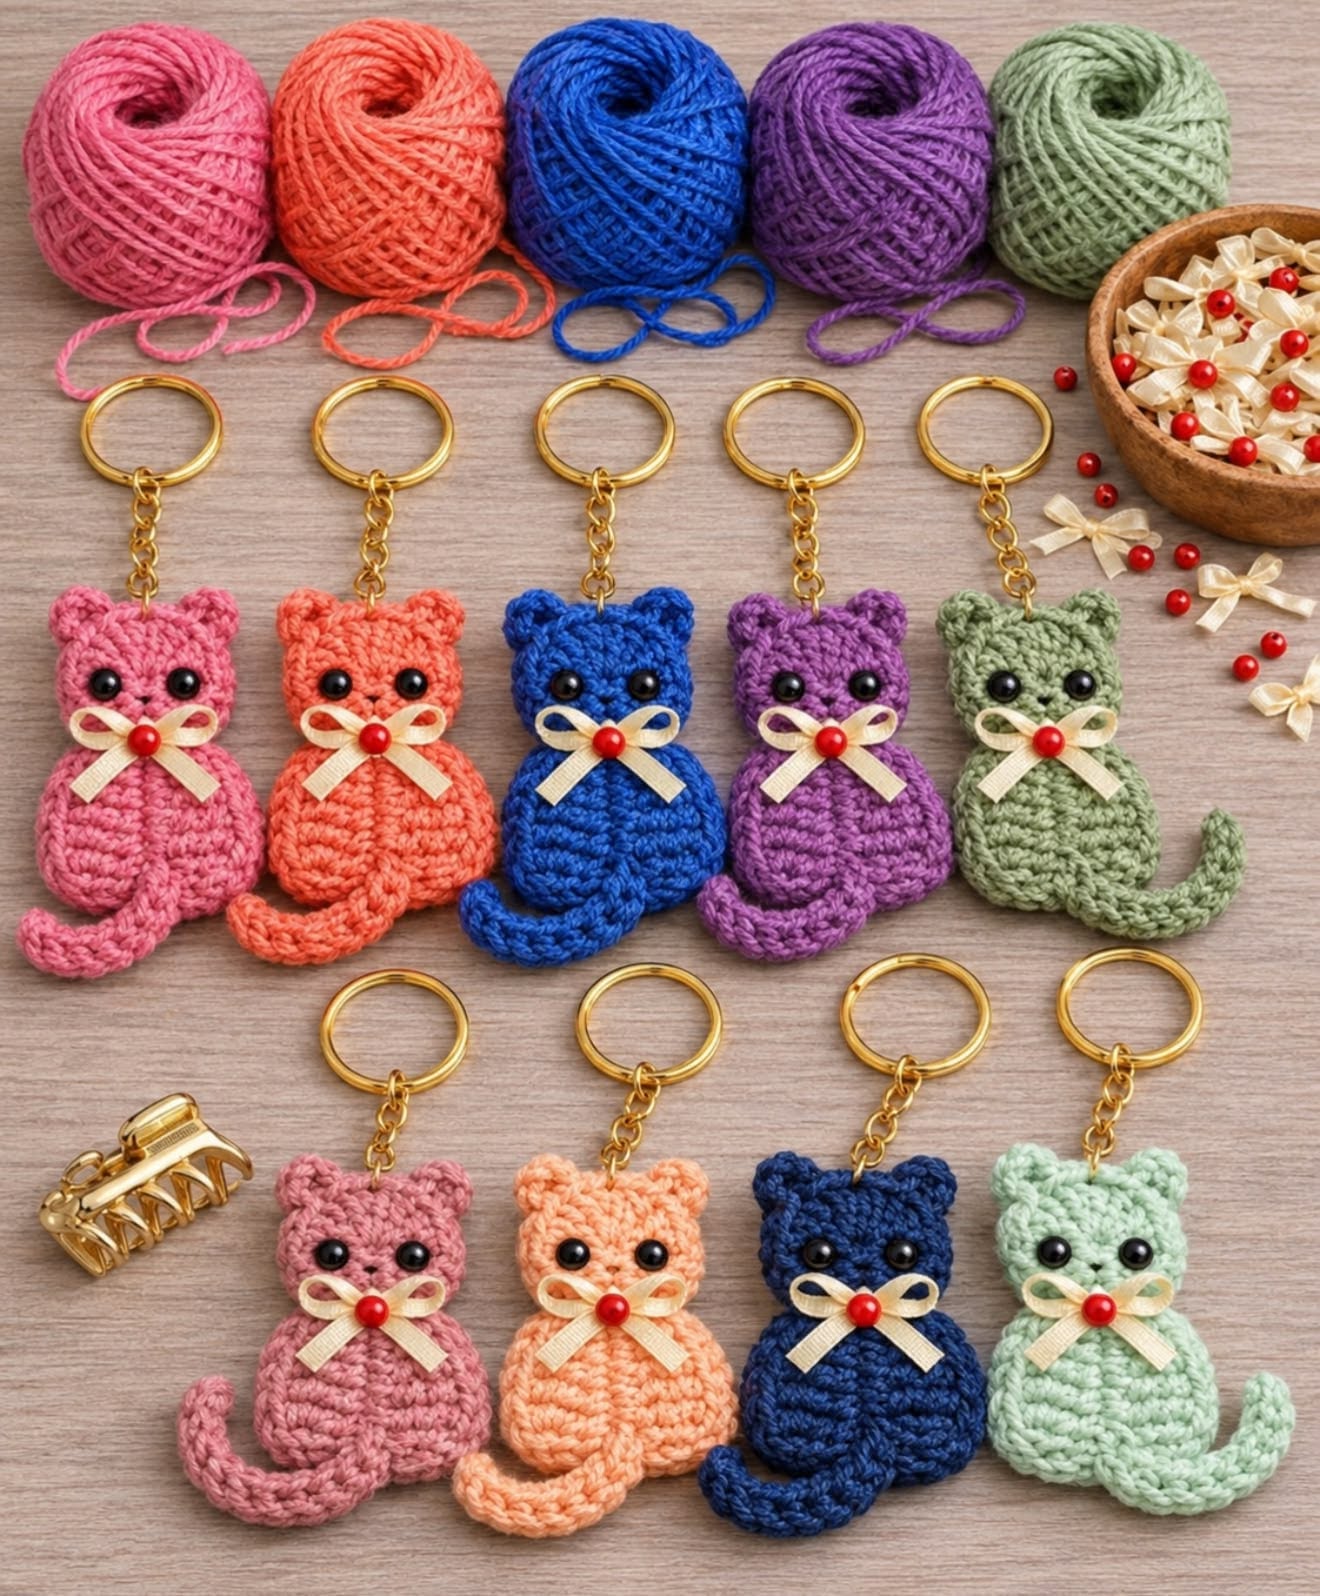
Choosing Yarn and Supplies for a Crochet Cat Keychain
The first step in any Cat Keychain Crochet Tutorial is selecting materials that will produce a small, firm, and durable amigurumi. Since the finished cat will be handled frequently, choosing suitable yarn and accessories is important.
Cotton yarn is an excellent option because it provides clear stitch definition and helps the miniature figure maintain its shape. Lightweight acrylic yarn is another possibility if you prefer a softer texture and a wider range of colors.
For a traditional miniature cat, choose shades such as white, gray, black, orange, beige, or brown. You can also experiment with pastel colors for a playful handmade appearance.
Gather the following supplies:
- Lightweight cotton or acrylic yarn.
- A crochet hook suitable for your yarn.
- Polyester fiberfill.
- Yarn needle.
- Stitch marker.
- Scissors.
- Keychain ring or lobster clasp.
- Embroidery thread for facial details.
A smaller crochet hook than the yarn label recommends can help create tight stitches. This is particularly useful for amigurumi because it prevents the stuffing from showing through the fabric.
Before beginning, familiarize yourself with these common US crochet abbreviations:
- MR: Magic ring.
- SC: Single crochet.
- INC: Increase (two single crochet stitches in one stitch).
- DEC: Decrease.
- SL ST: Slip stitch.
- CH: Chain.
- FO: Fasten off.
Most miniature cat designs use single crochet stitches worked continuously in spiral rounds. A stitch marker helps you identify the beginning of each round and maintain an accurate stitch count.
Step-by-Step Cat Keychain Crochet Tutorial
This simple design creates a rounded miniature cat head with two small ears. It is suitable for beginners who already understand how to make a magic ring, single crochet stitches, increases, and decreases.
Step 1: Create the cat’s head
Start with a magic ring and work six single crochet stitches into the center.
- Round 1: 6 SC in MR (6).
- Round 2: INC in every stitch (12).
- Round 3: (1 SC, INC) repeat 6 times (18).
- Round 4: (2 SC, INC) repeat 6 times (24).
- Rounds 5–8: 24 SC around (24).
The increases gradually create a rounded shape. Keep your stitches consistent so the head looks symmetrical.
Step 2: Shape the head
Begin decreasing to close the bottom portion.
- Round 9: (2 SC, DEC) repeat 6 times (18).
- Round 10: (1 SC, DEC) repeat 6 times (12).
Add a small amount of polyester fiberfill before closing the remaining opening. Distribute the stuffing evenly without making the head too firm.
- Round 11: DEC 6 times (6).
Fasten off, leaving a yarn tail. Use a yarn needle to close the remaining stitches and hide the yarn securely inside the piece.
Step 3: Make two small ears
The ears can be crocheted separately and attached to the top of the head.
For each ear, make a magic ring and work 4 SC into it. Pull the ring closed and fasten off, leaving a long tail for sewing.
Shape each ear into a small triangular point using your fingers. Attach them to the upper corners of the head, making sure they are positioned evenly.
Step 4: Add the cat’s facial features
Use black embroidery thread to create two small eyes, a triangular nose, and a short mouth.
You can also embroider small whiskers using a contrasting thread. Keep the facial details simple because the miniature size makes small features especially noticeable.
For a child-friendly keychain, embroidered eyes and facial details are preferable to plastic safety eyes or detachable decorations.
Adding the Keychain Ring and Personalizing Your Cat
Once the crochet figure is complete, the next step is attaching the hardware. A secure attachment is essential because the keychain will experience pulling and movement during everyday use.
Use a yarn needle to pass a strong yarn tail through the upper center of the head. Create a reinforced loop and connect it to a metal keychain ring or lobster clasp.
If the design does not have a long enough yarn tail, crochet a short chain of approximately 6 to 8 stitches and attach both ends securely to the top of the head. Reinforce the connection with additional stitches.
Before using the keychain, gently test the attachment to make sure it does not loosen. The metal ring should remain securely connected to the crocheted piece.
There are many ways to customize your miniature cat:
- Orange tabby: Use orange yarn and embroider darker stripes.
- Black cat: Create a classic black cat with a small pink nose.
- White kitten: Use white yarn with pastel facial details.
- Calico cat: Combine white, orange, and dark patches.
- Gray kitten: Add a contrasting nose and embroidered whiskers.
You can also add a tiny crocheted bow, collar, or scarf. Keep embellishments small and firmly attached so they do not interfere with the keychain’s everyday use.
Finishing, Care, and Common Crochet Mistakes
A beautiful Cat Keychain Crochet Tutorial should include proper finishing techniques. Small amigurumi projects can reveal mistakes more easily than larger pieces, so take a moment to inspect the figure before considering it complete.
One common problem is loose stitches that allow the stuffing to become visible. Using a smaller hook and maintaining consistent tension can help create a tighter fabric.
Another issue is uneven increases, which can make the head look asymmetrical. Count your stitches after each round and use a stitch marker to avoid losing your place.
Avoid adding too much fiberfill. Excessive stuffing can stretch the stitches and change the intended shape of the cat’s head.
After finishing, trim loose yarn ends and check that the ears, facial details, and keychain hardware are secure. If you plan to sell or gift the accessory, pay particular attention to the strength of every attachment.
To clean your crochet cat, gently spot-clean it with a damp cloth and mild soap when appropriate for the yarn. Allow it to air-dry completely before attaching it to keys or storing it.
Because the finished piece includes metal hardware and may contain small components, it should be treated as an accessory rather than a toy for babies or young children.
Frequently Asked Questions
Is this Cat Keychain Crochet Tutorial suitable for beginners?
Yes. The basic design uses simple amigurumi techniques, including single crochet, increases, decreases, and a magic ring. Beginners can practice each technique while making a small project.
What yarn is best for a crochet cat keychain?
Cotton yarn is a great choice because it provides excellent stitch definition and a firm structure. Lightweight acrylic yarn can also work well.
How much yarn does a miniature crochet cat require?
Usually, only a small amount is needed. The exact quantity depends on the size of the head, yarn thickness, and any additional decorations.
Can I make the cat in different sizes?
Yes. You can change the yarn weight and crochet hook size to create larger or smaller versions. Always maintain tight stitches when making stuffed amigurumi.
How do I attach the keychain ring securely?
Create a reinforced yarn loop or crocheted chain at the top of the figure and attach it firmly to the metal ring. Check the connection before everyday use.
Can I sell handmade crochet cat keychains?
Yes. They are popular small handmade accessories that can be customized with different colors and expressions. Make sure your finished products have secure stitching and durable hardware.
Conclusion
This Cat Keychain Crochet Tutorial shows how a small amount of yarn and a few basic crochet techniques can become an adorable handmade accessory. From shaping the rounded head to adding ears, facial details, and a secure keychain attachment, every step offers an opportunity to personalize your creation.
Try different cat colors, experiment with embroidered expressions, and create a collection of miniature kittens. These little crochet companions are perfect for personal use, thoughtful gifts, and handmade craft collections.