How to Make a Crochet Fruits Pattern is a delightful way to explore creativity, color, and texture while crafting charming handmade pieces that can be used for decoration, educational toys, or thoughtful gifts.
Creating a Crochet Fruits Pattern allows you to practice shaping techniques, color transitions, and stitch control while producing adorable results that feel both playful and realistic.
Whether you are new to crochet or already experienced, this project offers endless possibilities for customization and personal expression.
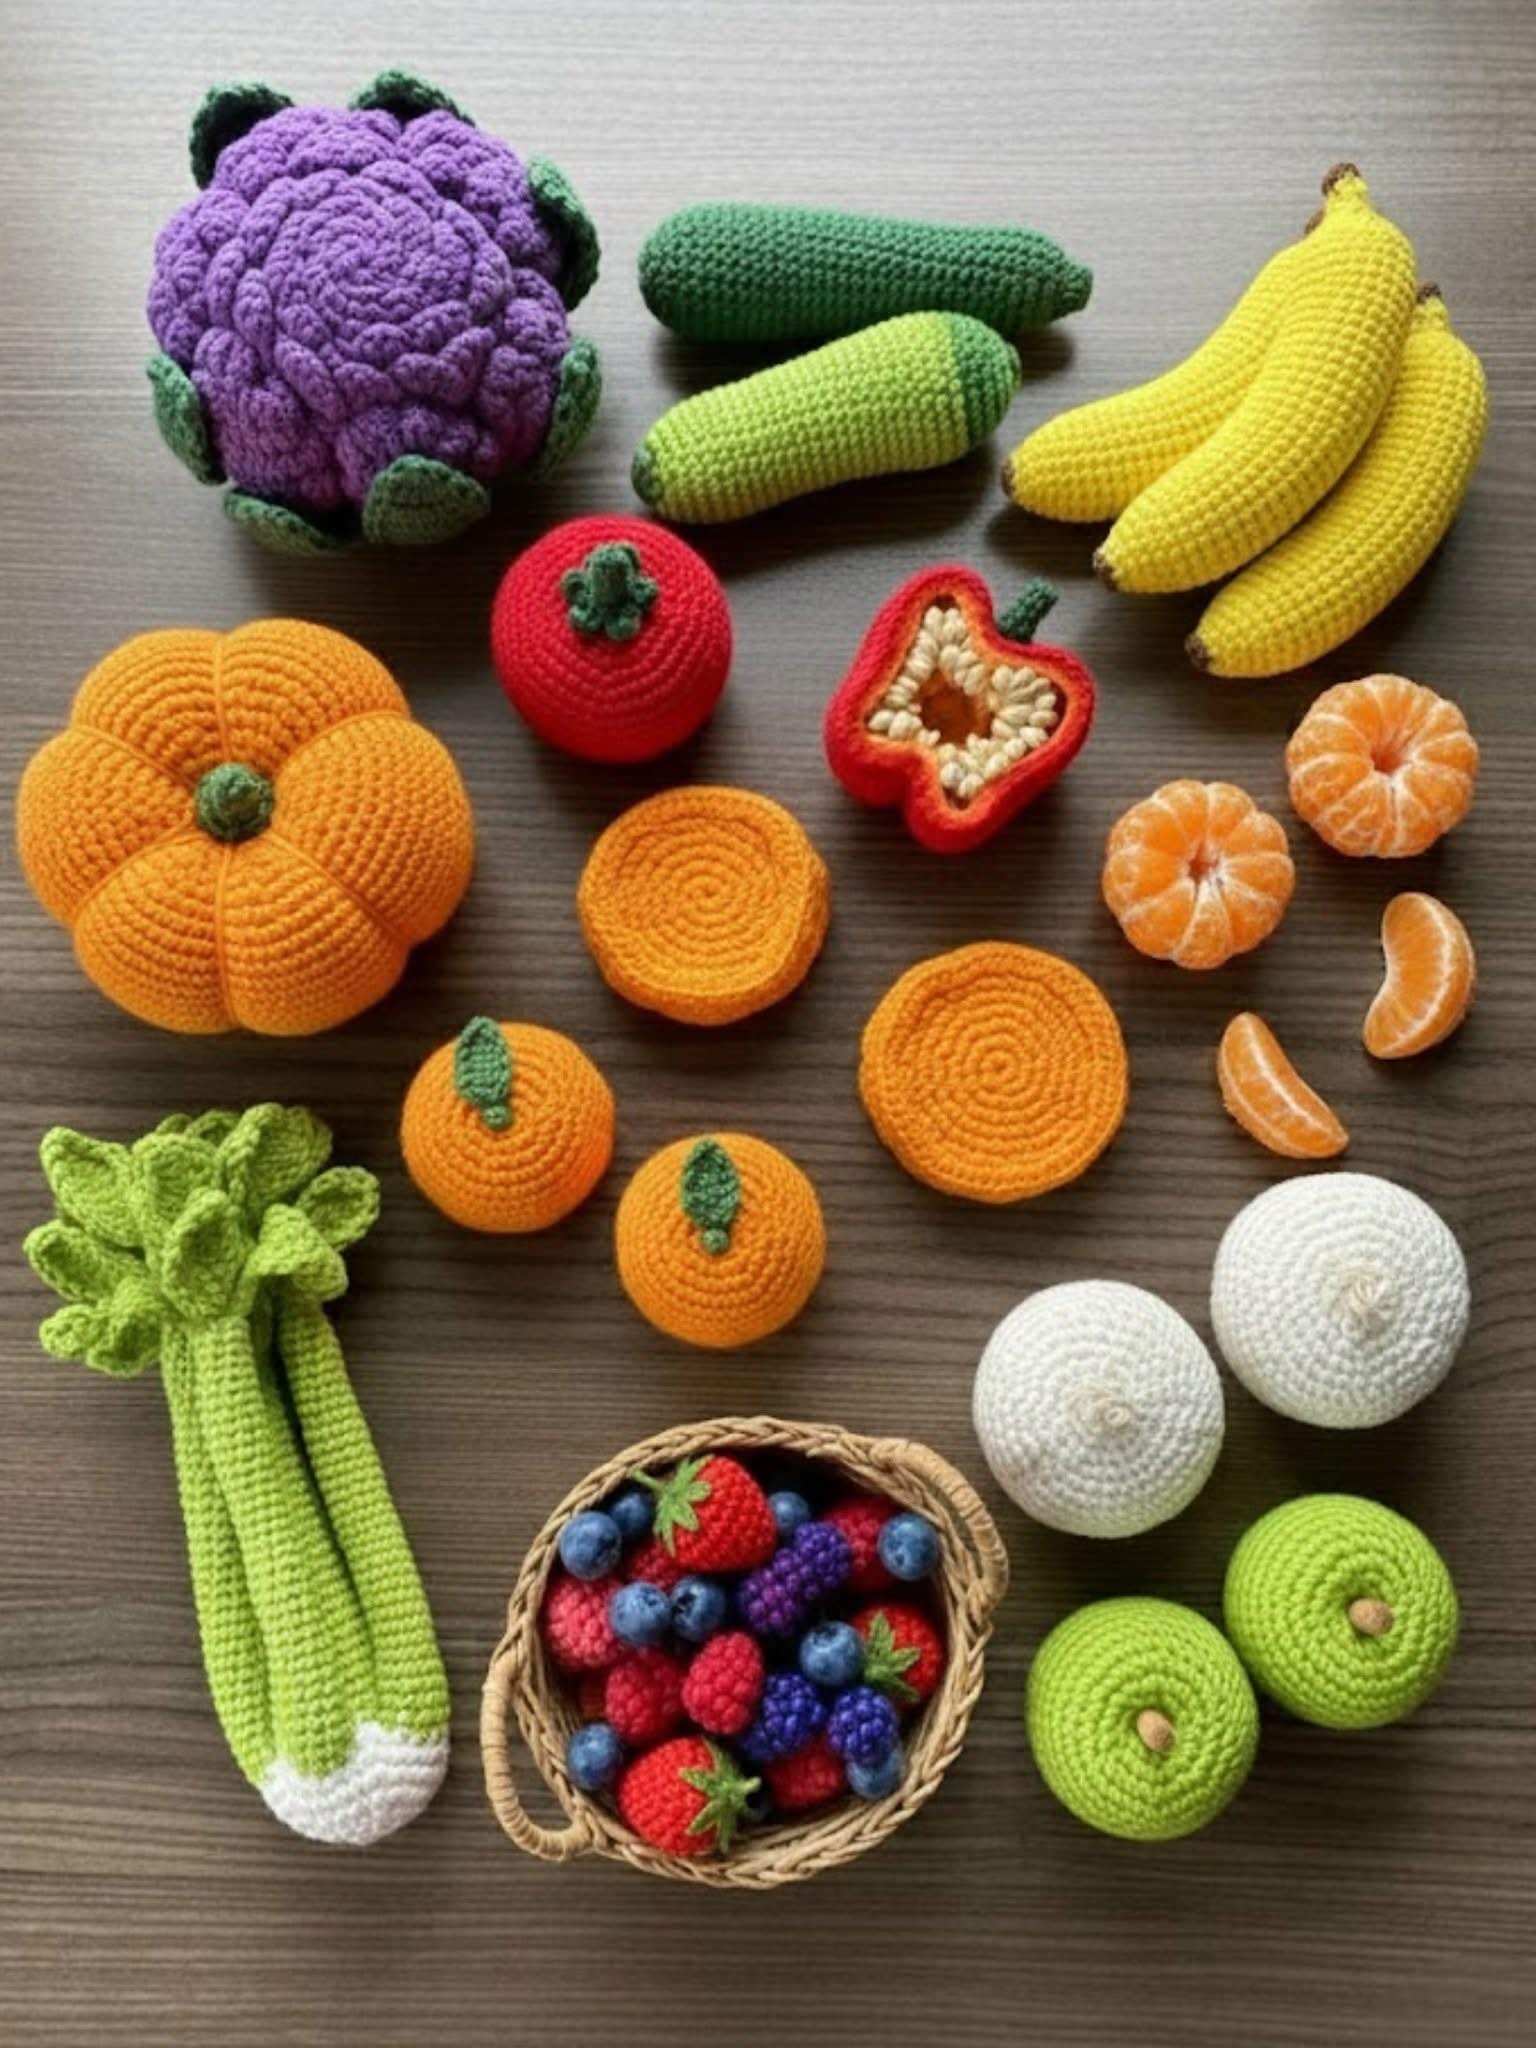
Crocheting fruits is not only enjoyable but also highly versatile. From apples and strawberries to bananas and lemons, each fruit presents a unique opportunity to experiment with shaping and surface detailing.
A well-structured Crochet Fruits Pattern helps you understand how increases, decreases, and tension adjustments work together to create three-dimensional forms. These techniques are fundamental in amigurumi and other sculptural crochet designs, making fruit patterns an excellent skill-building exercise.
Another reason why learning How to Make a Crochet Fruits Pattern is so rewarding is the practicality of the finished items. Crochet fruits can be used as children’s pretend play food, kitchen décor accents, market display props, or even educational tools to teach colors and healthy eating habits. The small size of most fruit projects also makes them quick to complete, which is perfect for craft fairs, gift baskets, or using up leftover yarn from larger projects.
Understanding the Basics of a Crochet Fruits Pattern
Before starting your Crochet Fruits Pattern, it’s important to understand the core structure behind most fruit designs. Typically, crochet fruits are worked in the round using techniques commonly found in amigurumi. The foundation usually begins with a magic ring, allowing you to create a tight, seamless center without visible gaps. This method is essential for achieving a polished, professional appearance.
In most fruit patterns, shaping is achieved through evenly spaced increases and decreases. Increases help expand the body to create fullness, while decreases close the shape smoothly toward the top. Mastering these two techniques ensures that your fruit looks balanced and symmetrical. Proper stitch counting is crucial at every stage of the process to maintain consistency and avoid uneven shaping.
Tension control also plays a significant role in the success of a Crochet Fruits Pattern. Because fruits are typically stuffed, stitches must be tight enough to prevent the filling from showing through. Choosing the correct hook size for your yarn is important to achieve a firm yet flexible structure. Many crocheters opt for a hook slightly smaller than recommended to create a dense fabric.
Color changes are another key element. For fruits like apples or peaches, you may incorporate subtle color transitions to mimic natural shading. Clean color changes enhance realism and give your finished project a refined look. Learning how to join new colors seamlessly is an essential skill that improves with practice.
Finally, surface embellishments such as embroidered seeds, leaves, or stems add personality and detail. These finishing touches elevate a simple sphere into a recognizable fruit. Taking time to refine these small details makes a significant difference in the final presentation of your crochet fruits.
Materials and Tools You Will Need
Selecting the right materials is crucial when learning How to Make a Crochet Fruits Pattern. Most fruit projects use lightweight or medium-weight yarn, depending on the desired size. Cotton yarn is often preferred because it provides excellent stitch definition and durability, especially if the fruits will be used as toys.
A crochet hook appropriate for your yarn weight is essential. As mentioned earlier, using a slightly smaller hook can create tighter stitches that hold stuffing securely. Stitch markers are highly recommended to keep track of rounds, especially when working in continuous spirals.
You will also need polyester fiberfill stuffing to give your fruit its shape. The amount of stuffing influences the firmness and overall look of the piece. Filling gradually and evenly prevents lumps and helps maintain symmetry.
A yarn needle is necessary for sewing parts together and weaving in ends. For fruits with separate stems or leaves, secure attachment ensures durability. Small scissors and optional embroidery thread may also be used for adding details like seeds or decorative accents.
If you want to enhance realism, felt sheets can be used to cut leaf shapes and attach them to the top of your fruit. However, crocheted leaves made in matching or contrasting green yarn are equally charming and maintain a cohesive handmade appearance.
Step-by-Step Construction Process
The first step in How to Make a Crochet Fruits Pattern is creating the base shape. Begin with a magic ring and work several rounds of single crochet stitches, increasing evenly to form a flat circle. This base gradually curves upward as you continue adding rounds without increases.
Once the desired width is reached, you will crochet several rounds without increasing to build the body of the fruit. This stage determines whether the fruit appears round, elongated, or slightly tapered. For example, strawberries may require a slightly conical shape, while apples remain more spherical.
As the fruit begins to take shape, stuffing is added gradually. Insert small portions of fiberfill at a time and distribute evenly. Overstuffing can distort the shape, while under-stuffing may result in a flat appearance. Achieving balance is key.
When you reach the top section, begin decreasing stitches evenly to close the fruit. Continue stuffing lightly as you decrease to maintain fullness. Once only a few stitches remain, fasten off securely and use a yarn needle to close the opening neatly.
To complete your Crochet Fruits Pattern, add the finishing elements. Crochet or attach a small stem at the top using brown yarn. Leaves can be made separately and sewn on, or crocheted directly into the top round. For fruits like strawberries, embroider tiny seeds using contrasting thread.
Taking your time during assembly ensures a polished result. Secure all pieces tightly and weave in ends carefully. A clean finish not only looks professional but also increases durability, especially if the fruit will be handled frequently.
Creative Customization and Styling Ideas
One of the most exciting aspects of a Crochet Fruits Pattern is customization. You can experiment with vibrant colors for a playful aesthetic or choose muted tones for a more realistic approach. Creating a full fruit basket with various sizes adds visual interest and variety.
Scaling your fruit larger or smaller is possible by adjusting yarn weight and hook size. Using bulky yarn creates oversized decorative pieces, while lightweight yarn produces miniature fruits perfect for keychains or garlands.
Adding faces transforms simple fruits into adorable characters. This is especially popular in children’s toys. Small safety eyes or embroidered expressions give personality and charm without complicating the structure.
Seasonal adaptations also expand creative potential. Pastel fruits can be used for spring decorations, while rich autumn shades work beautifully in fall-themed displays. Combining different fruits into sets increases versatility for gifting.
You can also incorporate your crochet fruits into other projects. Attach them to baby mobiles, sew them onto blankets as appliqués, or use them as embellishments for market bags. The flexibility of a well-designed Crochet Fruits Pattern allows endless imaginative applications.
Care Instructions and Longevity Tips
Proper care ensures your crochet fruits remain beautiful for years. If made with cotton yarn, most pieces can be gently hand-washed in cool water using mild detergent. Avoid aggressive scrubbing to protect stitches and shaping.
After washing, reshape the fruit while damp and allow it to air dry completely. Avoid high heat or machine drying, as this may cause distortion. Storing fruits in a dry place helps prevent dust accumulation and fiber damage.
If your fruits are used as toys, inspect them regularly for loose stitches or attachments. Reinforce stems and leaves if needed. Taking preventive care preserves the integrity of your Crochet Fruits Pattern creations.
Maintaining clean and well-shaped crochet fruits ensures they continue to look vibrant and appealing, whether displayed in a bowl or gifted to someone special.
Frequently Asked Questions (FAQ)
What is the best yarn for a Crochet Fruits Pattern?
Cotton yarn is often recommended because it offers durability, excellent stitch definition, and holds shape well when stuffed.
Are crochet fruits suitable for beginners?
Yes, most fruit patterns use basic stitches such as single crochet, increases, and decreases, making them ideal for beginners who want to practice shaping.
How do I make my crochet fruit look more realistic?
Use subtle color variations, shape carefully with balanced stuffing, and add detailed finishing elements like embroidered seeds or textured leaves.
Can I sell items made from a Crochet Fruits Pattern?
In most cases, handmade items can be sold, but always respect the original designer’s usage terms if following a specific pattern.
How long does it take to complete one fruit?
Depending on size and complexity, a single fruit can take between one to three hours to complete.
Can I make oversized decorative fruits?
Yes, simply use thicker yarn and a larger hook while maintaining proper stitch tension for structure.
Conclusion
Learning How to Make a Crochet Fruits Pattern opens the door to creativity, skill development, and practical handmade artistry. From mastering increases and decreases to refining color transitions and finishing details, each step builds confidence and technique. Crochet fruits are versatile, charming, and perfect for decoration, gifting, or playful educational use.
VIDEO TUTORIAL
By following structured construction methods, selecting appropriate materials, and exploring customization options, you can create beautiful and durable crochet fruits that reflect your personal style. If you enjoyed this guide, share your honest opinion and suggestions. Your feedback inspires creativity and helps refine future projects even further.

